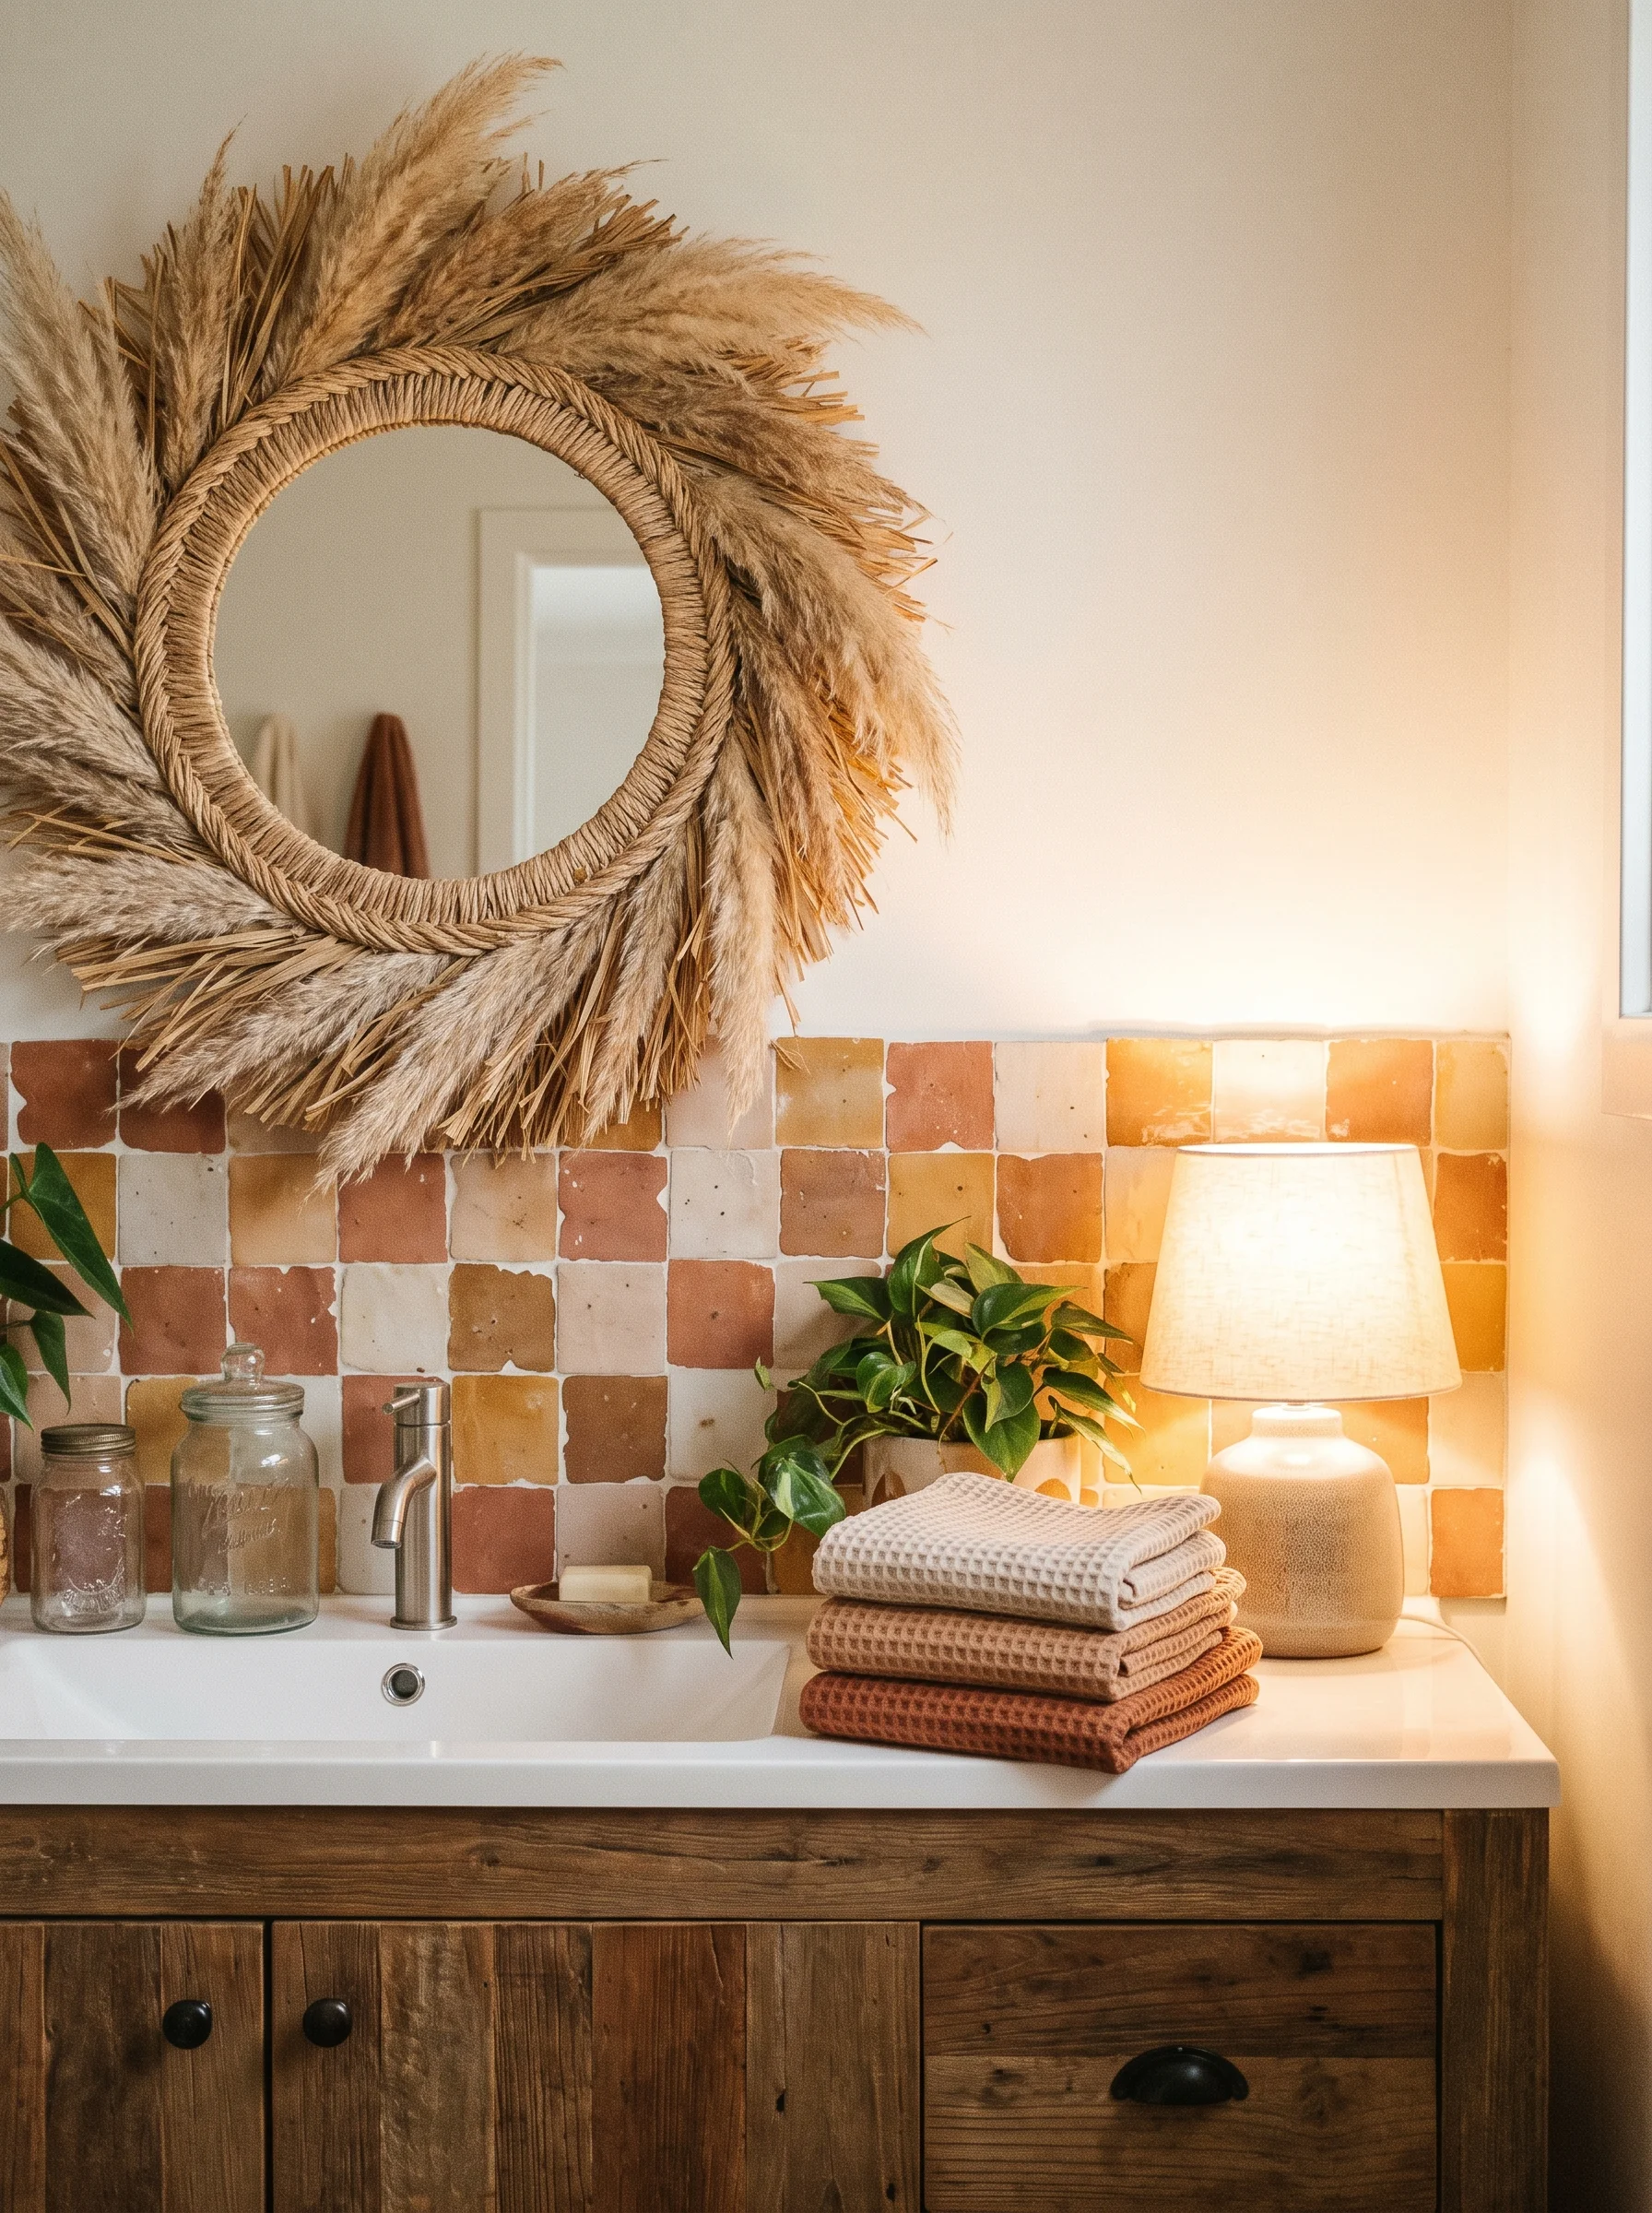
17 Easy DIY Bathroom Backsplash Ideas for a Weekend Glow-Up
The fastest bathroom backsplash to install yourself is peel-and-stick tile or a single solid panel, both of which go up over existing drywall in an afternoon with no wet saw and no grout. Real tile still wins behind a tub or inside a shower, where water hits the wall directly. One caveat: any adhesive product needs a clean, fully cured, glossy-free wall to bond to.
Most bathroom backsplash ideas assume you already own a tile saw and have a free weekend to learn how to use it. That is why so many bathroom walls stay bare for years, waiting on a project nobody ever schedules. The gap between wanting a backsplash and having one is almost always the install, not the taste. That is why this list leans on inexpensive bathroom backsplash ideas you can install in a weekend.
Every one of these bathroom backsplash ideas is sorted by how hard it actually is to put up. I have flagged what the wall behind it needs to be, roughly how long the install takes, and whether a renter can pull it back off later. Those three things decide which of these you can genuinely finish, and the styling comes second.
The list spans rentals where drilling is banned, powder rooms with no shower at all, tight apartment corners, clawfoot tubs and full walk-in showers. Materials run from two-dollar-a-square-foot vinyl up to handmade zellige, with beadboard, wallpaper and stone-look panels filling the middle.
This post contains affiliate links. If you buy through them, I may earn a small commission at no extra cost to you.
Start with peel-and-stick subway tile behind a pedestal sink
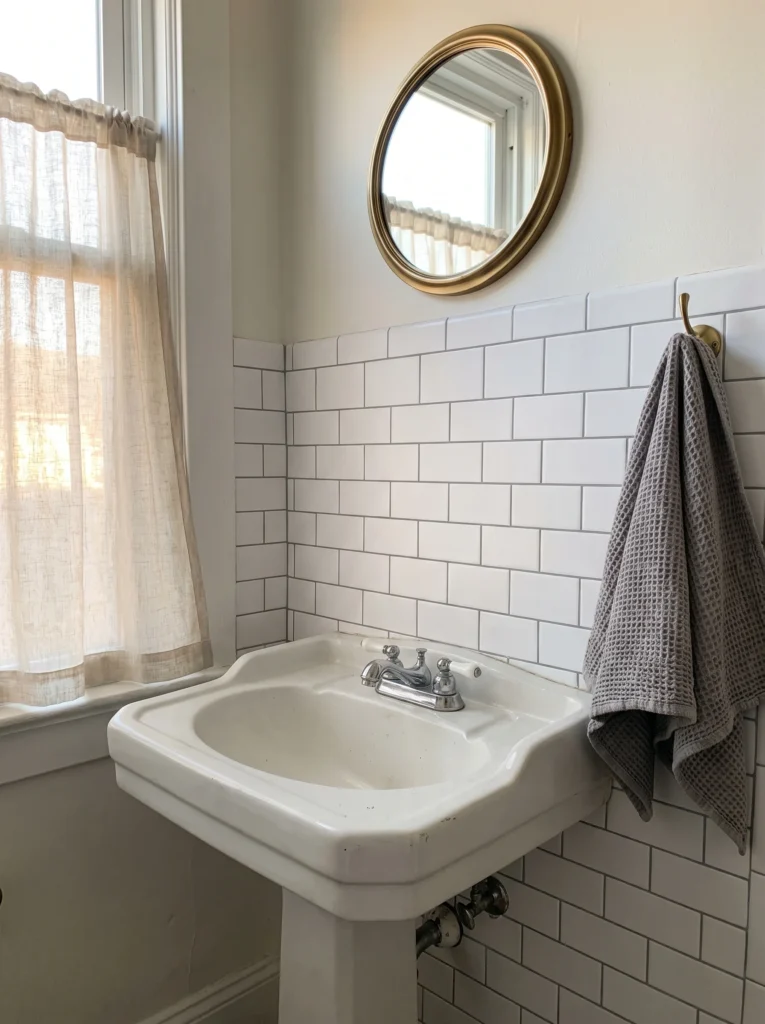
A pedestal sink is the easiest wall in the house to start a first backsplash on, since there’s no counter to work around, just flat open wall. Run white subway tile corner to corner and stop at about chair-rail height, capped with a smooth bullnose row. Pick a soft gray grout instead of bright white so the wall doesn’t read clinical, and let a brass round mirror and a brass hook with a waffle towel warm up all that cool ceramic.
Measure 18 inches up from the sink lip for a splash zone that actually catches water, and reach for interlocking peel-and-stick subway sheets. They cover a wall this size in about two hours with a utility knife and a level.
Wipe the wall with a degreaser and let it dry overnight before the first sheet goes up. Adhesive backsplash tile fails at the corners far more often than in the middle, and almost always because of dust or leftover soap film on the wall.

Run beadboard up the wall instead of tile

Painted wood covers a damaged wall in a way flat tile never can, which is the real case for beadboard here. This sage green version runs from a reclaimed wood counter up to a chair rail and hands off to plain white above, the vertical grooves adding texture without a pattern. Brass cup pulls and a matching faucet pick up the counter’s warm tones.
Beadboard sells in four-by-eight sheets for around $25, which covers far more wall than any tile pack at the same price. Prime every cut edge before it goes up, because bare MDF swells the first time it meets steam, and caulk the top seam where the panel meets drywall so the whole thing reads like millwork rather than a panel.
Cover a floating vanity wall in penny round tile
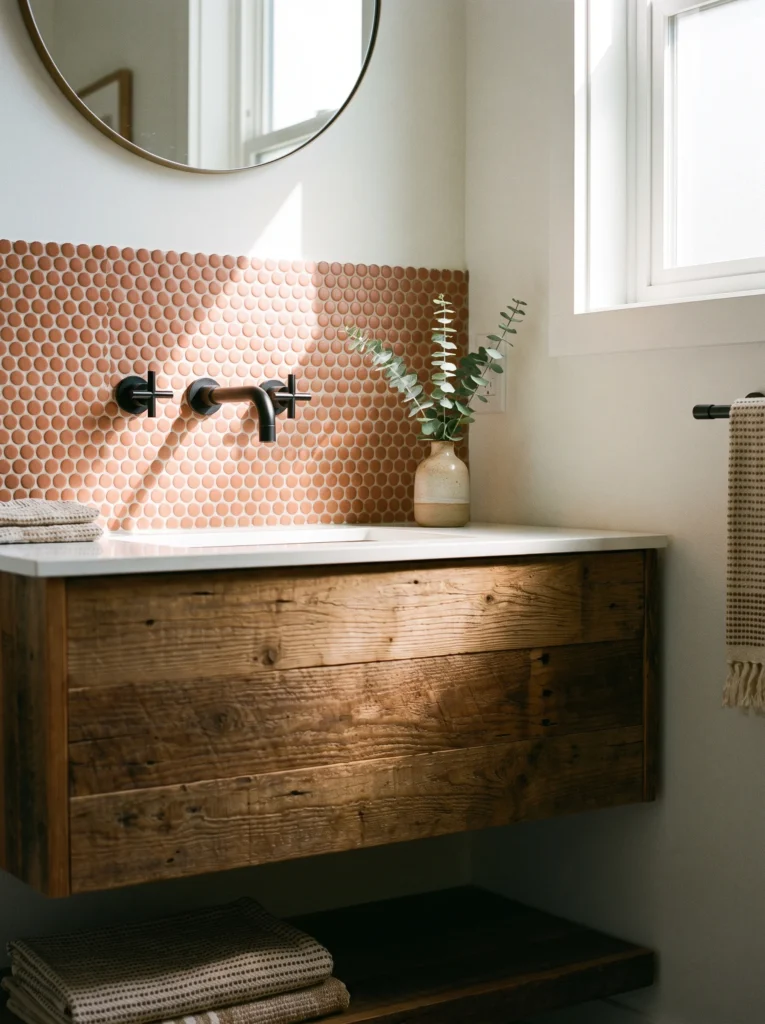
Most floating vanities look unfinished the moment tile runs edge to edge behind them. Stop penny tile right at the vanity’s edge instead, and that hard vertical line is what makes the piece look intentional. Terracotta penny rounds work well here: the matte clay finish shifts between salmon and rust depending on the light, and a black wall-mounted crossbar faucet keeps all that warmth from going soft.
Penny tile arrives on mesh sheets, so you’re placing a square foot at a time instead of a coin at a time. The tradeoff is grout: a penny sheet carries roughly four times the grout line length of subway tile, so add an hour for cleanup. Seal it once at install, then once a year after that.
Lay subway tile in herringbone behind a double vanity
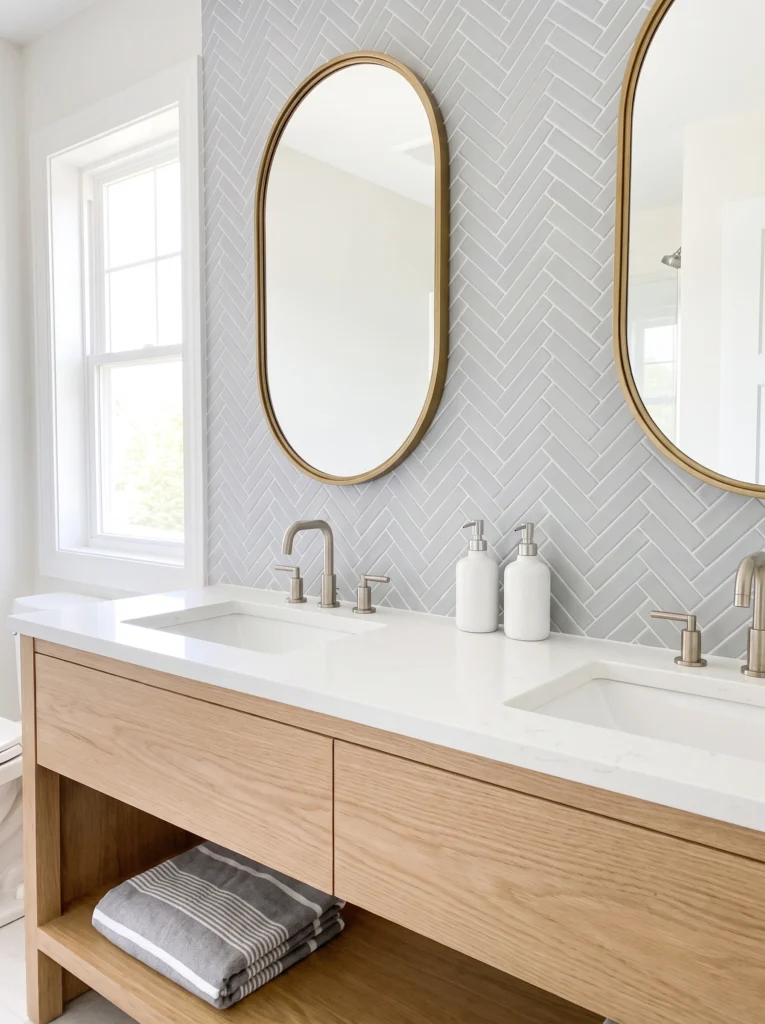
A double-vanity wall needs a pattern that can carry the room on its own, and herringbone subway tile does exactly that. Pale gray tile climbing behind two gold oval mirrors reads as the room’s main feature here, so keep everything else quiet: a white oak base, a quartz counter, and brushed nickel faucets that don’t compete with the gold overhead.
A herringbone backsplash eats about 15 percent more tile than a straight stack because of the angled cut at every edge, so order the overage up front. Start the pattern at the center of the wall behind the faucet and work outward, which pushes the awkward cuts into the corners. For a higher-end version of this same wall, these modern luxury bathroom tile ideas go further with stone and large format.
Use removable wallpaper as a powder room backsplash
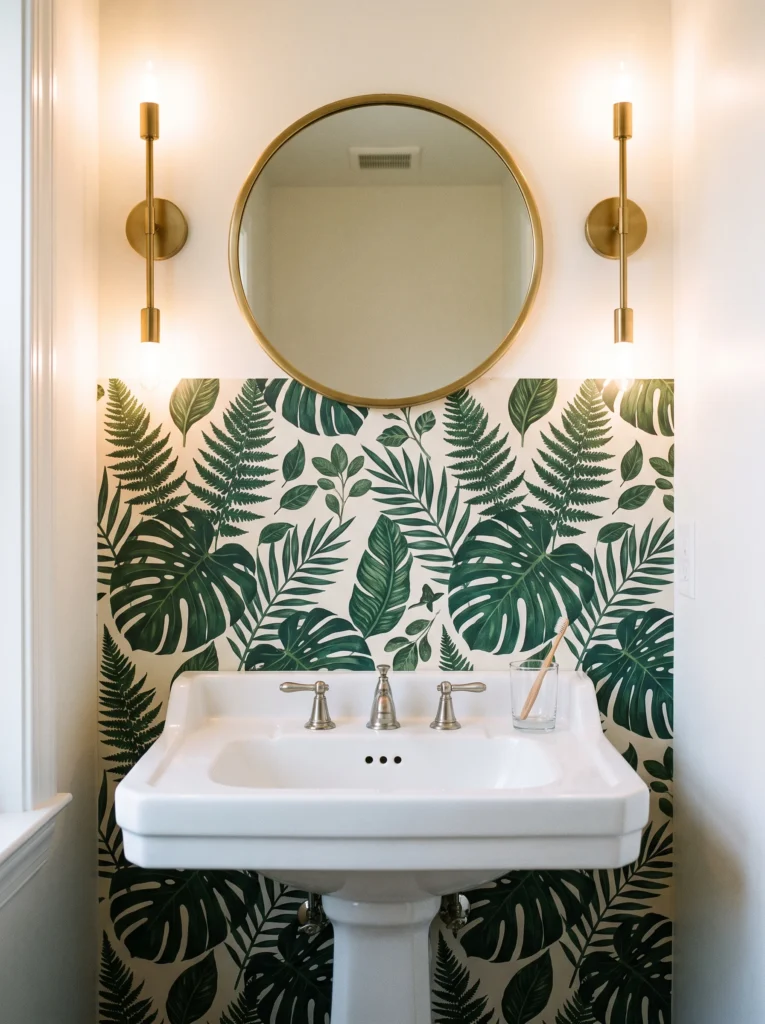
Wallpaper really only belongs in one bathroom: a powder room with no shower in it at all. A dense print like this fern and monstera one, framed by two slim brass sconces and a gold round mirror, reads best when the pattern is thick enough that the sink looks like a cutout rather than an interruption.
Peel-and-stick wallpaper belongs anywhere that never takes direct spray, which in most homes means the half bath. Run a thin bead of clear silicone along the top of the sink where it meets the wall so splashes cannot creep behind the seam. A single roll covers about 30 square feet, which is more than most powder room walls need.
Treat this as a backsplash with an expiry date and it stops being a risk. Paper comes off in one afternoon, so a pattern this bold costs almost nothing to change your mind about two years from now.

Go checkerboard behind a thrifted vanity

Black and white checkerboard tile is genuinely old, tracing back to Victorian bathroom floors, which is why it pairs so naturally with a repurposed wood dresser like this one. Afternoon light through a lace curtain softens what would otherwise be a hard graphic, and amber glass bottles with a spray of pampas grass keep the styling loose against the strict grid.
Use four-inch squares rather than twelve-inch ones in a small room, so the pattern reads as texture from the doorway instead of a game board. A dresser conversion like this one usually needs a two-inch hole saw for the drain.
Fit one marble-look slab instead of dozens of tiles
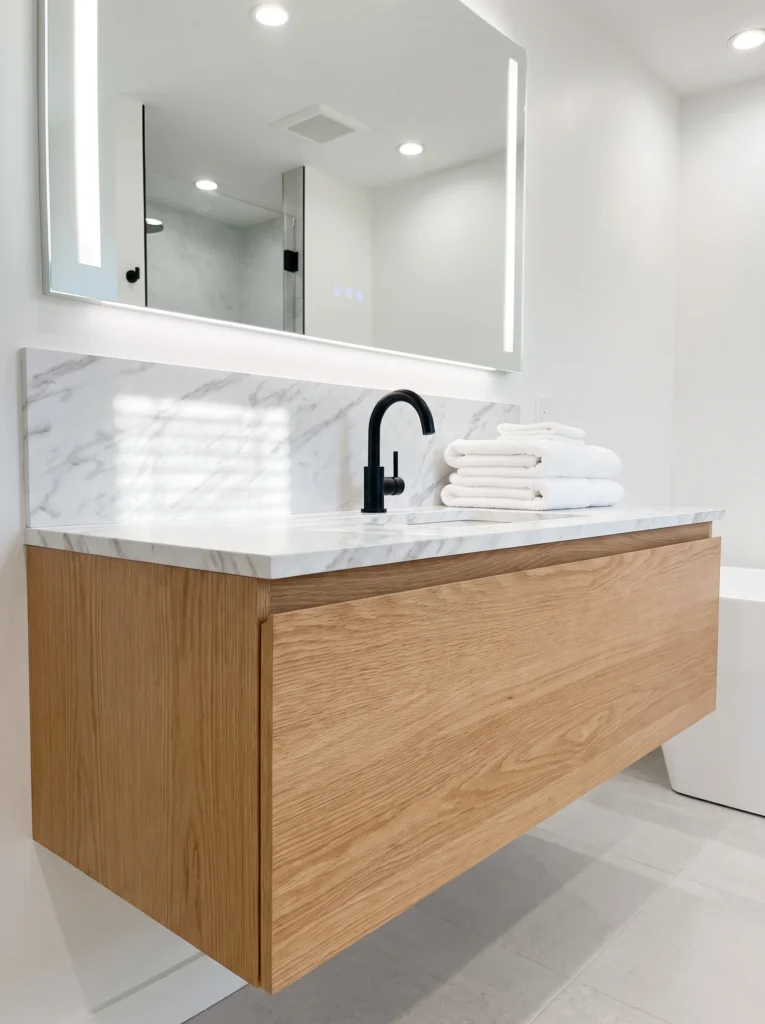
Grout lines are the part of a backsplash most people end up hating to maintain, and a single marble-look slab removes them entirely. Run it the full length of a floating vanity and turn it up the wall in one uninterrupted piece; a matte black faucet reads sharp against soft gray veining, and white oak underneath keeps the whole thing from feeling cold.
One slab means one seam, which is the entire argument for doing a bathroom backsplash this way. Stone yards and big-box stores cut quartz and laminate remnants to size for roughly $20 a linear foot, and a remnant is usually plenty for a vanity wall. Silicone it to the wall instead of mortaring it and a future you can pull it off cleanly.
Try scallop tile in a small bathroom

Most small-bathroom advice says to keep tile low so the room doesn’t feel boxed in. Tile higher instead: removing the horizontal break is what actually stops a short wall from reading as cut in half. Blush fish-scale tile running from the baseboard up past a round gold mirror does that here, and gold fixtures push the pink warm instead of sweet.
Keep the tile to a single color and let the shape carry the interest. It’s one of the cheaper ways to make a small bathroom feel finished without touching the layout.
Plank the wall in reclaimed wood behind a vessel sink

Real wood only survives as a backsplash when water never touches it directly, which is what a raised vessel sink is really for here. Weathered gray barnwood running horizontally behind a hammered copper basin, continuing up past a caged Edison sconce, shows the payoff: warm bulb light rakes across the grain and picks out every knot and nail hole in the boards.
Seal every board properly before it goes up: three coats of marine spar varnish on all six sides, edges included. Skip the edges and the boards cup within a season.
Step hexagon tile up behind a freestanding tub

A hexagon can’t be cut cleanly in half across its points, which is exactly why the top row here steps instead of running straight. Large white hexagons climbing halfway up behind this clawfoot tub, with a ragged top edge, look like they grew out of the wall; linen curtains and a reclaimed wood bath caddy keep the room soft around all that hard ceramic.
Eight-inch hexes cover a tub wall faster than any small format tile. Run the field at least six inches above the tub rim so splashes land on tile, not paint.
Bring in patterned Moroccan tile on a boho vanity
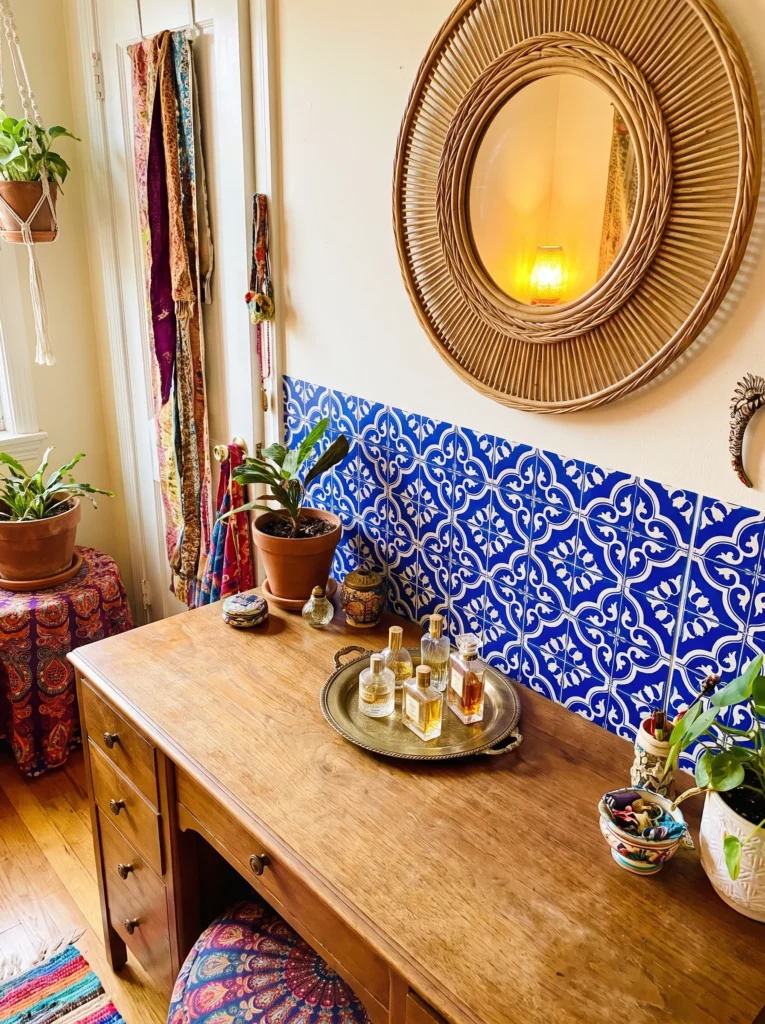
A saturated pattern like Moroccan tile will fight the whole room unless it gets a hard stop at one consistent height, not the furniture line. Behind a wood desk repurposed as a vanity, this cobalt blue and white band works well with a rattan sunburst mirror and a brass tray of perfume bottles; terracotta pots and layered textiles carry the same color through the rest of the room.
Moroccan and Portuguese tiles usually sell by the individual piece instead of by the sheet, which makes them slower to lay and much easier to replace when one cracks.
Line a shower niche with metallic mosaic
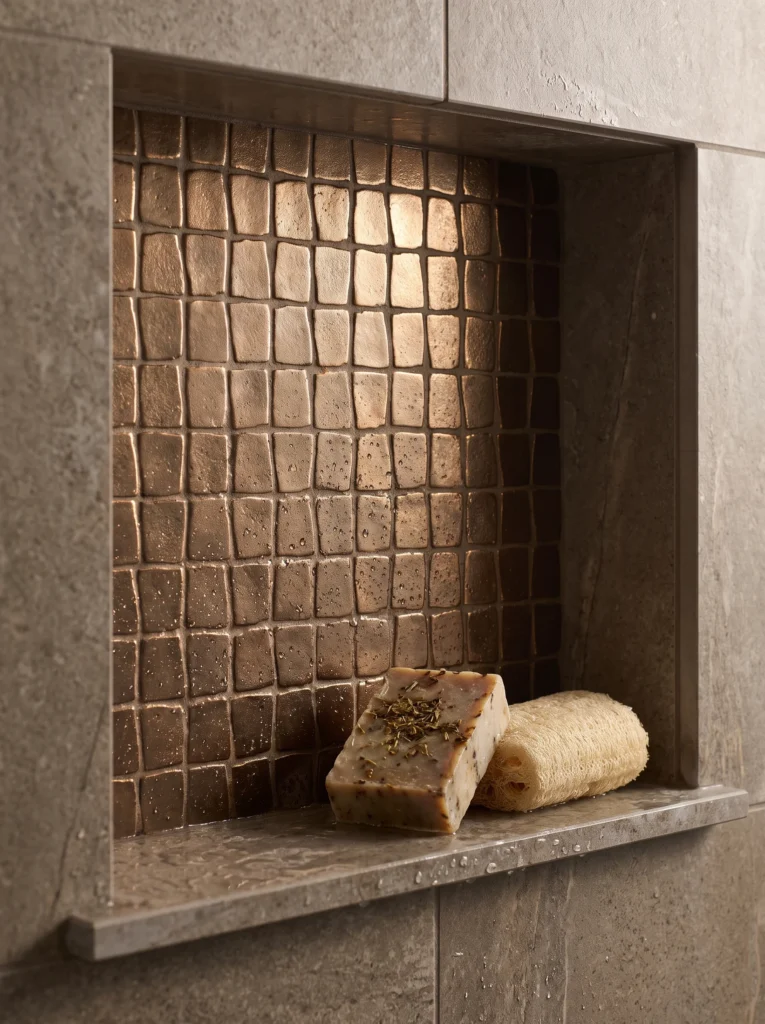
A shower niche is the cheapest place in the house to use an expensive tile, since a standard 12-by-14-inch opening only needs about a square foot of it. Bronze glass mosaic lining the back of this niche, framed by large-format gray stone everywhere else, is exactly that move: water beads on the metallic squares and catch light from above.
That puts a $30-a-sheet mosaic inside almost any budget. Slope the shelf a quarter inch toward the shower so water runs out instead of sitting in the corner.
Metallic mosaic is one of the few backsplash materials that reads better wet than dry. The glaze picks up whatever light is in the room, so a niche facing the shower head catches it every time the water runs.
Wrap a narrow apartment corner in chevron tile

Low ceilings read even lower under a horizontal pattern, so this apartment corner runs chevron tile floor to ceiling instead. Charcoal and white chevron wrapping the corner behind a compact wood vanity tricks the eye into reading the wall as taller than it measures; a slim brass mirror and a jade plant keep the counter quiet so the busy wall stays the focus.
Chevron differs from herringbone in that each tile is cut on an angle so the points meet in one continuous line, which is why it costs more per square foot.
Skip grout entirely with stone-look wall panels
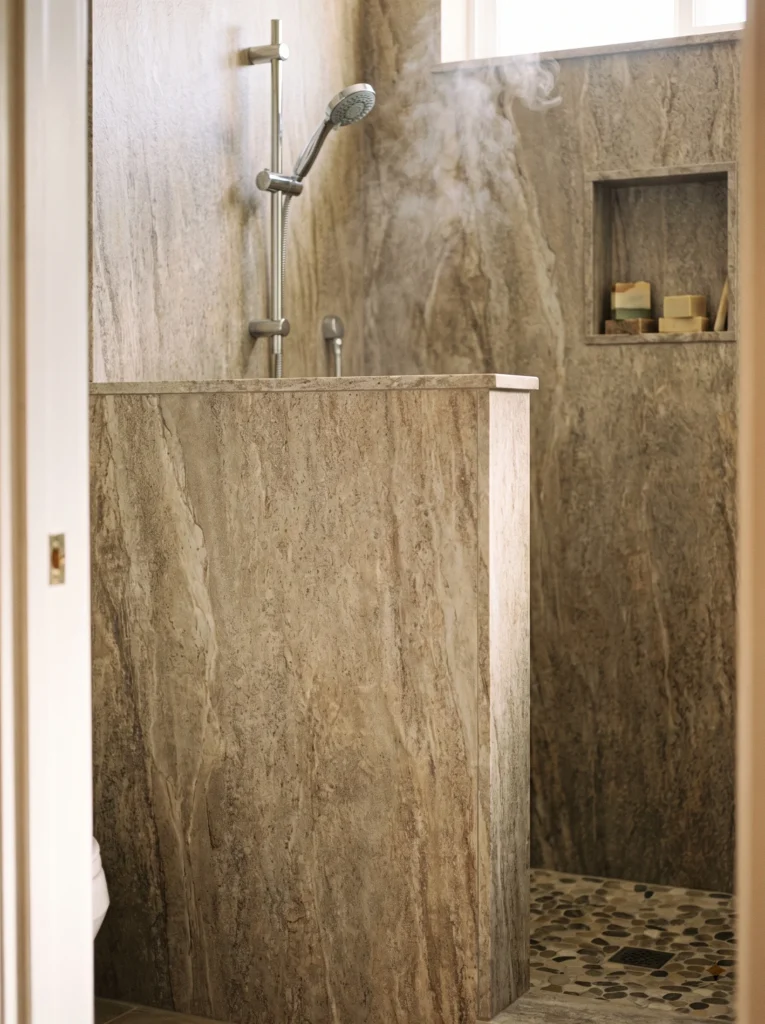
Grout is the actual reason most people end up redoing a shower wall, and stone-look panels sidestep the problem completely. Travertine-look panels covering the walls in this walk-in, with no visible joint except where two sheets meet, pair well with a pebble mosaic floor to break up all that flat stone underfoot.
A four-foot panel goes up with construction adhesive and a few screws hidden in trim channels. Budget roughly $8 to $15 a square foot.
This is the only backsplash on the list a single person can install over a wet wall in a morning. The panels arrive cut to standard shower heights, so the one saw cut most jobs need is around the valve.
Curve glass mosaic over a bullnose edge
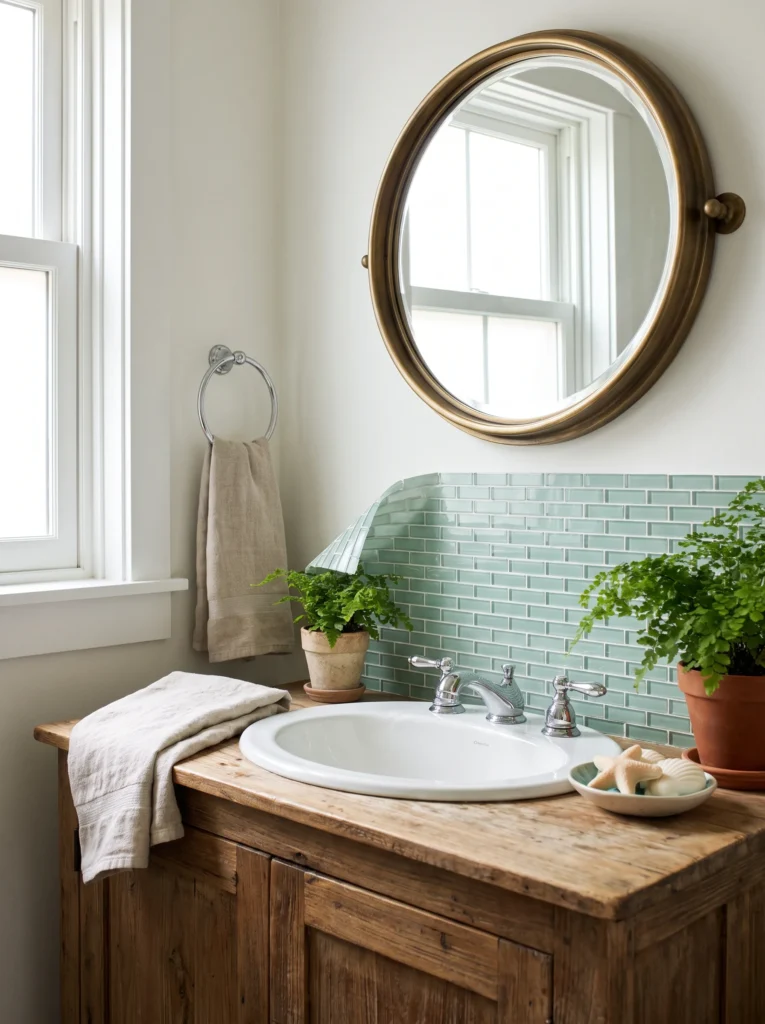
A raw cut edge is the one detail that gives away a DIY glass mosaic job, so finish the last row with a bullnose trim piece instead. Seafoam mosaic curling over a rounded edge behind this drop-in sink catches window light and shifts between green and gray depending where you stand; a maidenhair fern and a dish of shells lean the room coastal without stating it outright.
Order the trim in the same order as the field tile, because dye lots shift between shipments and a mismatched trim piece is far more visible than a mismatched field tile in the middle of a wall.
Mix warm zellige squares into a checkerboard
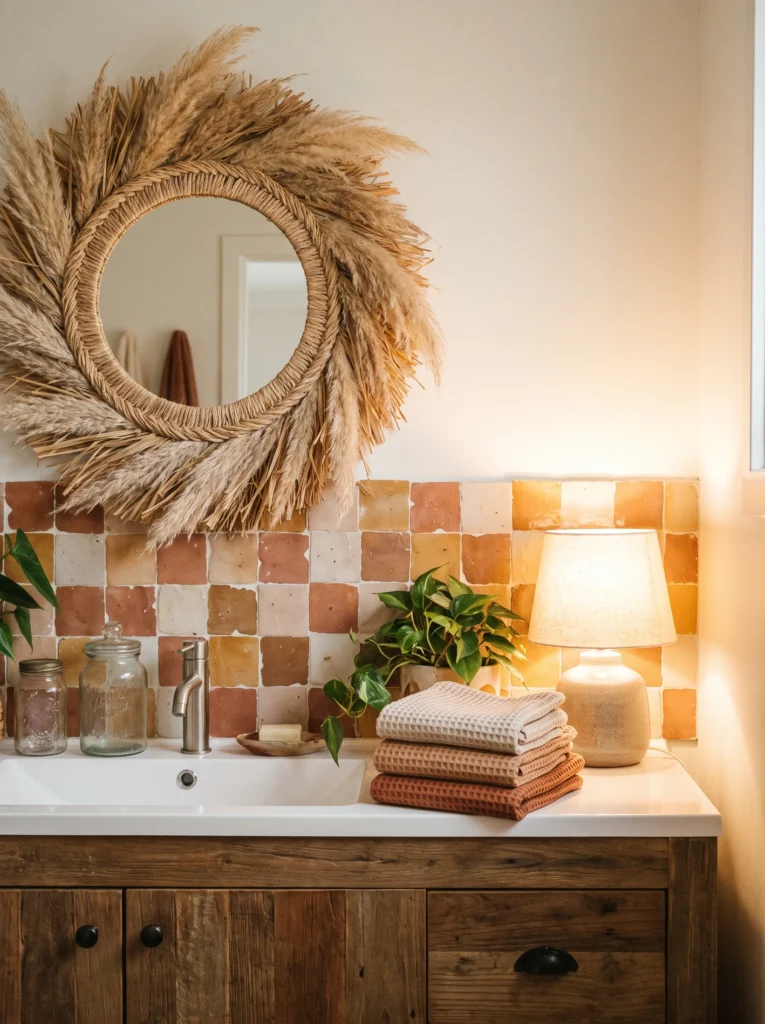
Zellige tiles are never meant to match each other exactly. The color variation between pieces is the entire product, not a defect, so shuffle every tile on the floor before you set any of them, or the darkest ones will quietly cluster in one corner. Terracotta, mustard and cream squares alternating behind this wood vanity, with a small ceramic lamp throwing warm light along the uneven glaze, only work because no two tiles share exactly the same shade.
Zellige is shaped and glazed by hand, so ordering from a single batch matters more here than with machine-made tile.
Order 15 percent extra on any handmade backsplash tile. The edges are irregular enough that a few pieces in every box will not sit flat, and a second order months later rarely matches the first.
Refresh plain white subway tile with dark grout
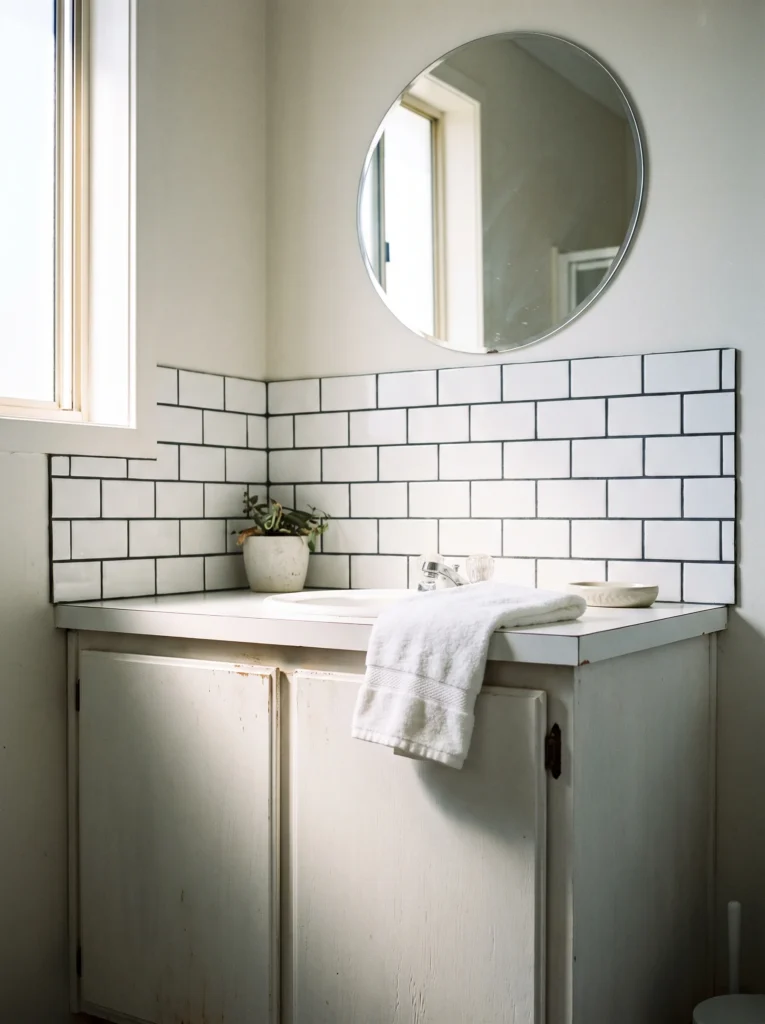
The cheapest bathroom backsplash upgrade isn’t a backsplash at all, it’s the grout color. Swapping white for charcoal on this white subway tile above an older painted vanity does all the work on its own; keep the rest plain, a frameless round mirror and one white towel, so attention stays on the grid.
A small wall takes an evening with a grout colorant pen rather than a full regrout. Scrub the lines with vinegar first and let them dry completely, because the colorant will not bond to damp or previously sealed grout. Test one square in a corner before committing to the wall.

Which material suits these bathroom backsplash ideas best?
Four material families cover every idea above, and they are not interchangeable. Answer one question before anything else: does water hit this wall directly? That single answer removes two of the four options straight away and saves you from redoing the wall next year.
Cost matters less than most people expect here, because a bathroom backsplash is a small surface. The wall behind a standard vanity is usually 8 to 12 square feet, so even the priciest option on this list lands under $200 in materials.
Peel-and-stick vinyl tile
Best for renters and anyone installing a backsplash for the first time. It runs about $2 to $5 a square foot, goes up in an afternoon with a utility knife, and lifts back off with a hairdryer and patience. The limit is water: it will peel at the edges inside a shower or anywhere it takes a direct daily soaking.
Real ceramic or glass tile
Best for tub surrounds, shower walls and niches, where standing water rules everything else out. Expect $5 to $15 a square foot plus mortar, grout and a wet saw rental. The limits are time and permanence: plan a full weekend, and accept that removing it later means removing the drywall behind it too.
Beadboard and wall panels
Best for covering a large wall quickly or hiding drywall that has already been damaged. Beadboard starts near $1.50 a square foot and stone-look shower panels reach $15. The limits are the edges and the joints: every cut edge needs sealing and every joint needs caulk, or steam gets behind the panel where you cannot see it.
Removable wallpaper
Best for powder rooms and half baths with no shower in them at all. Under $2 a square foot and reversible in an hour, which makes it the lowest-risk option on this list. The limits are strict: it will not survive direct spray, and in a bathroom with no working exhaust fan it lifts at the seams within a few months. More DIY and budget bathroom projects follow the same rule.
Pick the wall first, then the material
The backsplash that actually gets installed is the one matched to its wall and to the tools already in the house. Decide first whether the backsplash wall gets splashed, sprayed or neither. That answer narrows seventeen bathroom backsplash ideas down to roughly four, and everything after it is color and pattern.
Whatever you land on, dry-fit the first row before any adhesive comes out. A backsplash that starts crooked stays crooked all the way up the wall, and the only real fix is pulling it back off and starting over.
Save this pin to your bathroom board so the material chart is with you next time you are standing in the tile aisle.