
22 Bathroom Wall Tile Design Ideas for Every Wall in the Room
Good bathroom wall tile design starts with where the tile goes, not which tile you like. Tile shower walls all the way to the ceiling, stop half-height tile at a planned line with a proper edge, and save bold pattern for one wall, usually behind the toilet, tub or vanity.
One caveat: zellige, marble and handmade tile look best but ask for more grout and sealing care.
These 22 bathroom wall tile ideas go wall by wall, from the shower to the ceiling, with the heights, grout widths and trim details most galleries leave out.
This post contains affiliate links. If you buy through them, we may earn a small commission at no extra cost to you.
Table of Contents
Stack slim finger tiles vertically to lift a low shower ceiling

If your shower ceiling sits low, run long, thin tiles straight up the wall instead of across it.
Narrow finger tiles, about 2 x 8 inches, stacked in straight vertical columns draw the eye upward and make an 8-foot ceiling feel taller. A brick offset breaks that line, so keep every joint stacked from floor to ceiling.
Stacked layouts are unforgiving. The first column should start from a laser line, not from the corner, because corners are rarely plumb, and a lean of 1/8 inch at the bottom becomes obvious by the top of a shower wall tile layout.
White tile with thin white grout, around 1/16 inch, keeps the lines crisp. Contrasting grout would turn the wall into a grid and fight the vertical effect you’re paying for.
Carry the tile all the way to the ceiling. Stopping short leaves a band of painted wall right where the steam collects, and that paint blisters within a year or two.
Wrap the shower in large marble-look panels for almost no grout
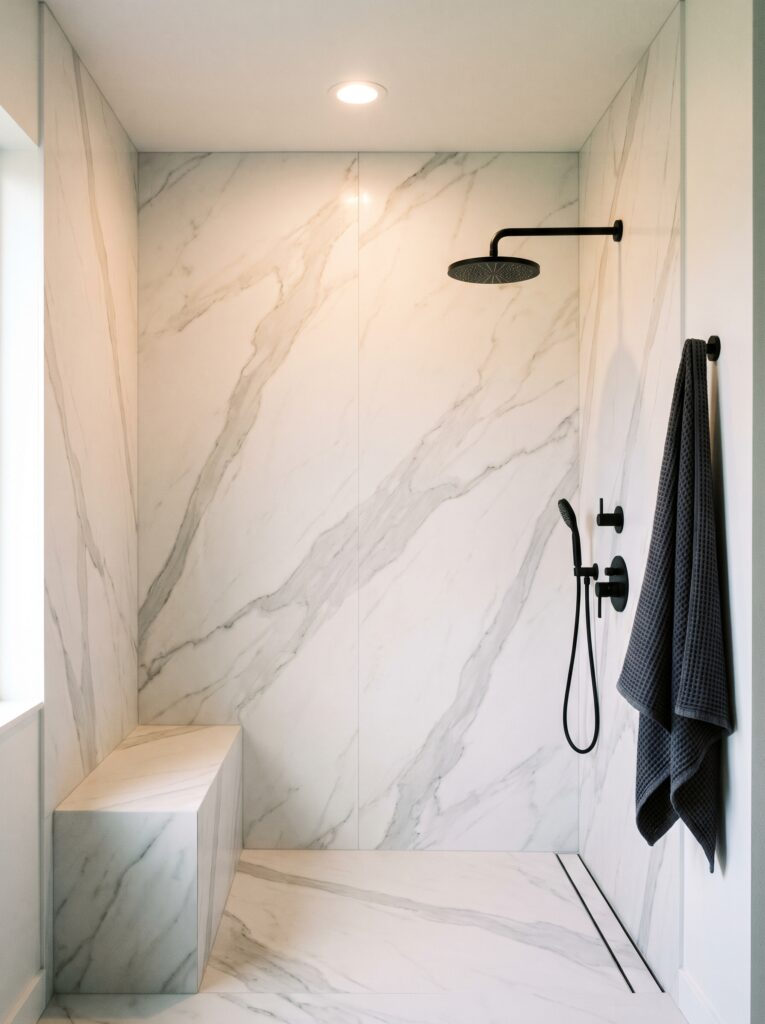
Large porcelain panels cost more to install than standard tile, but they give you a marble shower with almost nothing to scrub.
Panels of 24 x 48 inches or bigger leave one or two grout lines per wall. Book-matched panels, where the veins mirror each other across the joint, read like a single slab of stone for a fraction of the price.
Big panels show every bump in the wall behind them, so the backer board must be flat. Ask your installer to use a leveling clip system. Large tiles that sit even slightly uneven catch the light along their edges, a flaw called lippage, and daylight from a side window makes it obvious.
Clad a built-in bench in the same panels so wall, bench and floor read as one surface. Matte black fixtures and a linear drain give the white and gray veins a crisp, modern edge.
Set green zellige in the shower and line the niche up with the grout
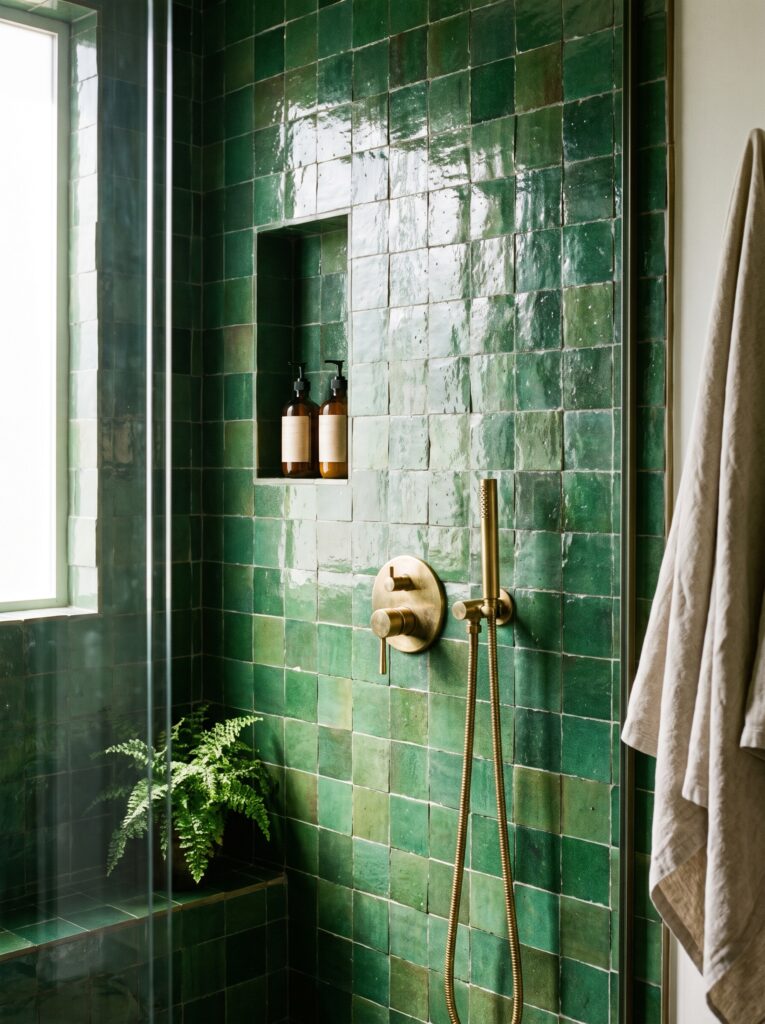
Zellige is the tile for a shower that should feel handmade, because no two pieces share the same shade, edge or thickness.
These glazed clay squares from Morocco catch the light differently on every tile, so an emerald wall shifts from moss to bottle green as you move. Install them with tight joints, about 1/16 inch or less, so the wall reads as one shimmering surface instead of a grid.
Plan the niche before the first tile goes up. Size the opening to whole tiles so its edges land on grout lines, and you avoid thin slivers around the hole that make a handmade wall look cheap.
Zellige is porous at the edges and its glaze can chip. Seal the tile and grout, and accept a few nicks over time, since that worn patina is part of why people choose it. Aged brass fixtures suit the green beautifully.
Lay subway tile in herringbone on the main shower wall only
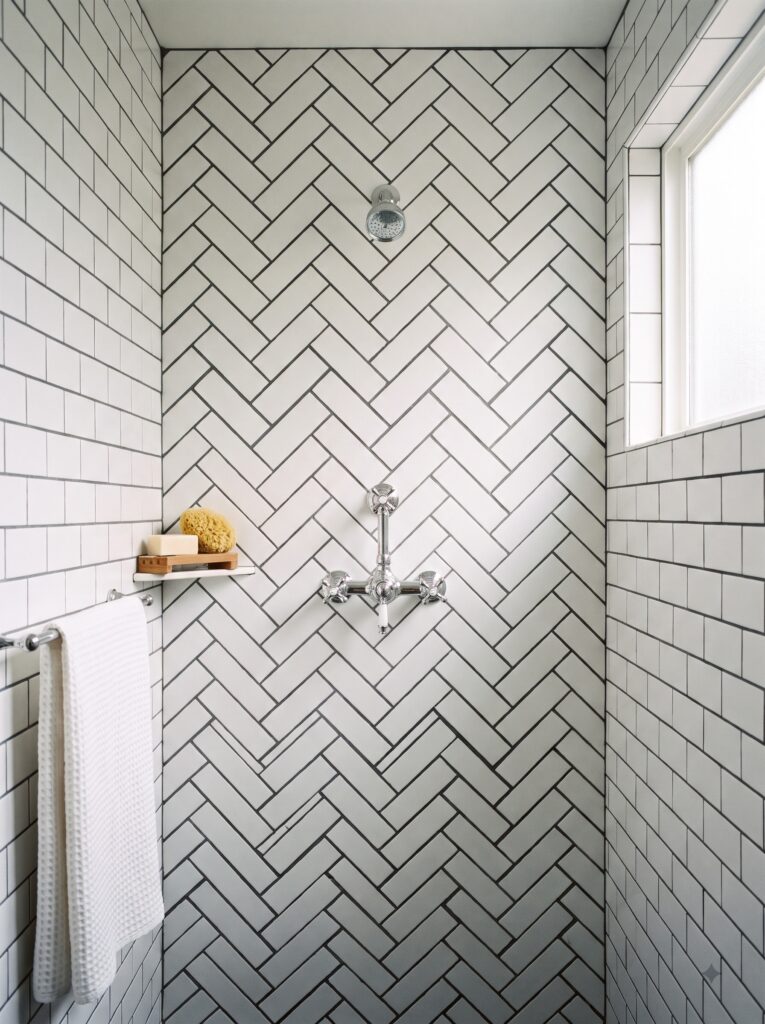
Put herringbone on one shower wall when you want pattern without filling the whole stall with it.
Classic white 3 x 6 subway tile turned into herringbone makes the back wall a feature. Keep the side walls in a plain brick pattern so the eye lands on one wall, and the room still feels simple.
Charcoal grout outlines every zigzag and hides shower grime far better than white grout does. The trade is that every crooked cut stands out too, so herringbone needs a centered layout line and a patient installer.
Expect about 15% more tile for all the angled cuts. An exposed chrome valve with cross handles finishes the wall with a vintage note that suits the pattern.
Run sage picket tile around a tall niche framed in brass
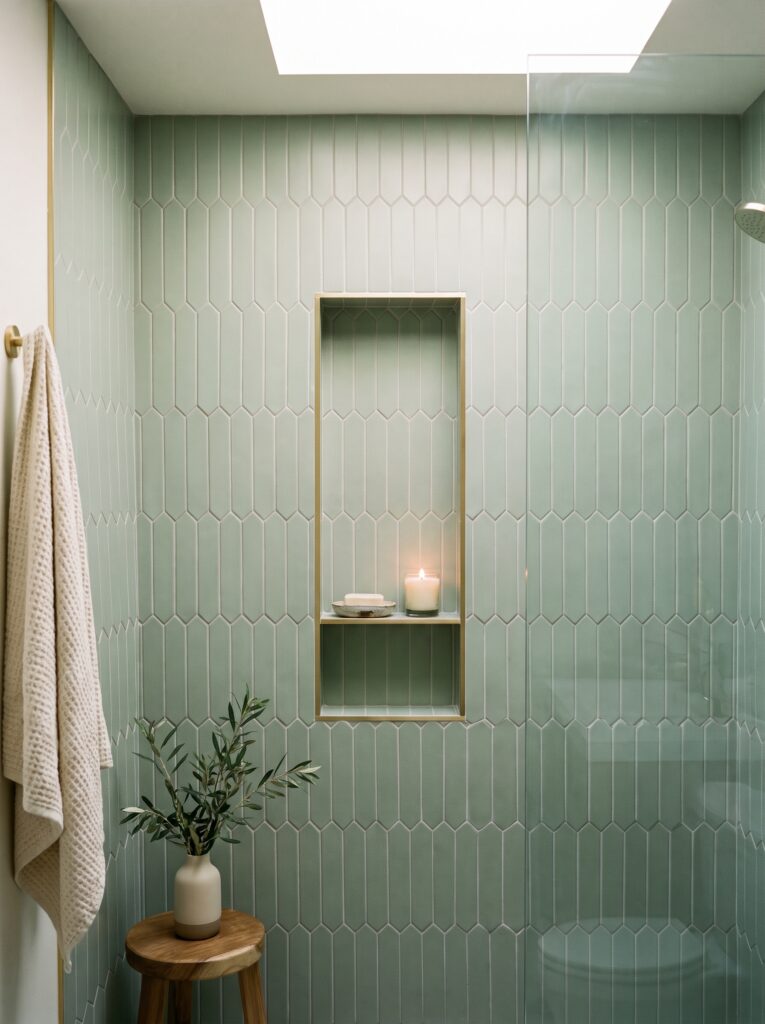
Most people tile a niche the same way as the wall and let it disappear. Framing it with a slim metal edge turns it into a detail you actually notice.
Picket tiles, long shapes with pointed ends, add soft pattern without the busy look of mosaic. In sage green with a light glaze, they keep a shower calm and suit both brass and black fixtures.
A tall, narrow niche centered on the wall suits picket tile’s vertical shape. Edge the opening with a brushed brass profile instead of bullnose, since pointed tiles rarely come with matching trim pieces.
Center the niche on the tile pattern first and the wall second. Picket tile looks wrong when the opening slices a row of points in half.
Tile a tub alcove to the ceiling in glossy blue squares

Owners of a standard tub and shower combo can get the biggest change from one move: tiling the whole alcove, from the tub rim to the ceiling.
Cobalt blue 4 x 4 squares with white grout bring strong color into a bath where everything else stays white. A glossy glaze bounces daylight from the end window and wipes clean in seconds.
Many builders stop tile at about 6 feet, which leaves painted wall above the shower head where steam hits hardest. Full height protects that wall and looks finished from the doorway.
Square tile in a straight grid is the easiest pattern to lay well, which keeps a bold bathroom wall tile design from looking fussy. For more ways to plan surfaces and fixtures together, browse our materials, fixtures and layout ideas.
Choose blush fish scale tile for a romantic tub wall
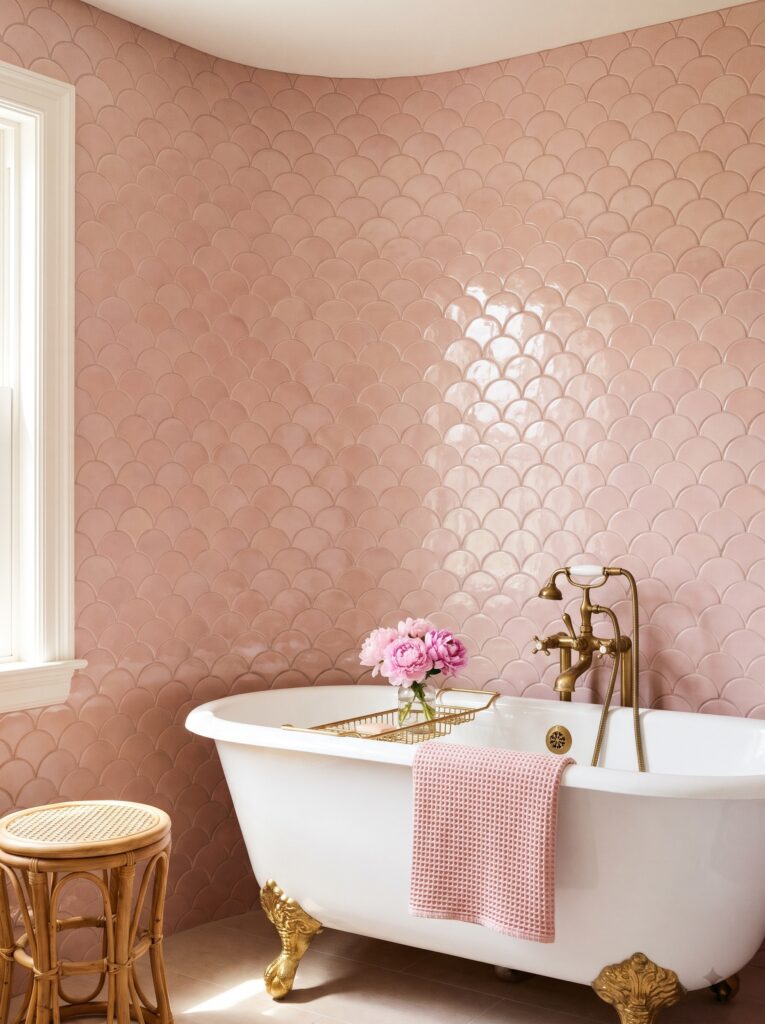
Fish scale tile takes longer to install than squares, but it softens a room in a way no straight-edged tile can.
The curved, overlapping shapes catch light along every edge, so even a single soft color has movement. In blush pink with a gentle glaze, they suit a clawfoot tub with gold feet and an unlacquered brass filler.
Fish scale rows have to be lined up one by one. Snap level lines every few rows, or the scallops drift out of line by the time you reach the ceiling and the whole wall looks tilted.
Finish the top with a cut straight row under a flat trim, or let a painted ceiling meet the tile cleanly. Ragged half scallops at the top edge are the giveaway of a rushed job.
Hang Delft-style painted tile behind the tub as one panel

Hand-painted blue and white tile brings history into a traditional bath without any other ornament.
Delft-style tiles show windmills, ships and flowers in cobalt on a white glaze. Set them as one panel behind the tub and paint the other walls plain white, so the pattern has space and doesn’t fight the room.
Mix several designs at random rather than repeating one motif. That is how old Dutch rooms were laid, and it hides the grid so the wall looks collected over time.
Real hand-painted tiles can cost a lot per piece. To keep the panel affordable, scatter a few painted tiles through plain white field tile of the same size, and the effect still reads as Delft from across the room.
Run creamy zellige floor to ceiling on the vanity wall

Tile the whole vanity wall, not just a backsplash, if you want the mirror and sconces to sit on one continuous surface.
Cream zellige stacked in vertical rows from floor to ceiling makes a small vanity wall look taller and gives a plain floating vanity something to stand against. The sconces mount straight onto tile, so set their electrical boxes before tiling and cut neatly around them.
Handmade tile has uneven edges, so a bone or warm white grout blends best. Pure white grout outlines every irregular edge and makes the wall look busy instead of soft.
Shop it on Amazon: Custom Building Products Fusion Pro Single Component Grout, Bone
A pre-mixed, stain-resistant grout also saves you from sealing every joint on a wall you’ll splash daily. Pair it with a floating oak vanity and a stone sink, and the zellige stays the star.
Wrap a Moroccan vanity wall in arabesque lantern tile

Arabesque tile is the simplest way to bring a Moroccan feel to a vanity wall without adding a patterned floor too.
Each lantern shape locks into its neighbors, so even a plain white glaze reads as pattern. Warm light from a brass lantern throws small shadows into every curve and makes the wall glow at night.
The cuts are the hard part. Every edge piece is a curved cut, so budget extra installer time and buy around 15% more tile than the wall area suggests.
Keep the floor plain and let a carved wood vanity, a hammered brass sink and a striped towel bring the color. White arabesque is the backdrop, not the whole show.
Brighten a windowless bathroom with a glass mosaic vanity wall
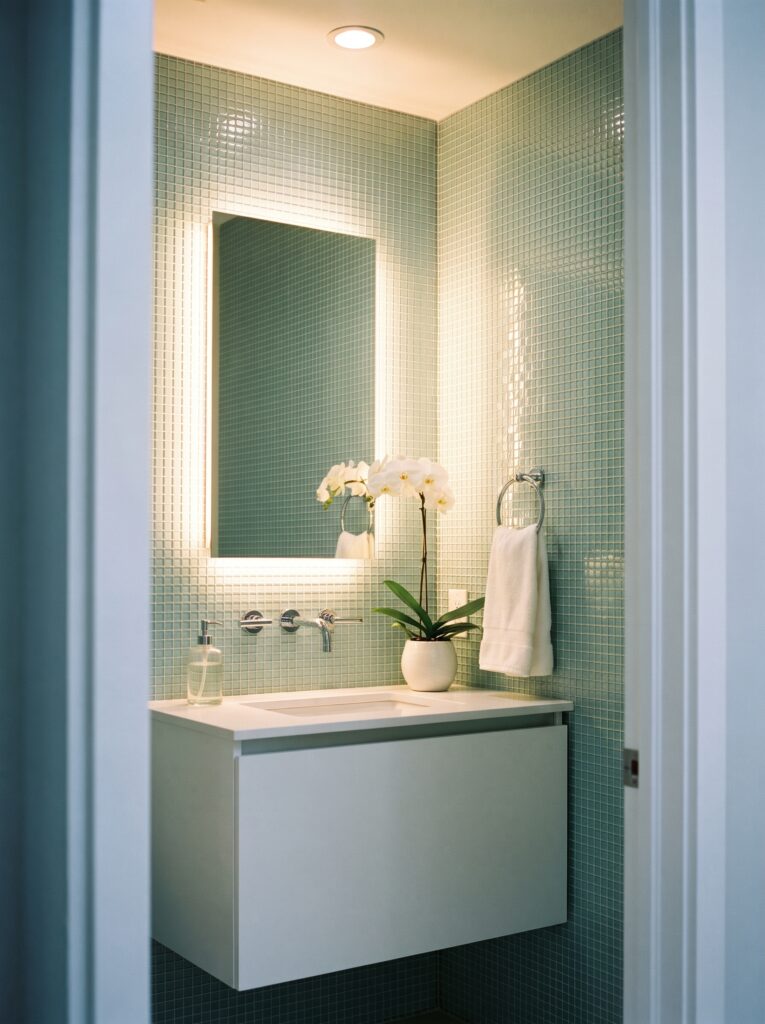
If your bathroom has no window, glass tile works harder for the light you do have than any other wall tile design.
Glass reflects light instead of absorbing it. A soft aqua glass mosaic behind a backlit mirror spreads the glow across the wall, so the whole room looks brighter than its single ceiling light should allow.
Choose bulbs around 3000 to 3500K so the aqua stays clean rather than turning green or gray. Glass also shows the mortar behind it, so it needs white thinset, never gray.
Glass shrugs off water and stains completely, which makes it one of the easiest walls to clean. The many small joints still need sealed or stain-resistant grout.
Make the toilet wall the feature with bold encaustic pattern
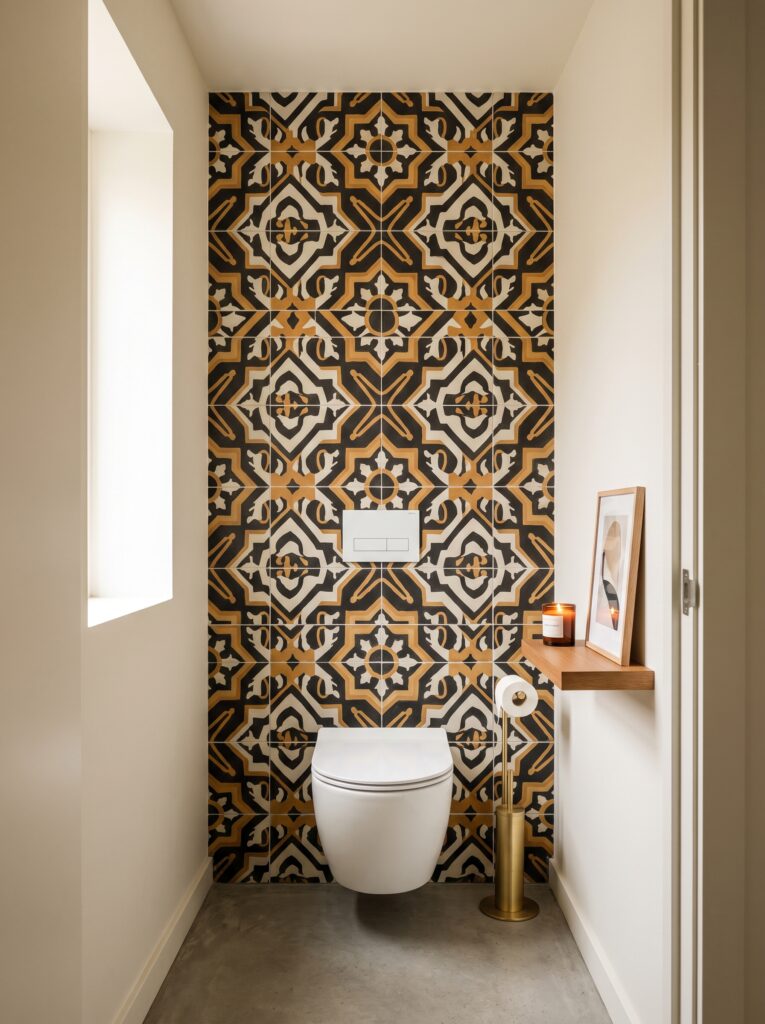
Small bathroom owners can fit a bold bathroom wall tile design into the room by tiling only the wall behind the toilet.
The toilet wall is often the first thing you see from the door, and it’s small, so a bold black, white and ochre pattern costs little and makes a big impression. Paint the other walls plain warm white so the tile does all the talking.
A wall-hung toilet with a concealed tank shows off more tile. Plan where the flush plate lands before tiling so it sits on a pattern line or in the center of a tile, not across a busy motif.
Cement pattern tile on a wall still needs sealing, but walls see far less wear than floors, so the colors stay crisp for many years here.
Use 3D wave tile on a powder room wall lit from the side
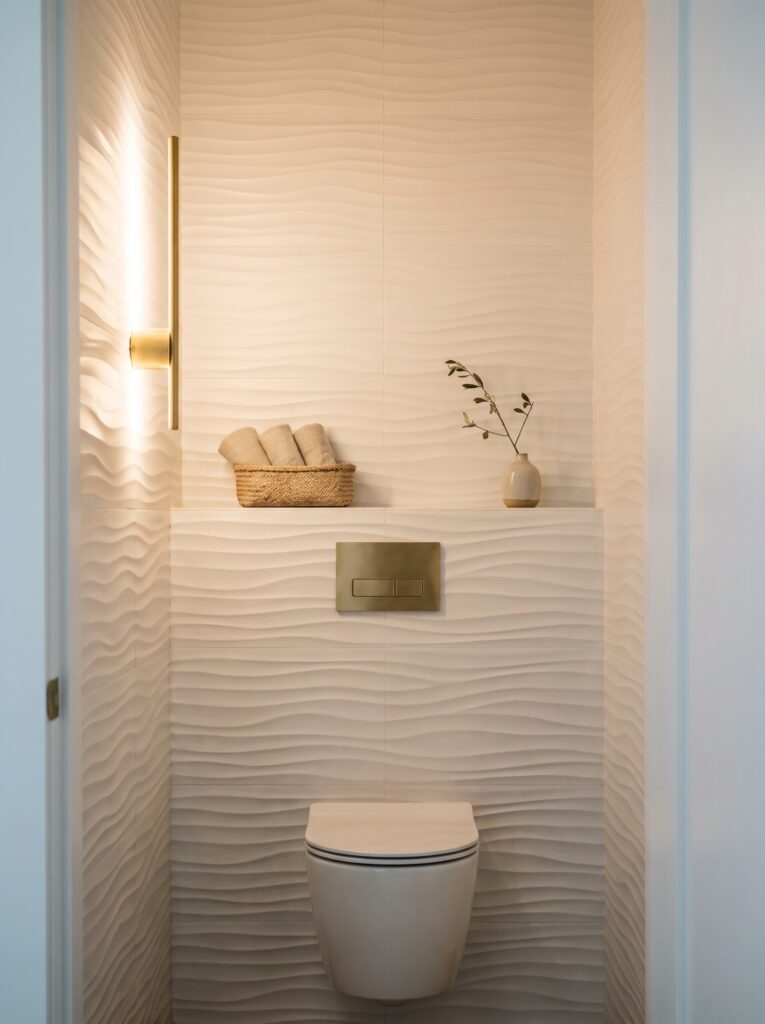
Textured white tile is the bathroom wall tile design for a room where you want impact without adding color.
Three-dimensional wave tiles change through the day. A slim sconce on one side grazes across the surface and draws soft shadows into every ripple, so a plain white wall becomes the feature.
Side light is the key. Mount the light beside the wall, not in front of it, or the texture flattens out. The same raking light that flatters 3D tile exposes lippage on flat tile, so keep this trick for textured surfaces.
Deep texture traps dust. In a powder room, a soft brush every few weeks keeps it clean, but keep it out of the shower, where soap film builds up in every groove.
Stop subway wainscoting at 42 inches in a cottage bathroom
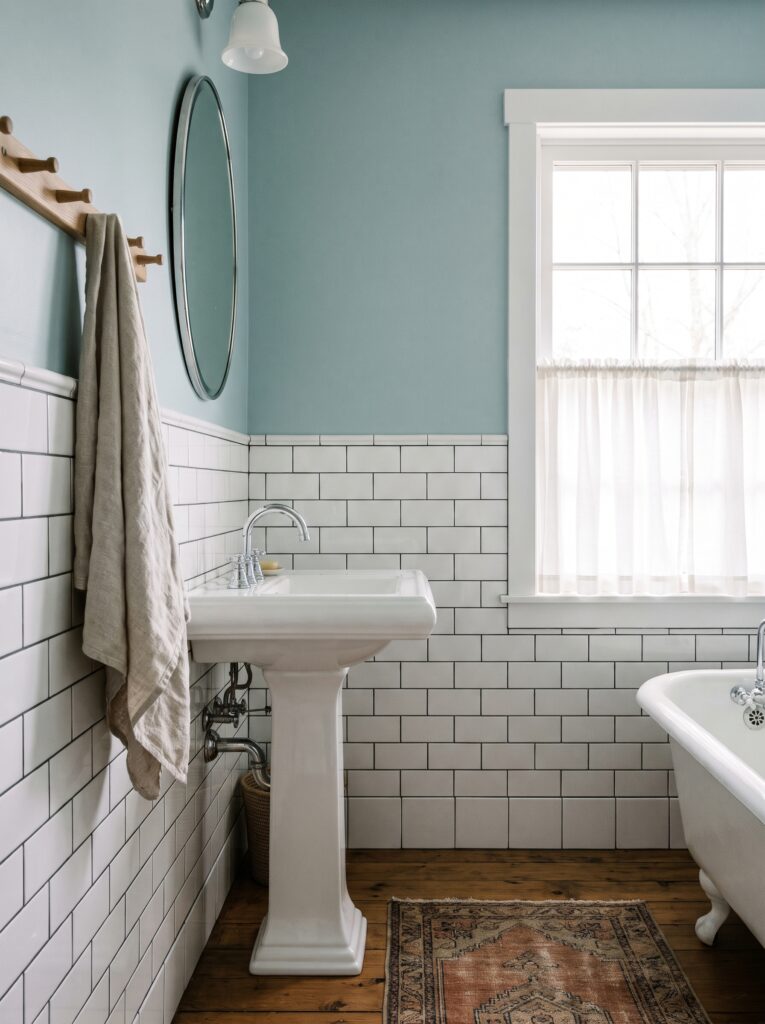
Many people tile a bathroom halfway and stop wherever the box runs out. The right height depends on what’s on the wall.
Around 42 inches works in most bathrooms. It clears the top of a pedestal sink, sits below the mirror and protects the wall from splashes and mop water. Next to a tub, run the tile a few rows above the tub rim instead.
Finish the top with a cap such as a pencil liner, a chair rail tile or a bullnose edge. A raw cut edge looks unfinished and chips the first time a vacuum bumps it.
Duck egg blue above white subway tile with dark grout gives a classic cottage look. Use a paint made for bathrooms, since the painted zone still takes steam every morning.
Split a wall two-tone with green tile and plaster pink above
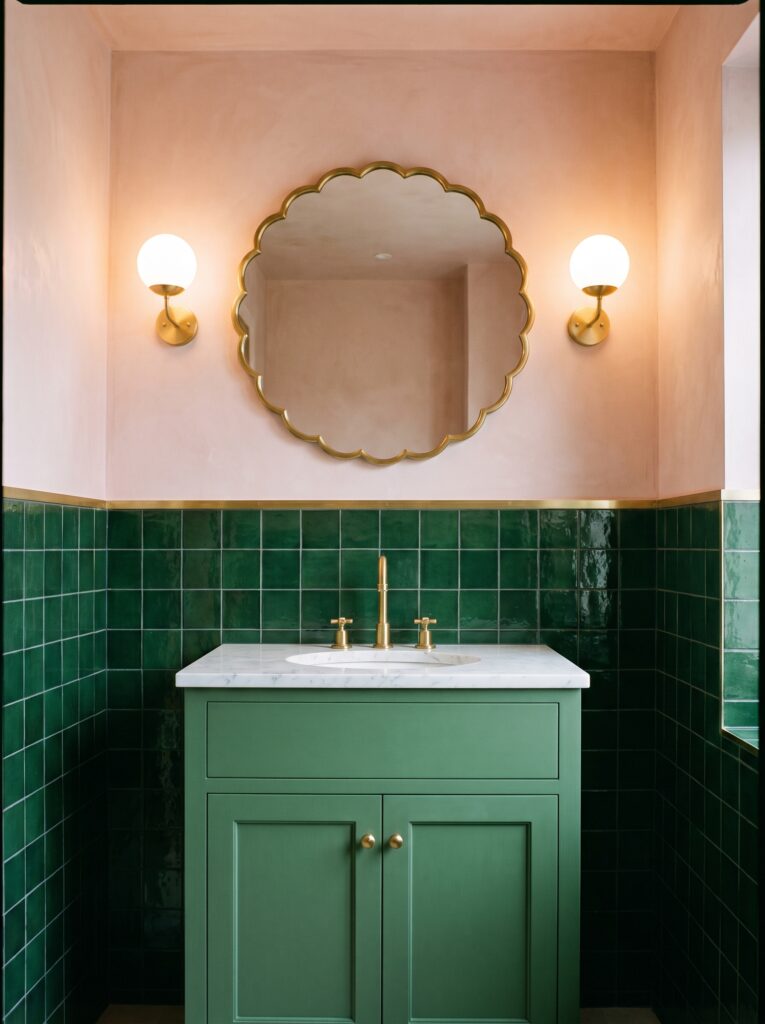
Try a two-tone bathroom wall tile design when one strong color alone would feel too heavy for a small room.
Glossy forest green square tile up to about 36 inches, with plaster pink limewash above, keeps the dark color where it protects the wall and the light one at eye level. A thin brass strip marks the line and hides the cut edge.
Line the split up with something already on the wall, like the vanity top or the base of the mirror, so it looks planned. A random height reads as if the tile simply ran out.
A green painted vanity in the same tone makes the tile and cabinet look built together, and gold globe sconces pick up the brass strip.
Lay a diagonal checkerboard wainscot in a powder room
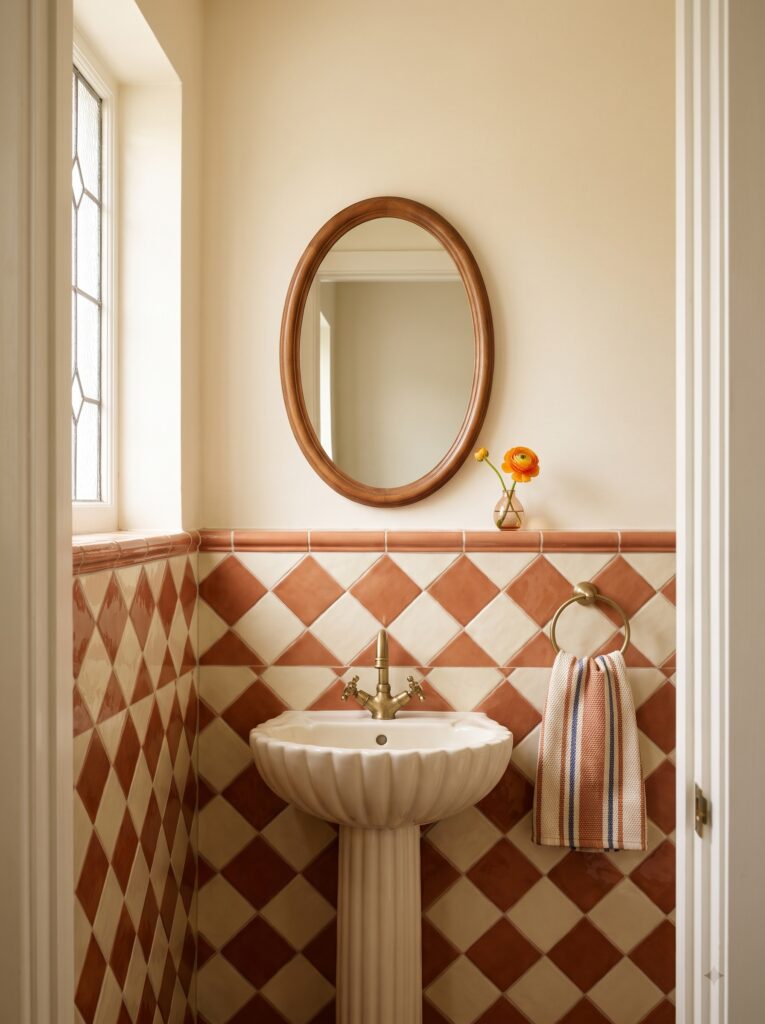
Diagonal checkerboard needs more cuts than a straight grid, but it gives a small powder room a playful, old-world charm.
Cream and terracotta squares turned 45 degrees form diamonds that carry the eye along the wall. A matching terracotta border strip on top frames the pattern and doubles as the stop line.
Stop a little above waist height and paint the wall above in warm cream. The pattern stays at hand level where it gets touched and splashed, and the room above stays light.
Center the pattern on the sink so the diamonds sit evenly on both sides. Starting from a corner leaves half diamonds right where every guest looks.
Finish a half-height tile wall with a brushed brass metal edge
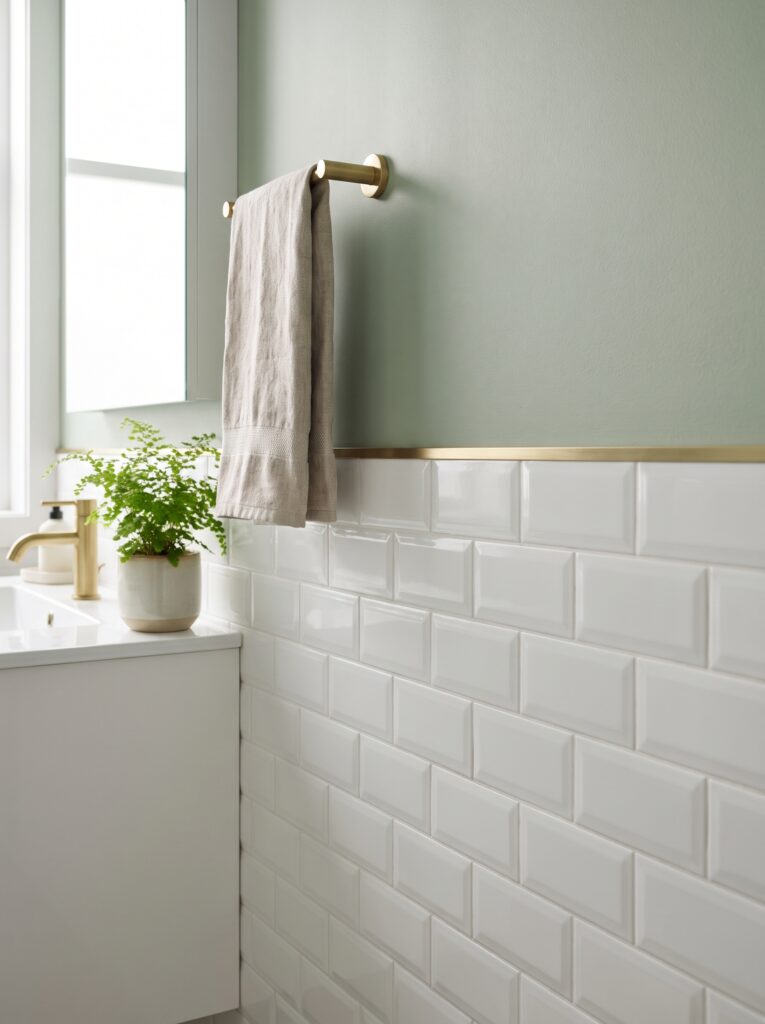
A metal edge profile is the cleanest way to stop tile mid-wall, and it’s the detail most bathroom wall tile design plans skip.
Bullnose tile only works when the tile line includes a matching edge piece, and many modern tiles don’t. A slim metal profile set into the thinset protects the edge from chips and gives a crisp, straight finish against the paint.
Match the profile height to the tile thickness, usually 3/8 or 7/16 inch for standard wall tile. Brushed brass suits warm fixtures, while matte black or satin nickel suits cooler ones.
Shop it on Amazon: Schluter Jolly Brushed Brass Anodized Aluminum Tile Edge Trim, 7/16 in
Sage green paint above gloss white beveled tile, with a brass towel bar on the painted part, shows how tidy that line can look when the metal matches the hardware.
Tile a Japandi bathroom floor to ceiling in travertine-look porcelain

People who want a calm, spa-like room can wrap every wall in one warm, quiet tile.
Honed travertine-look porcelain in warm beige gives the look of stone without the sealing. Used floor to ceiling on every wall, it makes the room feel like one carved space, and the soft texture keeps it from looking cold.
Choose larger tiles, around 12 x 24 inches, with grout that matches the tile. Offset each row by no more than a third of the tile length to keep long tiles flat at the joints.
A low oak vanity, a stone sink and a paper lantern finish the look. For more bathroom tile design ideas built around marble and stone looks, see our modern luxury bathroom tile ideas.
Cover a sunny bathroom in terrazzo wall tile
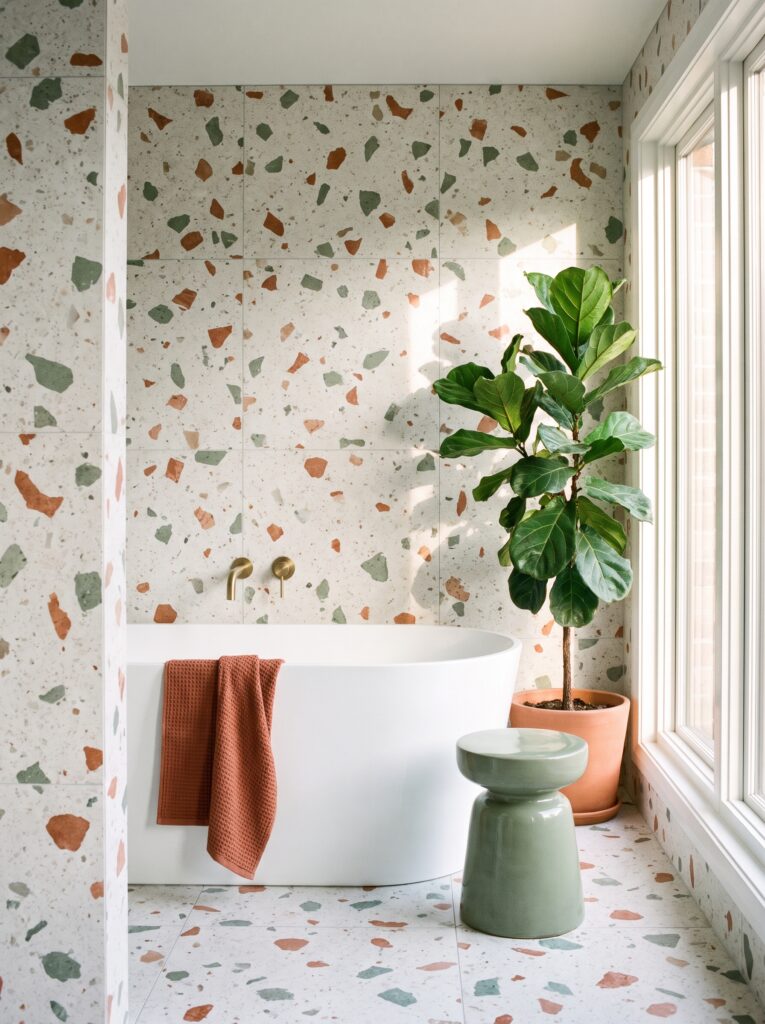
If your bathroom gets strong daylight, terrazzo walls make the most of it.
White terrazzo with terracotta, sage and gray chips looks lively in morning sun and calm by evening. Pull towel, stool and plant pot colors straight from the chips, and the room feels planned without any extra pattern.
Running the same terrazzo across the floor and walls gives one continuous look. If that feels too much, keep the walls patterned and the floor a plain matching tone.
Seal cement terrazzo before grouting. Its pale base shows soap marks, so a quick wipe after showers keeps it bright.
Continue small square tile across a steam shower ceiling
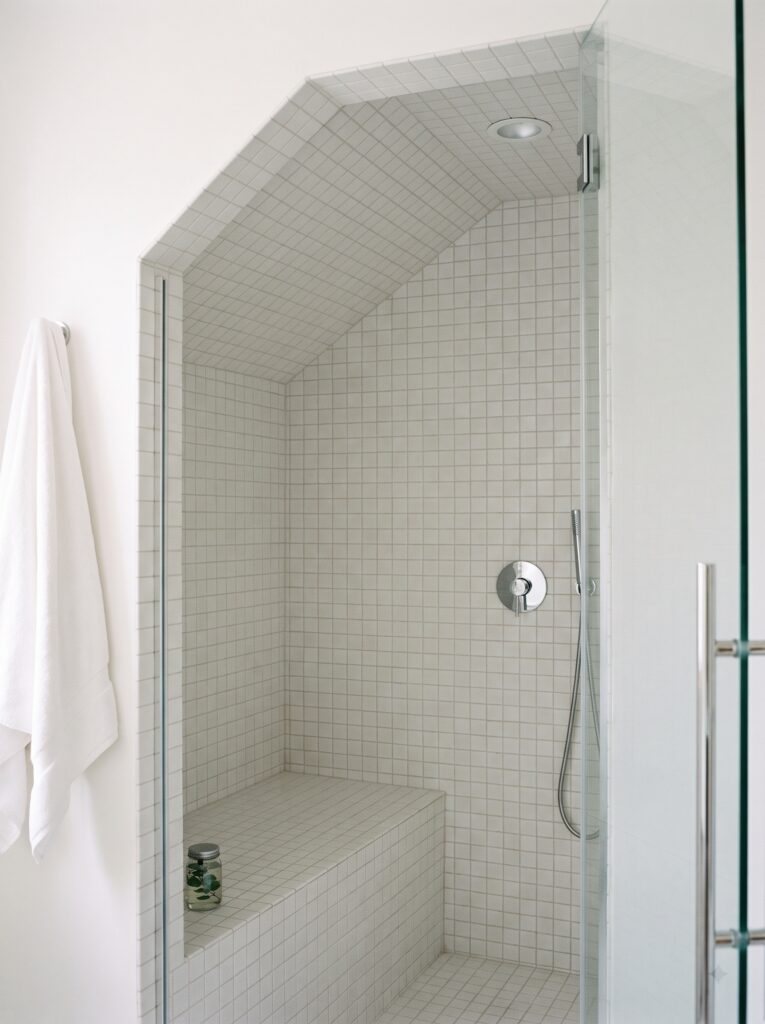
A steam shower needs tile on the ceiling as well as the walls, because steam rises and condenses there first.
Small white matte squares running from the wall straight across a sloped ceiling, with no change of tile, make the enclosure feel seamless. The slope also sends drips down the wall instead of onto your shoulders.
Steam showers need a vapor-proof membrane behind every tiled surface, ceiling included. Ask for a system rated for steam, since standard shower waterproofing isn’t always enough.
Line up the grout lines where the wall meets the ceiling so the grid wraps around the corner as one. A tidy corner is what makes a small tile ceiling look custom.
Turn the tub wall into a feature with marble basketweave mosaic
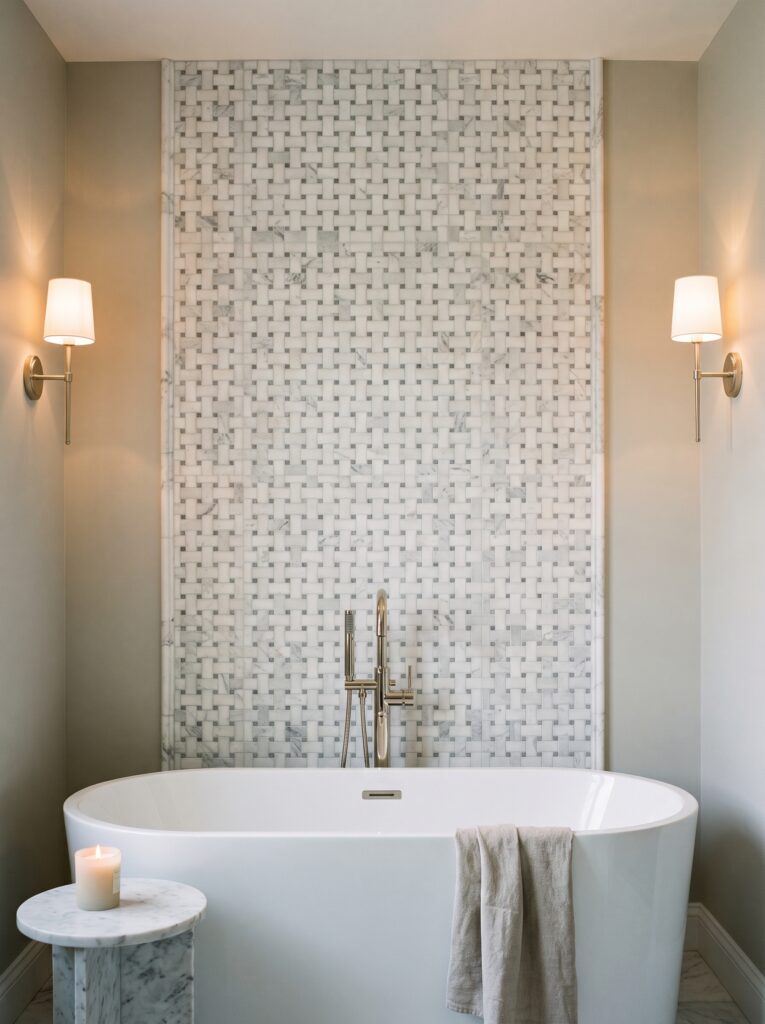
A marble mosaic costs more per square foot than field tile, but you only need one wall of it.
Basketweave mosaic, with white marble rectangles and small gray dots, behind a freestanding tub gives a luxurious feature in an otherwise plain greige room. Two wall sconces on either side light it evenly.
Frame the panel so it reads as deliberate. A thin stone pencil liner or a clean line where tile meets paint both work.
Marble on a tub wall is a good use of real stone, since it gets splashed rather than soaked every day. Seal it once a year and wipe it with a pH-neutral cleaner.
Refresh a rental’s walls with peel-and-stick subway panels

Renters stuck with plain painted walls can add the look of a subway wainscot in an afternoon with peel-and-stick panels.
Vinyl sheets printed with subway tile and grout lines stick to clean, smooth walls. Apply them to the lower half of the wall behind the toilet and up the tub wall, keeping a straight top edge with a level.
They work best on smooth painted walls away from direct spray. Check that the panels are rated for bathrooms and ask your landlord before you start.
Shop it on Amazon: STICKGOO Peel and Stick Subway Tile, White (10 Sheets)
Black hardware and a trailing plant make the quick refresh look intentional rather than temporary.
What makes bathroom wall tile design look cheap, and the fix for each
Most tile walls that look cheap don’t have cheap tile. They have a layout or finishing mistake. Here are the six that show up most, each with the fix.
Not this: thin slivers of tile in the corners and around niches.
Do this: dry-lay the tile, center the layout on the wall and size niches to whole tiles.
Not this: tile that stops at a random height where the boxes ran out.
Do this: stop at a planned line, such as 42 inches, a few rows above the tub or the ceiling.
Not this: raw cut edges at the top of a half wall.
Do this: finish with bullnose, a pencil liner or a metal edge profile.
Not this: bright white grout around handmade or uneven tile.
Do this: match the grout to the tile, and save contrast for simple shapes like subway or squares.
Not this: large tiles with uneven edges catching window light.
Do this: insist on a flat wall and a leveling clip system for anything 15 inches or longer.
Not this: painted drywall above the tile inside a shower.
Do this: take shower wall tile all the way to the ceiling.
Decide where your tile starts and stops before you pick a color
Walk around your bathroom and decide which walls get tile and how high it goes. Then choose the one feature wall. Only then pick the tile itself.
Good bathroom wall tile design comes from that order. Settle the walls, heights and trim first, and almost any tile you love will look planned instead of patched together.
Planning a tile refresh? Save this pin so these bathroom wall tile ideas are ready when you meet your installer.