Cabin Bathroom Ideas for Small, Sloped and Log-Wall Spaces
The best cabin bathroom ideas work with the wood you already have: keep one natural material in charge, balance it with a pale wall, and plan the shower, tub and vanity around any slope or log wall first. The catch is water. Wood near a shower needs a real sealer, and a closed cabin needs a fan.
Most cabin bathroom lists are decor lists. The twenty ideas below start from what actually limits a cabin: dark logs that swallow light, A-frame ceilings that cut headroom, tiny footprints, and plumbing that may run on a well or septic tank. Each one comes with a measurement or rule you can use right away.
After the ideas you’ll find a short list of what fails first in a cabin bathroom, ranked by how fast it goes wrong, so the room still looks good in year three.
Affiliate disclosure: this post contains Amazon affiliate links. If you buy through one, we may earn a small commission at no extra cost to you.
Table of Contents
Cabin bathroom ideas start with balancing honey-colored logs against one white wall

Honey-yellow logs turn orange fast in a small room, so give them a pale partner. Whitewashed shiplap on the sink wall does the job without hiding a single log, and the contrast makes both surfaces look chosen instead of heavy.
Put the light wall opposite the window if you can. Daylight hits the pale boards and bounces back onto the round log ends, which stops the warm color from deepening by afternoon. Black hardware, like a round mirror frame and a two-bulb sconce, gives the two surfaces one sharp line in common.
A cream pedestal sink and a clawfoot tub already read as old cabin pieces, so you don’t need a theme on top. A simple rule of thumb: let about one wall in three go light. Past that, you’ve painted over the cabin you came for.
Test it before you paint anything. Tape a white sheet of poster board where the shiplap would go and look at the room at 8 a.m. and again at 4 p.m. If the logs still look orange beside it, pick a white with a touch of gray instead of a stark one.
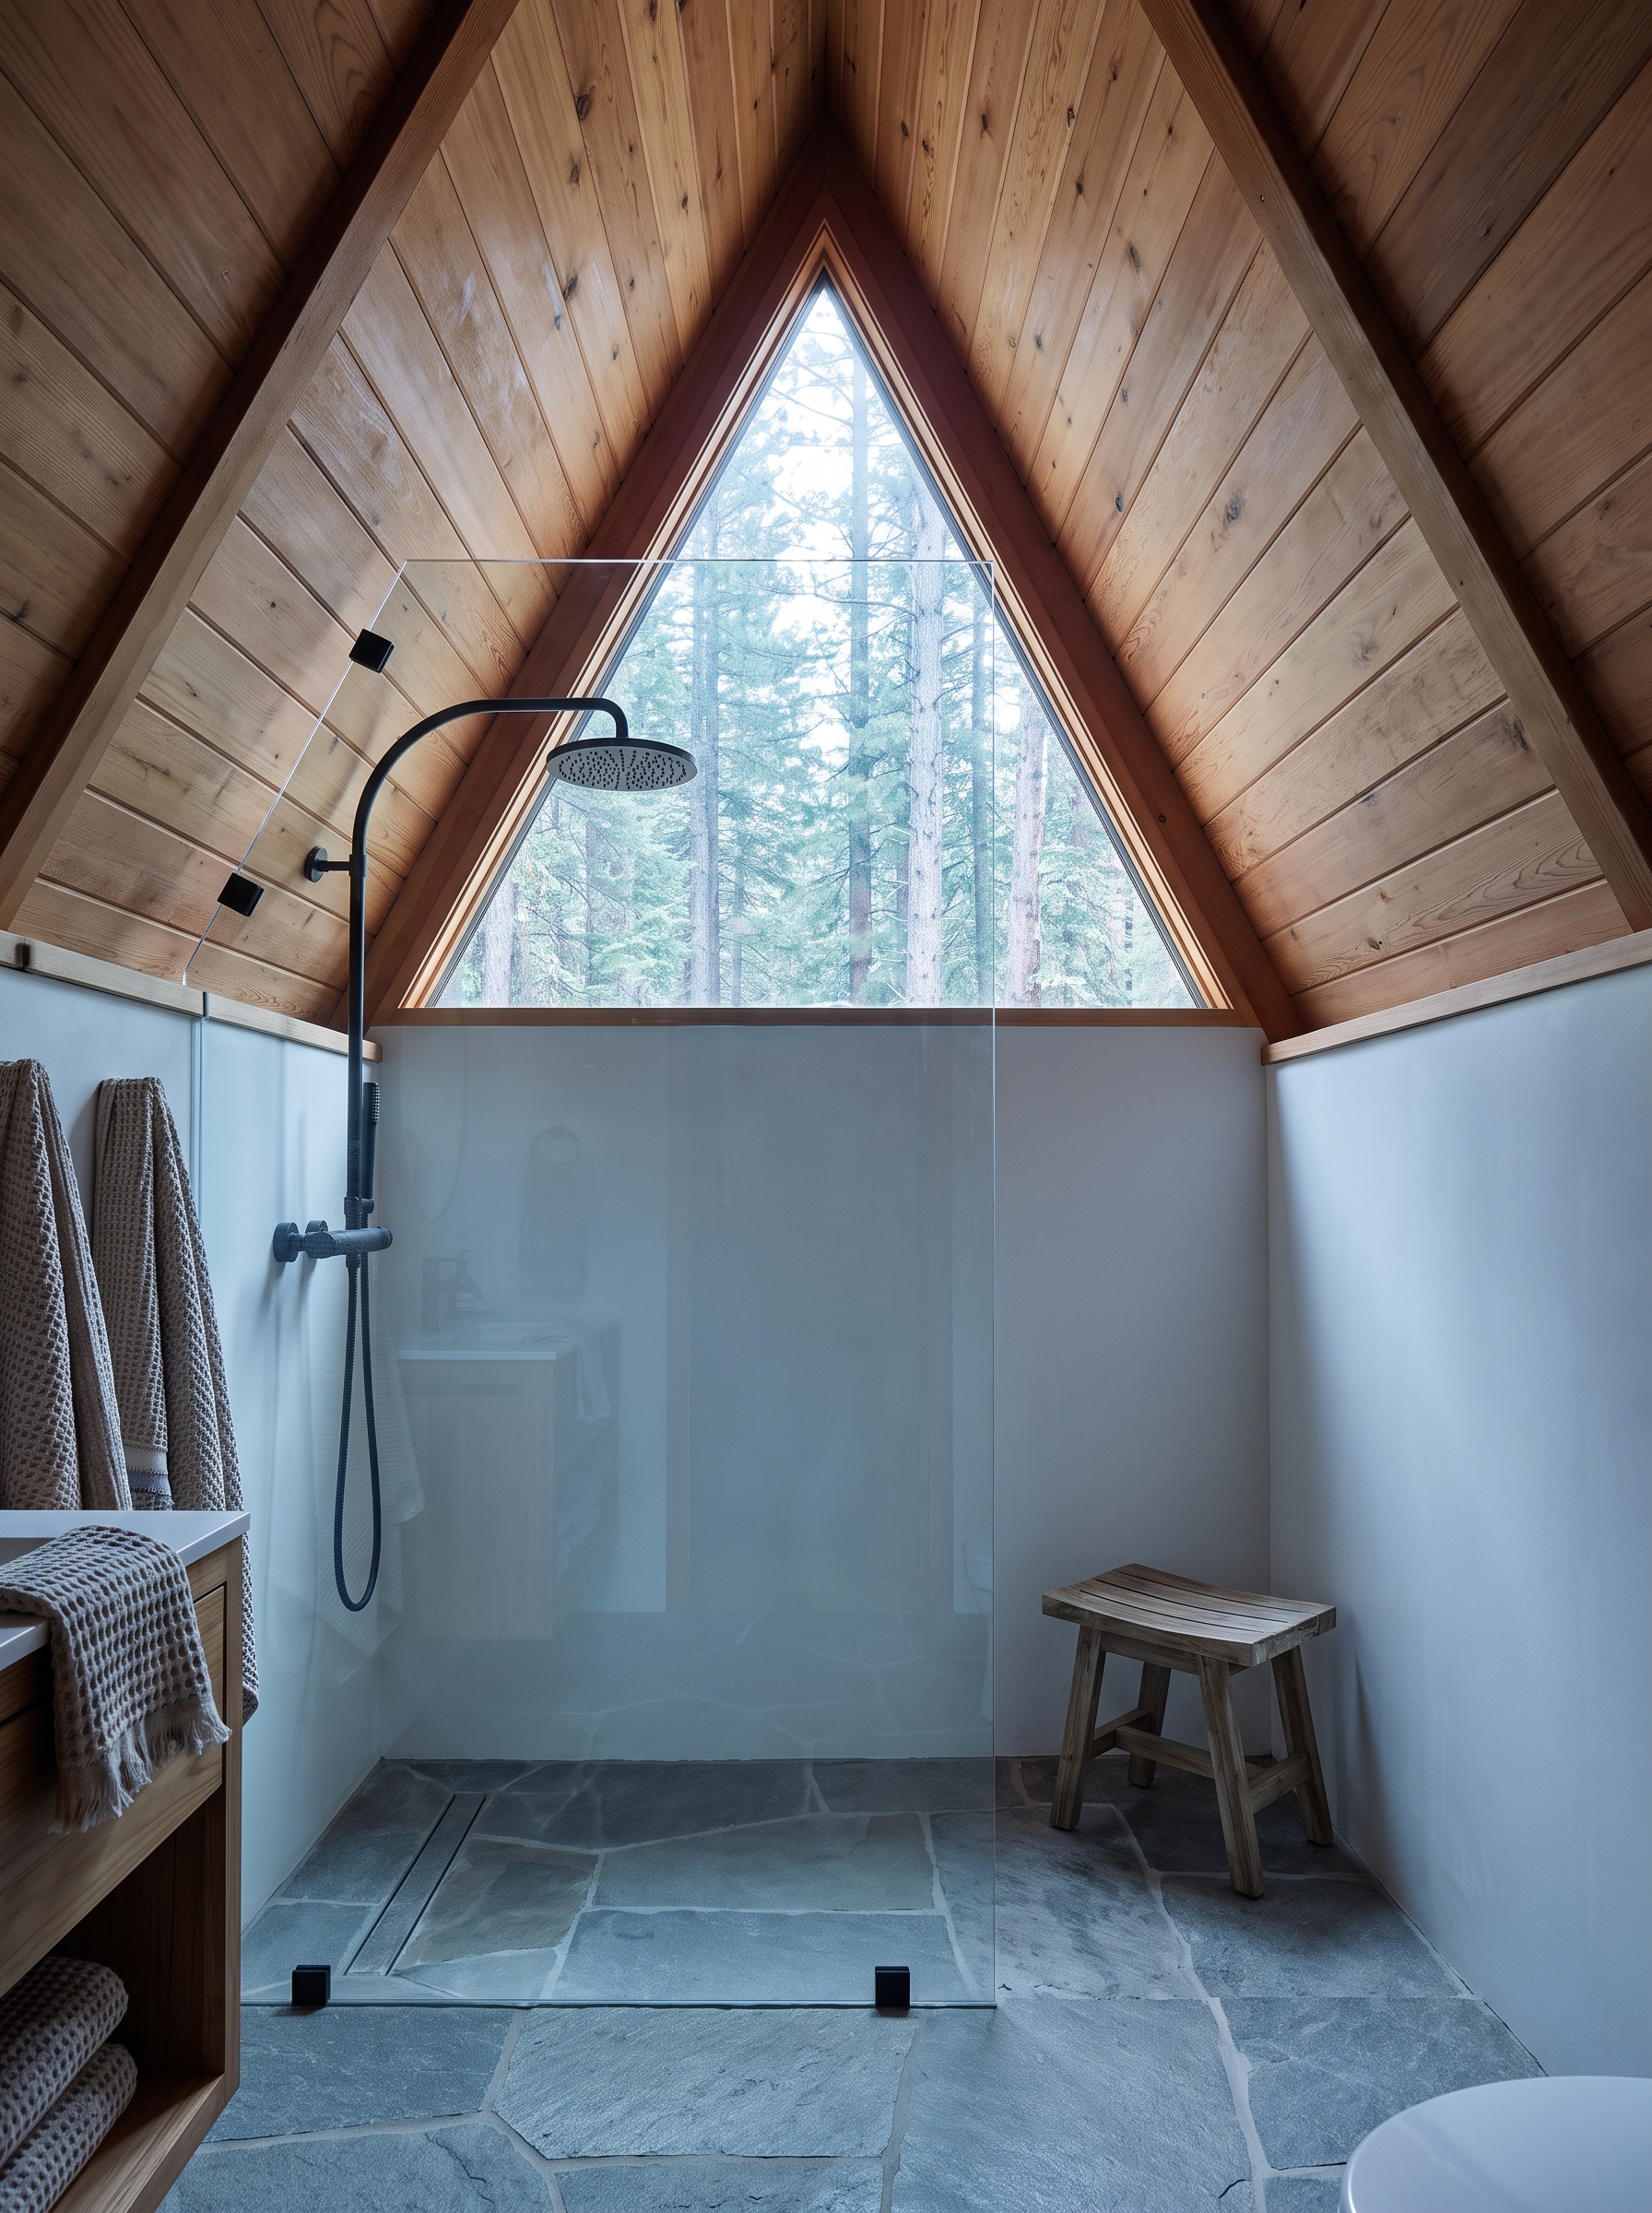
Place the shower under the peak of an A-frame ceiling, where the headroom is

In an A-frame bathroom the ceiling drops fast toward the walls, so the tallest point belongs to the shower. Most codes ask for roughly 6 feet 8 inches of clear height above the floor at the showerhead, so stand where you plan to wash and measure up to the ceiling before you commit. Local rules vary, so check yours.
A walk-in with one glass panel set parallel to the slope is the easiest fit, because there’s no door to swing into the angle. Mount the rain head on a curved arm so the spray lands inside the peak, and let the floor fall toward a linear drain on the low side.
Leave the slope wall bare. A gable window above the shower fills the triangle with forest light, and a stool placed outside the spray, off the main path, gives you somewhere to sit without eating headroom.
Use the low edges too. Where the rafters meet the floor nobody can stand, so give that strip to a towel shelf or a built-in bench instead of wasting it on empty wall.
Tuck a low floating vanity under the slope and leave the tall wall open
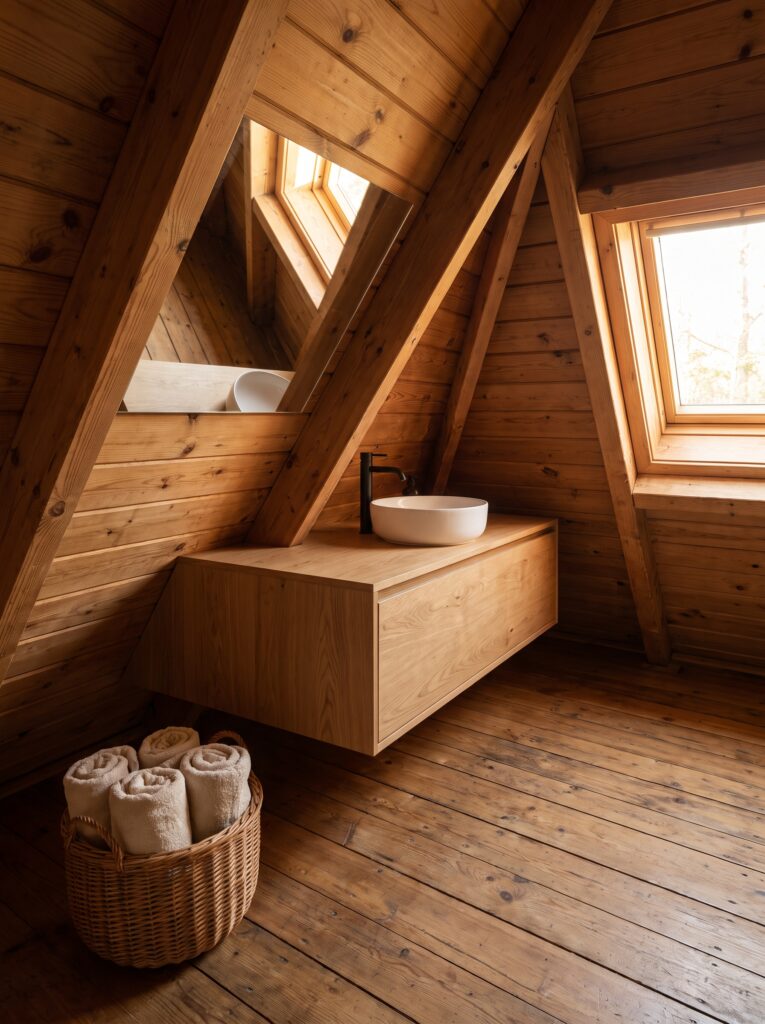
Put the vanity where the ceiling is lowest, since that’s the one spot nothing else needs. A floating box about 24 to 28 inches tall plus a vessel bowl puts the rim near 30 to 34 inches, which is low but workable under a slope. If you’re tall, choose a taller faucet and a shallower bowl.
Hanging the vanity off the floor keeps the planks visible underneath, and that visible floor is what makes a small cabin bathroom feel wider. A single wide drawer holds more than two narrow doors, and it never hits the slanted wall when it opens.
A low, wide mirror that follows the angle of the roof reflects the dormer window and doubles the light. Keep towels in a basket on the floor beside it instead of adding shelves that would crowd the rafters.
Test the fit with cardboard first. Cut a box to the vanity’s size, set it against the slope and stand at it with a toothbrush. If your head hits a rafter, lower the box another two inches before you order anything.
Save the highest point for the tub and put a skylight above it

A freestanding tub costs floor space, so spend it where the ceiling gives it back. Under the peak you can sit upright, and a skylight overhead turns a plain soak into a view of tall pines. The trade-off is steam, which fogs the glass and soaks the wood sill below it.
Pick a skylight with a vented or double-glazed unit, and seal the wooden sill the same way you’d seal a shower wall. Wipe the glass after a hot bath so the condensation doesn’t run down into the planks.
Condensation on a sloped pane drips instead of running straight down, so a small wooden drip rail below it keeps the water off the planks.
Plan at least 6 inches of clear floor around the tub so you can clean behind it. A floor-mounted filler in brushed nickel keeps the wall behind the tub free for the window, and a wooden tray across the rim gives you a place for a candle and a towel without adding hardware.
Paint the low slope a deep green so it fades back, then keep the walls light
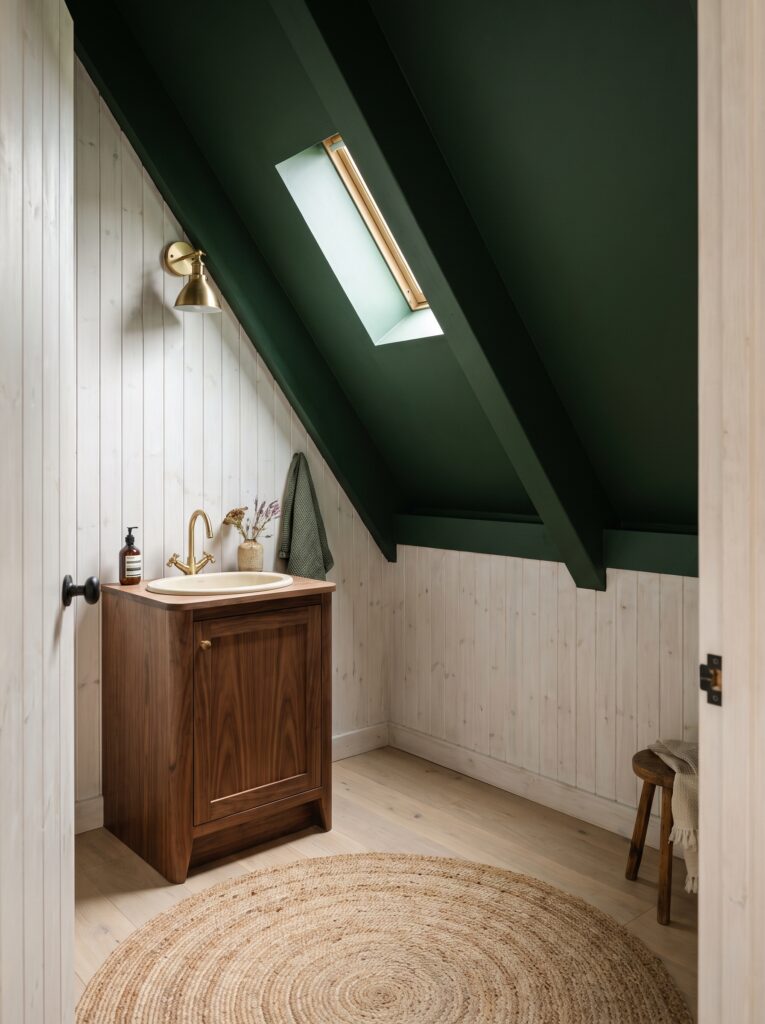
Most people paint a low ceiling white to lift it. A deep color works better, because the eye stops tracking the angle and the slope reads as a roof instead of a squeeze. Forest green keeps the cabin mood and sits well next to raw wood.
Keep the straight walls pale. Whitewashed vertical boards below the slope carry the light, and a skylight cut into the dark paint becomes a bright shape instead of a hole. Brass lights and a brass faucet pick up the warm wood without competing with it.
If dark paint is new to you, our bathroom styles and aesthetics guides show how other rooms balance it. A round jute rug on pale oak softens the floor, and one walnut vanity is enough furniture for a room this size.
Sample it first. Paint a two-foot square on the slope and look at it at night with the sconce on. Deep green can read as black in low light, so choose a shade with a little blue or gray in it if the room has one small window.
Seal knotty pine paneling before it meets the shower, or it will gray and stain

Anyone who wants wood inside the shower should treat the finish as the real purchase. Pine paneling costs far less than tile and looks right in a cabin, but raw or oiled boards drink water, darken and mold at the seams.
Use a water-based polyurethane or a marine varnish, and put on at least three coats, sanding lightly between them. Seal the cut ends and the bottom edge of every board, since water wicks in from the end grain first.
Test the finish on an offcut first: drip water on it overnight, and if it still beads after 24 hours, it’s a good sign.
Check the finish every spring. When water stops beading and starts soaking in, it’s time for another coat. Skip wax and oil-only finishes in the spray zone, and keep a stone tile floor underneath so no wood sits in standing water.
Use charcoal slate on the shower wall to make the pine ceiling look warmer

A dark slate wall is the quickest way to make cabin wood look warmer. Charcoal stone next to honey pine pushes the wood’s color forward, and brass fixtures echo it, so the room feels layered with only three materials.
Choose large tiles to keep grout lines few. Natural cleft slate is uneven, so ask for gauged or calibrated tile if you want a flatter wall, and seal it before you grout. Slate also hides soap film better than glossy tile does.
A potted fern thrives in the steam, and a jute mat outside the glass gives wet feet something to land on. One note on the glass: a frameless panel keeps the slate visible from the doorway, which is half the point of using it.
Slate also shows you where the water goes. Dark tile reveals every drip line and hard-water spot, so hang a squeegee inside the glass and pull the water down after each shower. It takes ten seconds and keeps the stone looking deep.
Choose a pebble floor for the shower when you want grip and a true log cabin look
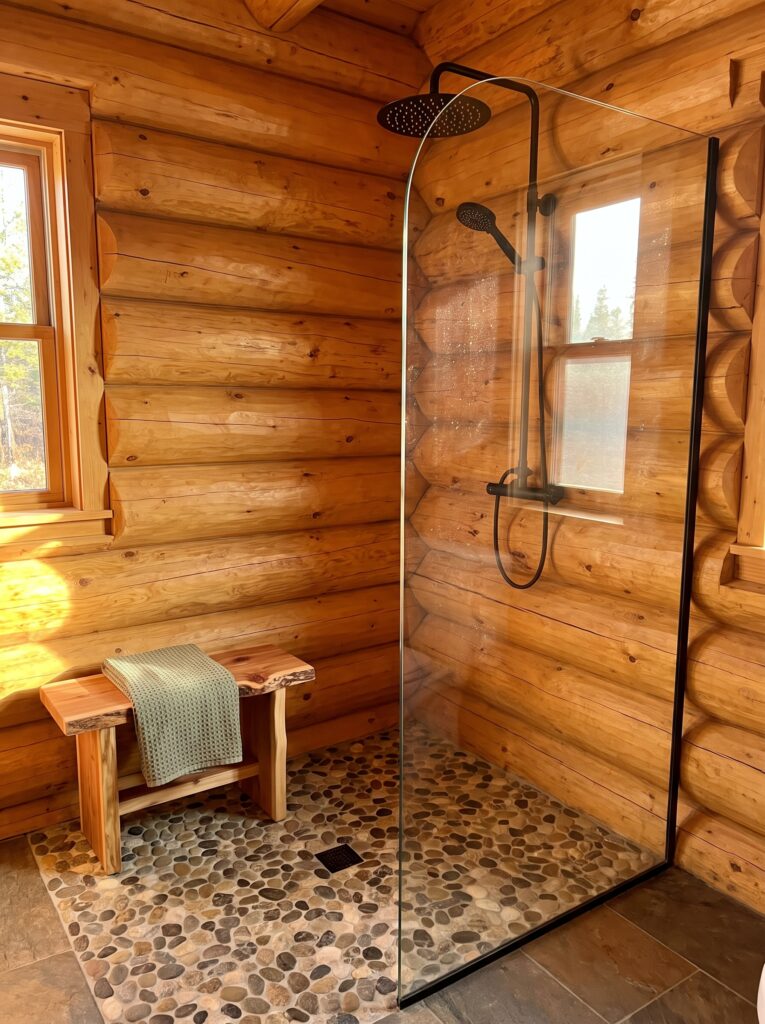
A wet room built from logs gets slick underfoot, and a pebble floor fixes that. The grout lines between rounded stones give bare feet something to grip, and the earthy mix of browns and grays sits naturally against round logs, which makes it one of the easiest log cabin bathroom ideas to get right.
Buy pebbles on mesh sheets, which lay like tile, and seal both the stone and the grout once it cures. Wide joints hold water, so a sealed, mildew-resistant grout matters more here than on flat tile.
Tumbled pebbles feel rounder underfoot, while sliced ones lie flatter and are easier to clean, so try both barefoot in a shop if you can.
Make the glass panel wide enough to keep spray off the log wall behind the shower, or seal those logs like a shower surround. A small bench in live-edge cedar keeps the corner usable, and a square black drain disappears against the dark stones.
Shop it on Amazon: Lovdeco Pebble Tiles for Shower and Bathroom Floor, Tumbled Mix River Rock Pebble Stone Mosaic Tile, 5 Sheets (12″ x 12″)
Face the tub toward the view, not the door, and plan the floor filler early

Turn the tub to face the biggest window in the cabin, and you give up the usual spot against a wall. The view becomes the artwork, and reclaimed beams, a stone fireplace and a plank floor already supply the rest of the room.
A floor-mounted filler needs supply lines that come up through the floor beside the tub, so decide its position before the subfloor and planks go down. Moving it later means cutting boards you’d rather keep.
Privacy comes from height, not curtains. If a neighbor or a trail can see in, frost the lower pane and leave the top clear for the view. A stool beside the tub holds a stack of towels within reach.
A fireplace in the same room is a bonus, not a rule. Without one, a heated towel bar near the tub does the same job of making the first step out of the water bearable.
Build the vanity from reclaimed barn wood, then seal the top like a countertop

Reclaimed wood isn’t too delicate for a vanity. The top just needs the same finish you’d give a kitchen counter: three coats of water-based polyurethane, with the edges and the area around the sink done twice.
A wall-mounted faucet frees the whole surface for a vessel sink and lets you keep the top clear, so pick one with a spout long enough to reach past the center of the bowl. Two framed mirrors, one on the log wall and one on the plaster wall, break up the room’s heavy texture.
If you like the farmhouse side of rustic, our guide to farmhouse rustic bathroom decor themes covers the softer look. A forged iron sconce beside the mirror and a flagstone floor underneath keep the corner true to the cabin.
Ask where the boards came from. Wood salvaged from an old building can hide nails, so have each board checked with a magnet or a metal detector before anyone saws it, and keep the cut edges tight.
Pick a long trough sink when the cabin sleeps a crowd
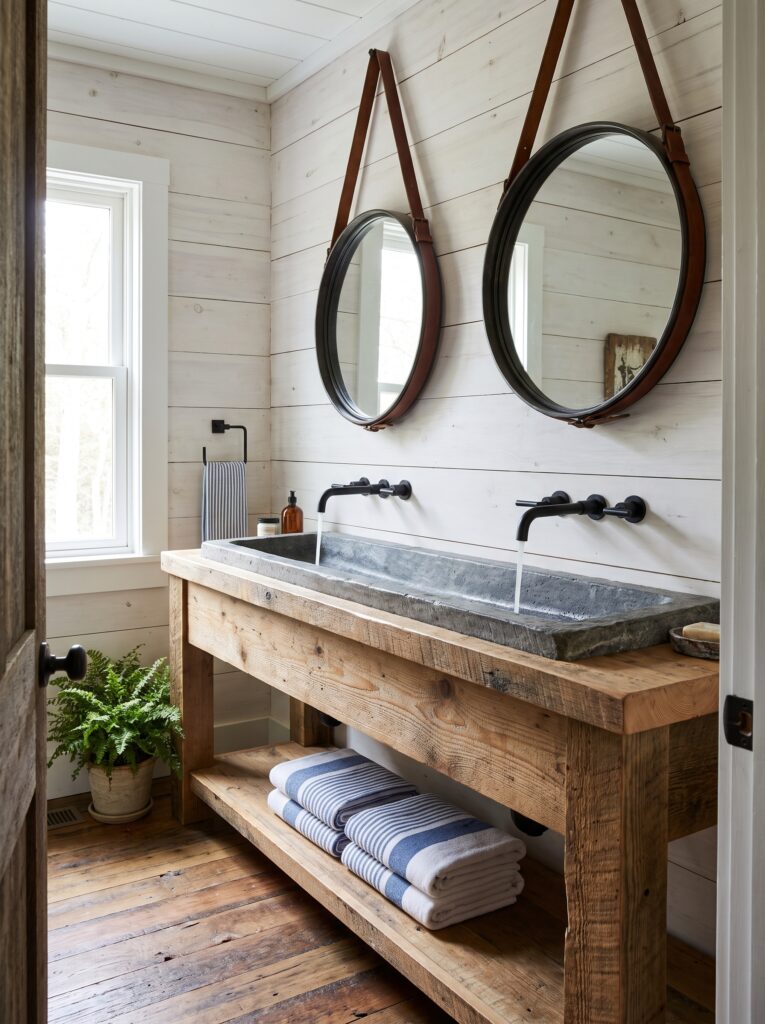
Cabins fill up on weekends, and one small basin turns into a queue. A trough sink 48 to 60 inches long lets two people brush their teeth at once, and two faucets with two matching mirrors make it feel planned instead of improvised.
Stone troughs are heavy, so build or buy a frame that carries the weight on legs rather than on the wall. An open shelf below the sink holds stacked towels in plain sight, which saves guests from opening every door to find one.
Whitewashed boards behind the sink brighten a room that doesn’t get much light. Leather straps on the mirrors add a warm, soft note against the cold stone, and a fern in the corner keeps the whole thing from feeling severe.
Mind the tap spacing. Two faucets should sit at least 24 inches apart so two people don’t bump elbows, and the trough should slope gently toward one drain so water doesn’t pool against the wall.
Add a hammered copper sink for warmth that ages instead of wearing out

Copper costs more attention than porcelain, but it hides what porcelain shows. The hammered surface scatters light, so water spots and fine scratches disappear into the texture, and the metal slowly darkens into a patina that looks right in a cabin.
Choose a heavier gauge, which means a lower number, if you can, because thicker copper dents less when a jar drops into it.
Clean it with mild soap and a soft cloth. Acids, including lemon and vinegar, strip the finish unevenly, and steel wool leaves scratches that will bother you more than the patina ever would. Wipe the bowl dry after use to slow the spotting.
Match the faucet finish to the metal. Oil-rubbed bronze sits quietly next to copper, while chrome fights it. Pale whitewashed boards behind the mirror let the copper glow, and a small enamel pitcher of dried stems adds one soft shape, which is all the cabin bathroom decor this corner needs.
Go wall-hung with the toilet and vanity if the floor is narrower than five feet
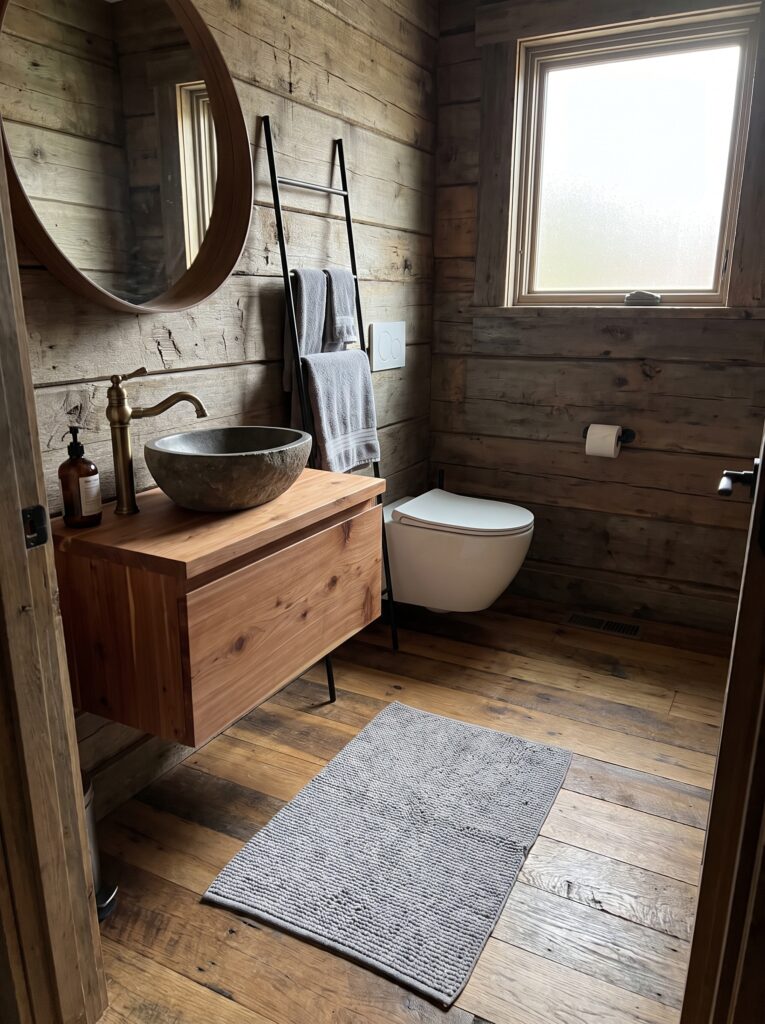
When a cabin bathroom is tight, lifting both fixtures off the floor is the cheapest of all the small cabin bathroom ideas for gaining space. You see more floor, you mop under everything, and a narrow room reads as wider than its measurements.
A wall-hung toilet needs a carrier frame and a tank hidden in the wall, and a solid log wall can’t hold that. Build a short framed wall for it, and mount the flush plate in the new panel.
Plan this before the plumber arrives, not after. Most carrier frames need a wall roughly 6 inches deep, so a standard 2 by 4 wall is too thin.
A leaning towel ladder needs no drilling into logs that will settle, so it suits a cabin well. Set it beside the vanity, and let a round mirror and a gray rug finish the corner. A frosted window above the toilet keeps the light and the privacy.
Hang a sliding barn door when a swinging door would hit the sink
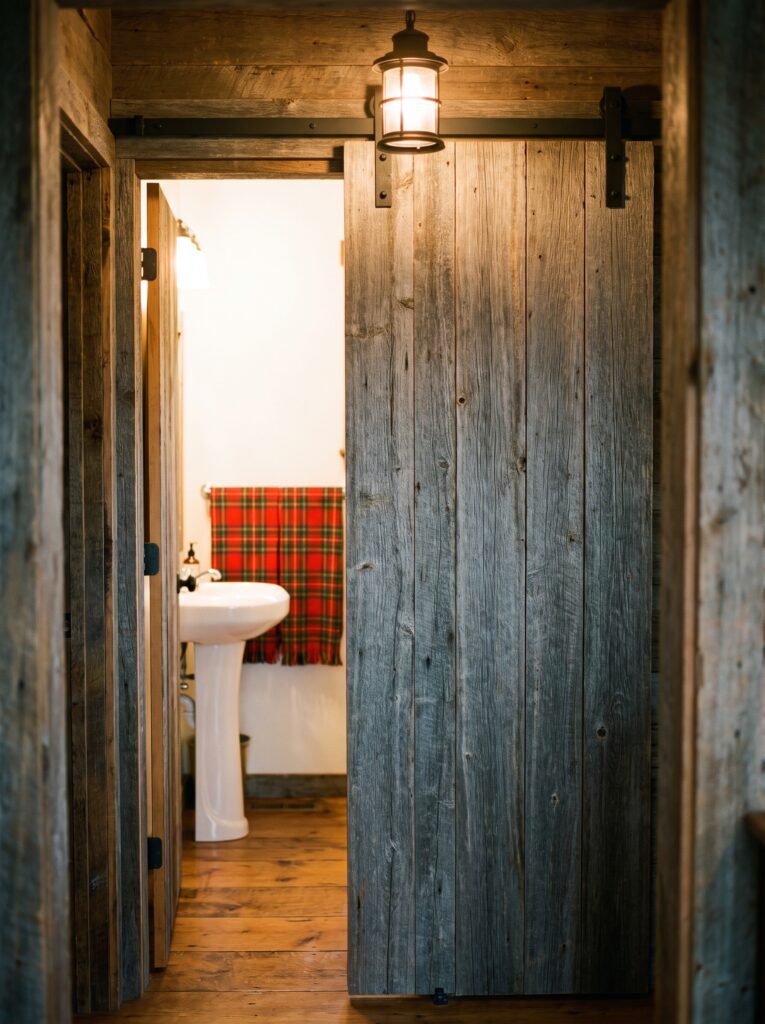
Anyone fitting a bathroom into a cabin hallway should think about the door swing first. A 30-inch swinging door sweeps about five square feet, and in a tiny space that’s often where the sink is. A sliding door removes the arc entirely.
A barn door needs a clear stretch of wall as wide as the door itself, plus about an inch of overlap on each side of the opening. Mount the rail to a solid header board rather than straight into logs that move as they settle.
Barn doors don’t seal sound or smell, so add a small latch and a gap-sealing strip if privacy matters. A pocket door solves the same problem with a cleaner finish, and a lantern above the rail lights the hall at night.
Weigh the hardware too. A solid plank door can run 60 pounds or more, so choose a rail rated well above that and fix the bracket into studs or a header, never into trim.
Mount open reclaimed shelves on the log wall so guests find towels fast
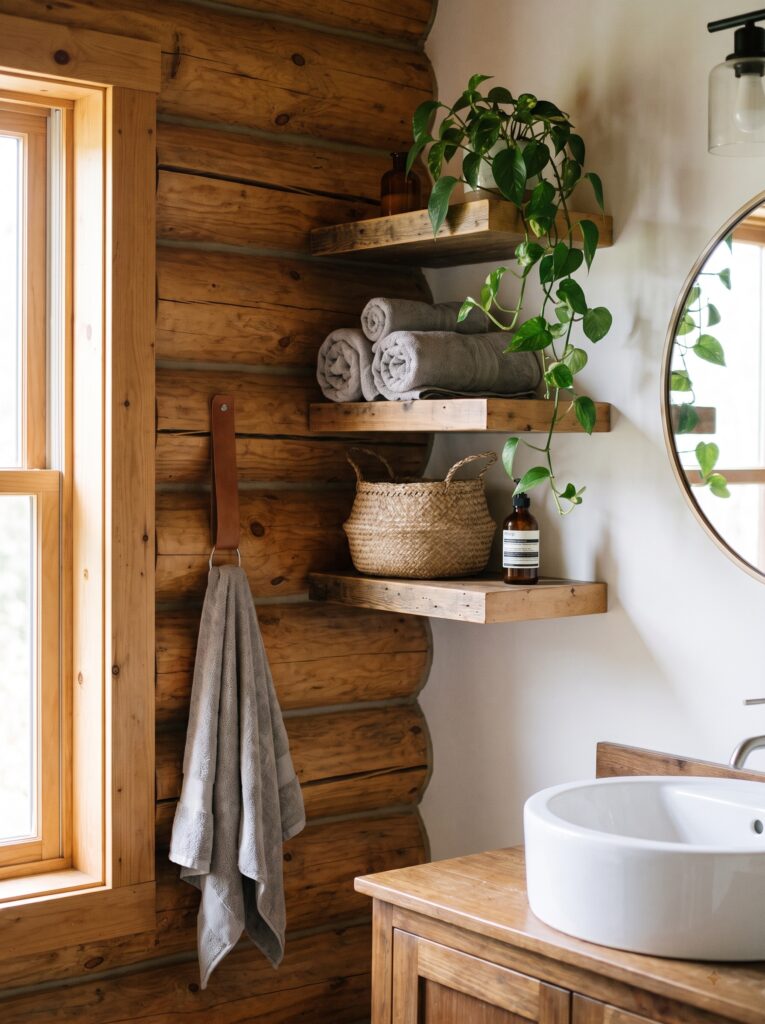
Open shelves beat a closed cabinet for guests, because nobody has to guess where the towels live. Roll them rather than fold them, and keep each shelf about 12 inches above the one below so a rolled towel clears the shelf above.
Log walls are curved, so screw a flat plank backer to the logs first and hang the shelves from that. Drill slotted or slightly oversized holes in the backer so the wall can move as the logs settle without splitting the board.
A basket on the bottom shelf hides the small things, and a pothos trails down without fuss because it tolerates humidity. A leather strap with a ring beside the window gives a hand towel a place without drilling into the frame.
Keep the lowest shelf at least 15 inches above the vanity so a tall soap pump still fits beneath it, and save the top shelf for light things like a plant, since it’s the hardest to reach.
Layer warm light at the mirror so dark logs don’t swallow the room

A single ceiling light makes log walls look like a cave. Wood absorbs most of the light that falls on it, so the face at the mirror ends up in shadow. Put a light on each side of the mirror instead, and the room works at night.
Center the sconces at roughly 60 to 66 inches above the floor, about eye level, and space them evenly beside the glass. Use warm bulbs around 2700 K, because cooler light turns the wood a flat yellow and makes skin look gray.
Put the lights on a dimmer so you can drop them low for a bath and raise them for shaving. Add a ceiling light on its own switch for cleaning, and keep the sconce finish dark so the iron looks like part of the cabin.
If you can’t move the wiring, a plug-in sconce with a cord cover works as a stopgap. Swap in dimmable warm-white LED bulbs, which run cool beside wood and cost very little to run.
Cut a long window high in the log wall for daylight without losing privacy
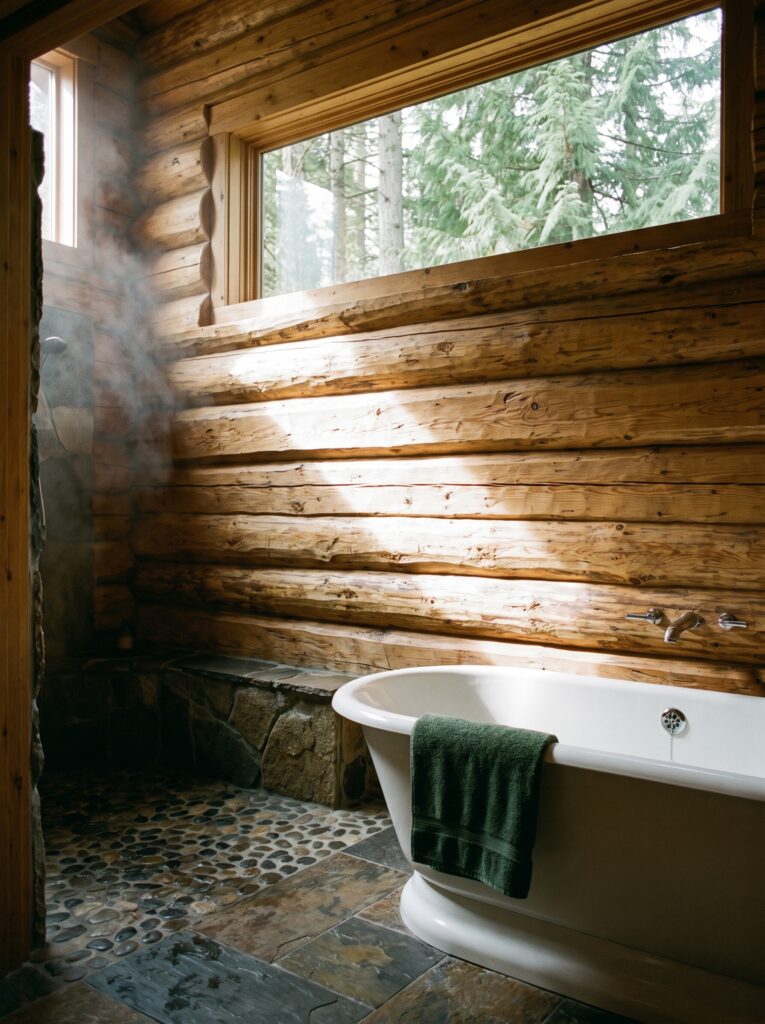
A tall window gives you privacy or light, but a wide window set high can give you both. A long horizontal pane above eye level lets daylight rake across the logs and shows only treetops from outside.
Keep the sill above about 60 inches if neighbors or a path are nearby. In a log wall, ask your builder about settling space above the frame, because logs shrink and compress over the first years and a tight frame can crack glass.
The light from a high window does extra work on a stone floor and a pebble shower. It brings out the color in slate and the grain in the logs. A green towel on the tub is all the color the wall needs.
If the wall faces the weather, look at the window’s insulation rating, because cabin walls lose heat fast in winter. Double-pane glass and a tight seal around the frame matter more than the shape of the window.
Warm a slate or stone floor with radiant heat before the first winter

Slate looks great and feels freezing at 6 a.m., so plan the heating when you plan the floor. A wood stove in the next room won’t warm a bathroom floor, and a thick wool mat only covers the spot where you stand.
Electric radiant mats go under tile and run on a thermostat with a floor sensor. Set a timer so the floor warms before you wake. A gentle, steady warmth takes the chill out of the stone without stressing the grout.
Put the mat on a GFCI-protected circuit, and lay it under the tile before anyone installs the vanity. Wool socks on a stool by the door make a good backup, and a hot drink on the vanity makes a good habit.
Ask about the floor build-up before you buy. Heating mats add very little thickness, but a cement board layer and the tile itself still raise the floor, so check the door clearance and the threshold.
Plan a composting toilet and a low-flow shower if your cabin runs on a well or septic

If your cabin runs on a well or a septic tank, water is the budget, so the fixtures should respect it. A composting toilet uses no water at all, and a low-flow showerhead at 2.0 gallons per minute or less spares the pump and the drain field.
A composting toilet needs a bulking material like sawdust or peat moss, so keep a jar and scoop within arm’s reach. Rules differ by county, and some places require a permit, so check before you buy.
Whitewashed logs lighten a room that has none of the usual tile, and a slatted wood shower floor lets water drain straight through. Add a thermostatic shower valve if your water pressure swings, and a galvanized bucket in case the pump goes out.
Plan for a power cut too. A headlamp by the door and a bucket of water for rinsing matter more in the woods than they do in town.
Fit a quiet exhaust fan into the plank ceiling and crack the window after every shower

Steam is the real enemy of a wood bathroom, so size a fan for the room before you pick the light fixtures. A fan rated between 50 and 110 CFM suits most small baths, and a rating of 0.3 sones or less means you’ll actually leave it running.
Vent it outside, never into the attic or crawlspace, and run it for 20 minutes after every shower. Pair it with a window cracked open on a casement, which pulls fresh air through and carries the damp out of the logs and planks.
Keep the duct run as short and straight as you can, because every bend cuts airflow. A common rule of thumb is about 1 CFM per square foot of floor, with 50 CFM as a minimum.
A freestanding wooden towel stand lets towels dry in the open instead of mildewing behind a door. White subway tile keeps the shower bright against the plank ceiling, and a copper rain head keeps the metals warm.
Shop it on Amazon: Panasonic FV-0511VQ1 WhisperCeiling Bath Fan, 50-80-110 CFM
What fails first in a cabin bathroom, and how to slow it down
Cabin bathrooms don’t age the way city bathrooms do, because wood moves, pipes freeze and steam has nowhere to go. Here is the order in which things usually go wrong, from fastest to slowest, with the fix for each.
- Unsealed wood near the shower, within months. Water darkens raw pine first at the seams and the end grain. Three coats of water-based polyurethane or marine varnish, recoated whenever water stops beading, stops it before the stain sets.
- Trapped steam, within the first winter. A closed cabin holds humidity, and log walls and plank ceilings take it up. Run a vented fan for 20 minutes after each shower and open a window a crack.
- Pipes in an unheated cabin, the first hard freeze. Don’t run supply lines through exterior log walls. Keep them in interior partitions or the floor, and drain the system, including the traps, before a long cold absence.
- Fixtures fixed to settling logs, over the first few years. New logs shrink and compress. Hang shelves and window frames on slotted fasteners, leave settling gaps above frames, and avoid rigid screws into the logs.
- Hard-water spotting on a well, ongoing. Mineral water leaves white spots on dark fixtures and glass. Choose a finish that hides them, like hammered copper or textured stone, and wipe dry after use.
Pick your cabin bathroom’s one fixed feature, then build around it
Every cabin has one thing that won’t change: a log wall, a roof slope, a window, or a stretch of plumbing. Start your cabin bathroom ideas there. Put the shower where the headroom is, the light where the logs are darkest, and the sealer wherever water will land.
Everything else, from copper sinks to barn doors, is a choice you can make slowly. Pick one wood, one stone and one metal, balance the wood with something pale, and give moisture a way out. Do those four things and the room will hold up long after the photo-ready look fades.
Save this pin so you can find these cabin bathroom ideas when you’re ready to plan your own.