How to Remove Mold From Bathroom Caulk and Grout Without Damaging the Seal
To remove mold from bathroom caulk and grout, first peel back a corner of the caulk and see how deep the dark spots go. When only the surface is stained, soak it with a cleaner your grout can take and scrub gently. If the black runs behind the bead, replace the caulk instead.
Most guides jump straight to a bleach spray. That clears a stain sitting on top of a bead and does nothing for mold that has already crept behind it. You can scrub for an hour, watch the black return in a week, and never learn why. Here is the trap.
This guide runs the other way around. Test first, pick a cleaner that suits your grout and stone, let it work before you touch a brush, and finish by cutting off the moisture that fed the mold. Every step protects the seal. Gouged beads leak.
Plan on about an hour of hands-on time plus an overnight dry. Gather gloves, goggles, a mask, a soft toothbrush and one cleaner. Measure first, though. The EPA suggests calling a professional for patches larger than roughly 10 square feet.
Affiliate disclosure: this post contains Amazon affiliate links. If you buy through one, we may earn a small commission at no extra cost to you.
Table of Contents
Step 1: Peel back a corner of the caulk to see where the mold starts

Lift one end of the bead with a fingernail or a plastic putty knife and peel back about an inch. Check the underside of the strip and the joint behind it. Clean white underneath means the mold sits on the surface, and the seal can stay.
Black speckles on the back of the strip, or a dark smear in the joint, tell a different story. Scrubbing lightens the front and leaves the roots alone. Silicone tends to grow mold on a thin film of soap scum, while old or cracked latex caulk can hold it deep inside.
Press along the bead with your thumb as well, because spongy or musty caulk is finished even when it still looks white. Pull a piece loose and sniff it. A damp, earthy smell settles the question.
Repeat the test every few feet around the tub or shower. Replace only what is actually bad. Pink or orange film is usually bacteria, not mold, and the same steps below handle it.
Step 2: Open the window or run the fan, then gear up

Spores lift into the air the moment you scrub moldy shower caulk, so open the window, switch on the exhaust fan and prop the bathroom door before you start. Rubber gloves, goggles and a snug N95 mask go on next.
Wear old clothes. Splashes of bleach spot fabric faster than you would guess. Closed shoes help too. Lay an old towel over the tub floor to catch drips before they reach the finish.
Send kids and pets out until you finish rinsing. Run a tape measure along the affected joints and add up the area. A total above about 10 square feet, or a wall that feels soft behind the tile, means you should stop and call a mold remediation pro.
Patches that large usually point to a hidden leak. No spray fixes a leak.
Step 3: Match the cleaner to your grout and stone before you spray

Pick the cleaner for the surface, not the stain. The wrong one fades colored grout or etches natural stone. Neither can be undone.
| Cleaner | Works best on | Skip it on | Contact time |
|---|---|---|---|
| Household bleach (about 1 cup per gallon of water) | White cement grout, glazed tile, silicone caulk | Colored grout and natural stone | 10 to 15 minutes |
| White vinegar, undiluted | Light staining on silicone caulk and glazed tile | Marble, travertine, limestone and unsealed grout | 30 to 60 minutes |
| 3% hydrogen peroxide | Colored grout and most tile | Dark grout, which may lighten a shade | 10 to 15 minutes |
| Baking soda paste | Gentle scrubbing of porous grout | Polished stone, where it can dull the finish | 10 to 15 minutes |
| Store-bought mold remover | Heavy stains on sealed tile, used exactly as the label says | Anything the label excludes, and any mix with another cleaner | Per the label |
Bleach looks like the obvious choice for white grout, yet it does not soak into porous material. On old cement grout it can whiten the surface while spores survive underneath, which is why peroxide earns its place on this list.
Epoxy grout tolerates every option here. Unsure what you have? Try a hidden spot and wait ten minutes, because a patch that lightens or turns cloudy has told you what you need to know.
If your peel test failed in Step 1, skip the spray and replace the caulk before anything else. Fresh silicone laid over living mold turns black again within weeks.
Step 4: Hold the cleaner on the joint with a paper-towel compress

A spray runs off a vertical joint in seconds. A compress does not. It keeps the cleaner touching the mold for the full contact time, and that steady contact is what actually kills the spores.
Dry the area first so the cleaner is not watered down. Tear a paper towel into strips as wide as the joint, soak them in your chosen cleaner, and press them flat along the caulk or grout. Tuck the ends into the corner so nothing peels away.
Stubborn corners respond to a strip of cling film laid over the towel, which slows evaporation. Baking soda paste needs no towel. Spread it on with a gloved finger and leave it be.
Work in sections about two feet long. That way the first strips are not dry before you reach the last.
Step 5: Wait out the contact time before you touch a brush
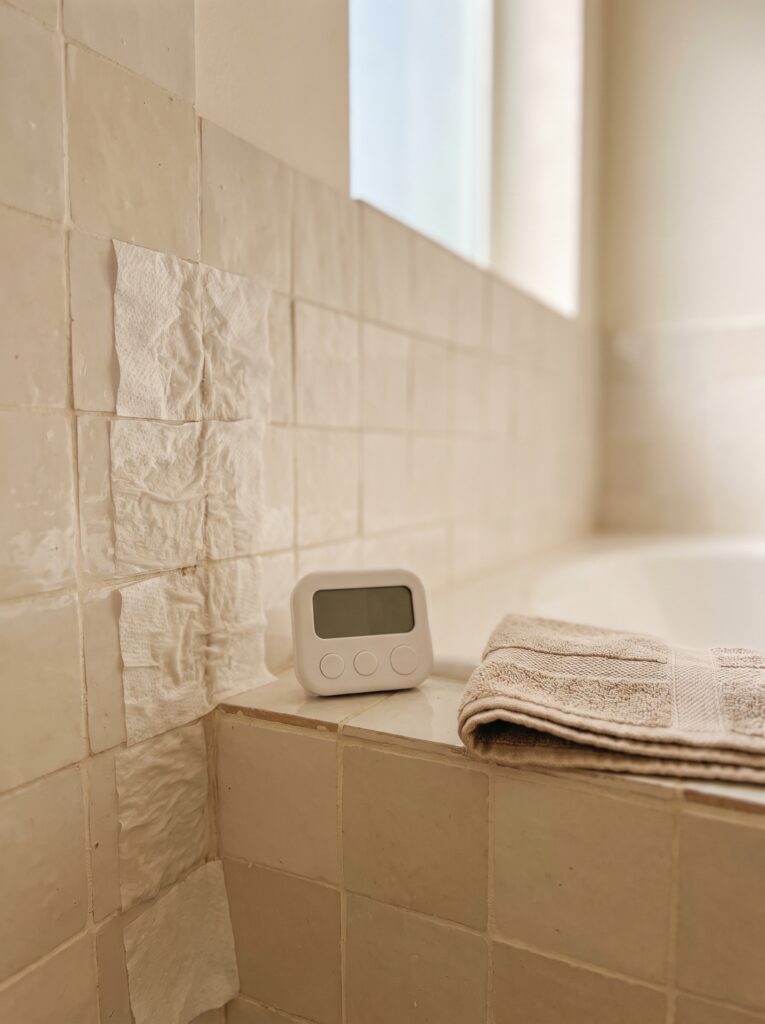
Time does the killing, not elbow grease. Give bleach 10 to 15 minutes, peroxide 10 to 15 minutes and vinegar up to an hour, and set a timer instead of guessing, since most people quit at the five-minute mark.
Leave the fan running while you wait. Step out if the smell gets sharp. With a heavy stain, swap in one fresh compress rather than letting the first one dry out.
One rule outranks every other here. Never mix bleach with vinegar, ammonia or any other cleaner, because the combination gives off toxic gas. Peroxide and vinegar should not share a bottle either, since together they form a harsh acid.
Choose one cleaner per session, rinse the surface well, and wait until it is dry before you try a different product on the same joint.
Step 6: Scrub along the joint with a soft brush, never across it

Peel the compress away and scrub in the direction of the joint. Bristles dragged across the line catch the edge of the caulk and chew it up, and a nicked bead lets water in. Use an old soft toothbrush on caulk and a firm nylon brush to clean moldy grout.
Keep strokes short. Cover six inches at a time. Light pressure is enough once the cleaner has soaked in, and a stain that will not lift is a signal to re-wet and wait, not to push harder.
Rinse the brush often. Dragging dirty bristles back along a clean joint just moves spores around. Stay off natural stone and polished tile with the firm brush, where it scratches.
Shop it on Amazon: QEP 20840Q Nylon Grout Brush
Step 7: Rinse, then dry every joint completely

Sponge the joints with clean water, working from the top of the wall down, and change the water often. Leftover bleach or vinegar keeps eating at grout and can leave a film that feeds the next round of growth if you skip the rinse.
Towel the joints dry, then leave the fan on for at least 30 minutes. Mold can restart within 24 to 48 hours on a surface that stays damp. The wait is part of the cleaning.
Now look closely, in good light and from a few inches away. Anything still grey belongs to Step 8. Cracked or lifted joints need a repair. Watch for water beading into a hairline gap along the caulk edge, because that means the seal has failed and the joint needs replacing soon.
Step 8: Treat leftover stains with a peroxide and baking soda paste
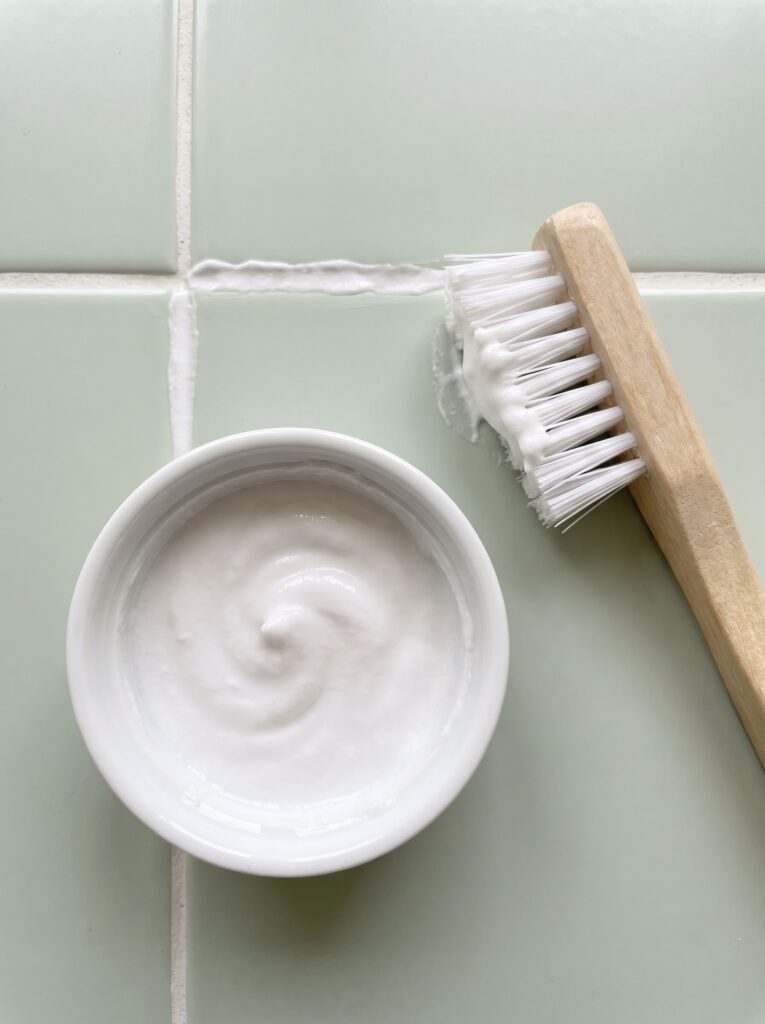
Some stains sink into porous grout and ignore a spray. Stir baking soda with a little 3% hydrogen peroxide until it holds like toothpaste, press it into the joint with a gloved finger, and leave it overnight. Hydrogen peroxide on grout lifts most stains with far fewer fumes than bleach.
An oxygen bleach powder mixed into a paste works the same way and treats colored grout more gently than chlorine does. Wrap it in cling film to hold the moisture in. Wash it off in the morning and dry the joint.
Expect the stain to fade over a day or two, not in minutes. Second passes are normal. Old grout often needs one. Stay patient. Harder scrubbing only wears the grout down.
Shop it on Amazon: OxiClean Versatile Stain Remover Powder, 5 lb
Step 9: Cut off the moisture that fed the mold

Mold returns wherever water sits. Squeegee the walls and corner joints after each shower. The whole job takes 30 seconds. This removes most of the water your caulk would otherwise drink.
Let the exhaust fan run for 20 minutes afterward and keep indoor humidity under 60 percent, and a cheap hygrometer on the shelf shows where you stand. Hang a shower curtain wide open to dry so its hem stays out of the corner.
Bathroom mold prevention comes down to those habits, plus a quick wipe of the tub corners once a week with a dry cloth. Soap scum feeds mold. Wipe it away and the problem starves.
Shop it on Amazon: OXO Good Grips Stainless Steel Squeegee
What to do if the mold is back within a week
Water always has a source. Fast regrowth means it is arriving from somewhere you have not fixed, such as a leak at the faucet base or shower valve, a tired seal where the tub meets the tile, or a fan that vents into the attic instead of outside. Find it before you clean again.
Should one corner keep blackening, cut out the caulk and inspect the joint behind it, because the mold is probably living where no brush can reach. Grout that crumbles under a fingernail needs regrouting. Joints that stay damp after a full day need a plumber first. Do not caulk over damp.
For more projects like this one, browse our DIY and budget bathroom guides.
Why the order matters when you remove mold from bathroom caulk and grout
Testing first saves you from scrubbing mold you cannot reach, and choosing the cleaner second protects the grout and the stone you chose to keep. The wait does the heavy lifting. Your arms do not have to.
Slow wins here. Follow that sequence and the seal survives, the stain stays gone, and you will not repeat this job every month, which is the real payoff when you remove mold from bathroom caulk and grout the careful way.