15 Savvy Bathroom Floating Shelf Ideas That Survive Humidity
Pick the material first and the placement second. Teak, sealed white oak, glass and stone all survive a steamy bathroom; veneered MDF does not. Then keep the board under eight inches deep, anchor it into studs or toggle bolts rather than plastic plugs, and seal the underside as well as the top. Those four calls decide whether your bathroom floating shelves still look good in three years.
Almost every roundup of bathroom floating shelf ideas tells you where to put one. Above the toilet, beside the mirror, over the tub, in the corner. That advice is fine and it is also everywhere, and none of it helps when the shelf you installed last spring has a cupped edge and a rust streak running down the tile beneath it.
A bathroom is a wet room with a fan in it. Wood in that room goes through a humidity cycle two or three times a day, and every part of the install either handles that cycle or slowly loses to it. The 15 bathroom floating shelf ideas below are organised around what actually survives, because that is the part the placement guides skip.
Some of these are material decisions, some are mounting decisions, and a few are small details like leaving an air gap that cost nothing and change everything. If you are still working out where the shelf goes at all, our bathroom decor and storage guide covers the layout side, and the over-toilet storage breakdown handles the most common spot of all.
This post contains affiliate links. If you buy through them, I may earn a small commission at no extra cost to you.
Table of Contents
Teak earns its price in a steamy bathroom
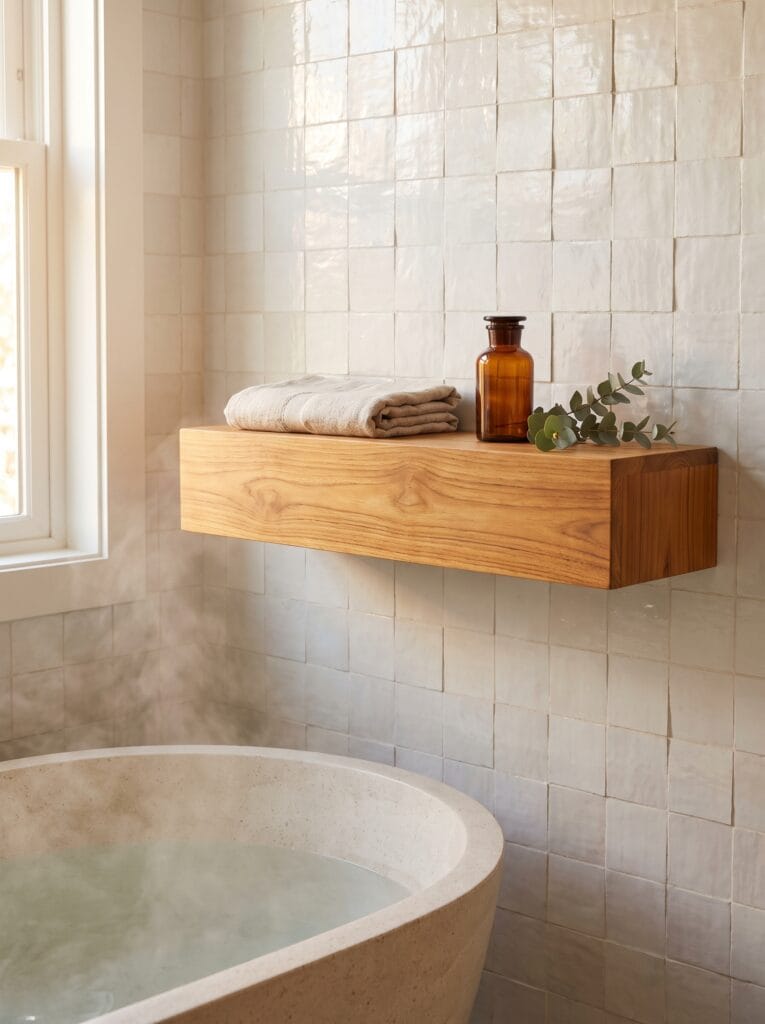
Start with teak if your bathroom has no window or a weak fan. The natural oils sit inside the grain and keep moisture from soaking in. Boat builders have used it on decks for two centuries for exactly that reason.
The chunky box above this stone tub sits well clear of the waterline, on glazed zellige rather than porous plaster. Steam reaches it every day and the grain stays tight. You are not paying for the look here, you are paying for a wood that does not ask to be maintained every season.
Expect roughly $60 to $140 for a 24 inch teak shelf with hardware included. That is two to three times a pine board, and the right call in a room that never fully dries.
White oak works if you seal it properly
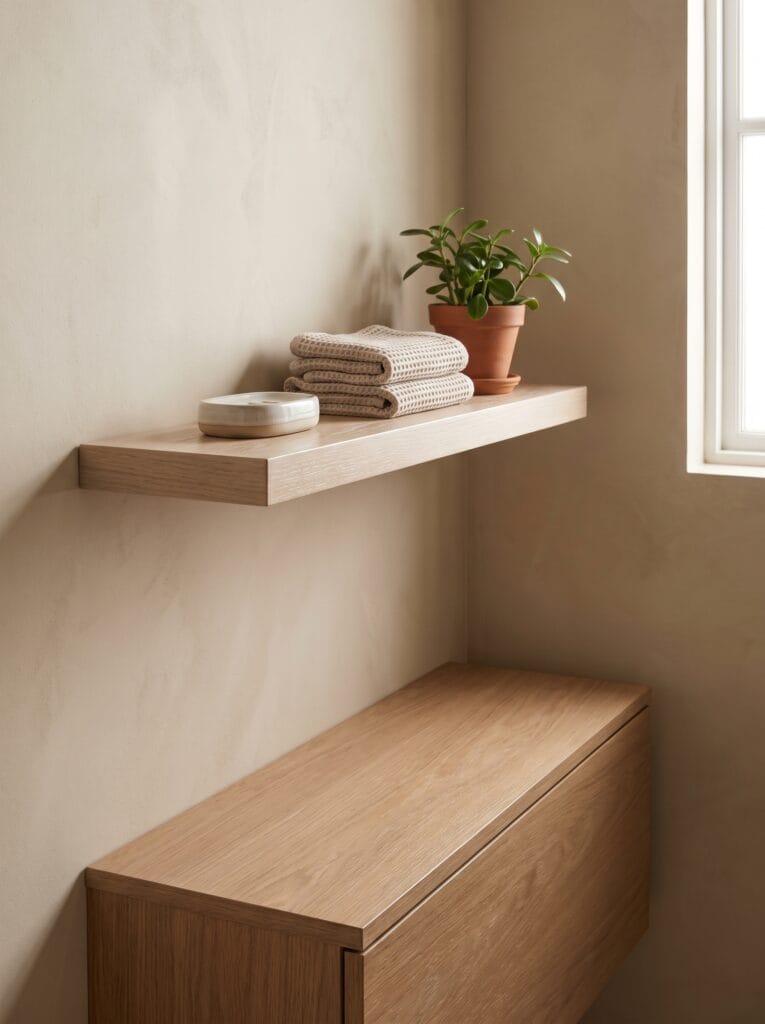
White oak is the cheaper route to the same result, with one condition attached. Its closed cell structure resists water better than red oak or pine, but no natural oil is doing the work, so the finish becomes the entire defence.
Notice the sheen on this one. It catches light softly rather than glossily, which is what a satin marine grade finish looks like beside standard indoor polyurethane. That difference is not cosmetic.
Interior poly goes brittle and micro cracks under repeated humidity swings, and water gets in through the cracks. A slim profile like this also stays honest about its load. Thin boards are for soap dishes and a folded washcloth, not stacks of bath sheets.
Solid boards outlast veneer where it gets wet
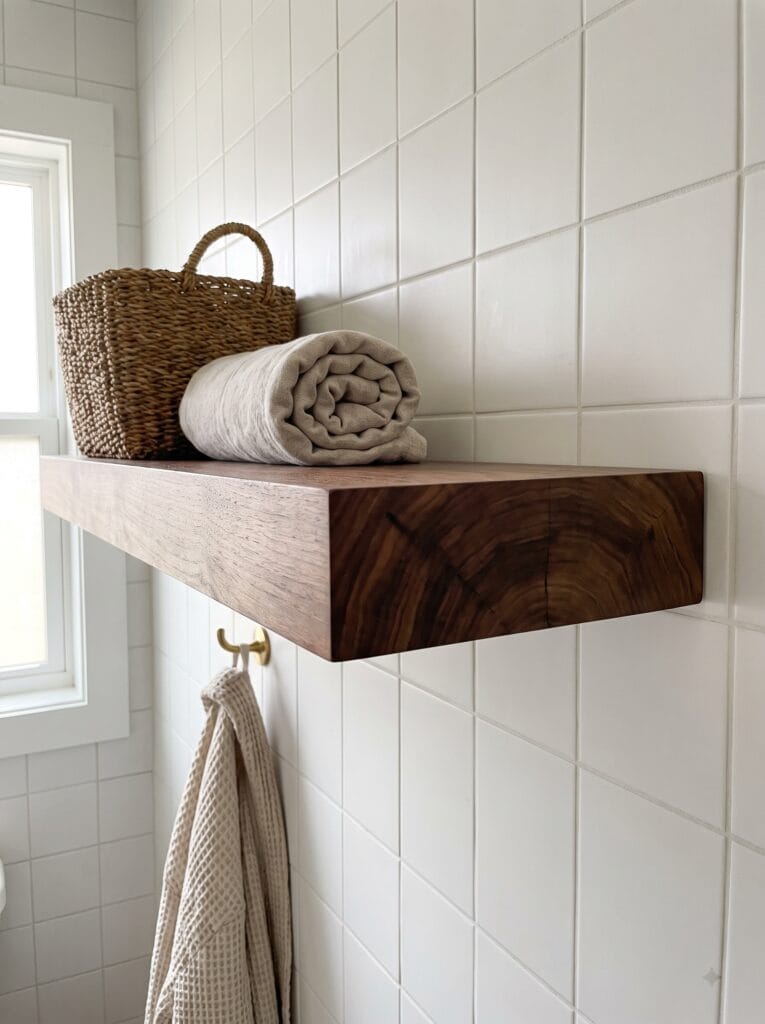
If you change one thing about how you shop for a shelf, make it this: buy solid stock, not veneered MDF. The veneer itself is fine. The particleboard underneath drinks water at the cut edges, swells, and lifts the decorative layer away in a bubble that no sanding brings back.
You can read solid from the side, the way this walnut board shows it. The end grain runs as continuous growth rings through the full thickness, where a veneered board shows a flat uniform core with a thin skin on top. That is the tell to hunt for in a product photo before you order.
Ask sellers for the thickness of the actual timber, because some listings quote a 2 inch shelf that is really a hollow box with quarter inch faces.
Seal the underside and the ends, not just the top

Here is the step almost everyone skips. Water vapour does not care which face is visible, and end grain absorbs moisture roughly ten times faster than the flat faces do. Finish only the top and you have left the two thirstiest parts of the shelf wide open.
This live edge oak was sealed all the way around. The underside and the cut end read the same colour and sheen as the top surface. It sits beside a frosted window in a room that clearly gets wet, and the timber is still holding its shape.
Two thin coats on every face beats one thick coat on the top. Let each one dry fully before the shelf goes anywhere near the wall.
Shop it on Amazon: Watco Clear Teak Oil Finish, 1 Quart
Glass is the one material steam cannot swell
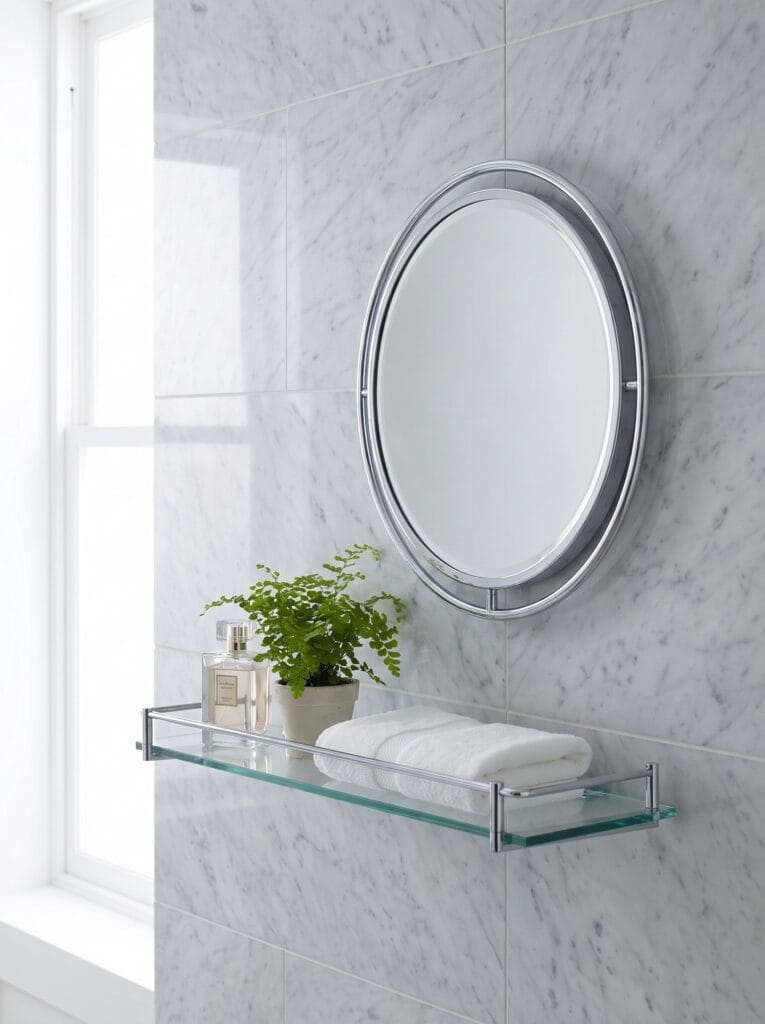
Wood is not the only answer, and in a small bathroom glass quietly solves two problems at once. It cannot absorb anything, so the maintenance conversation ends before it starts.
It also stays visually transparent, so a narrow room keeps the wall behind it. The shelf here sits on slim chrome rails against Carrara tile, holding a perfume bottle, a fern and a folded hand towel. The marble stays readable straight through it.
A solid wood board at that height would have cut the wall in half. Buy tempered rather than annealed. Look for a minimum thickness of 8mm on anything longer than 18 inches.
A stone ledge takes maintenance off the list
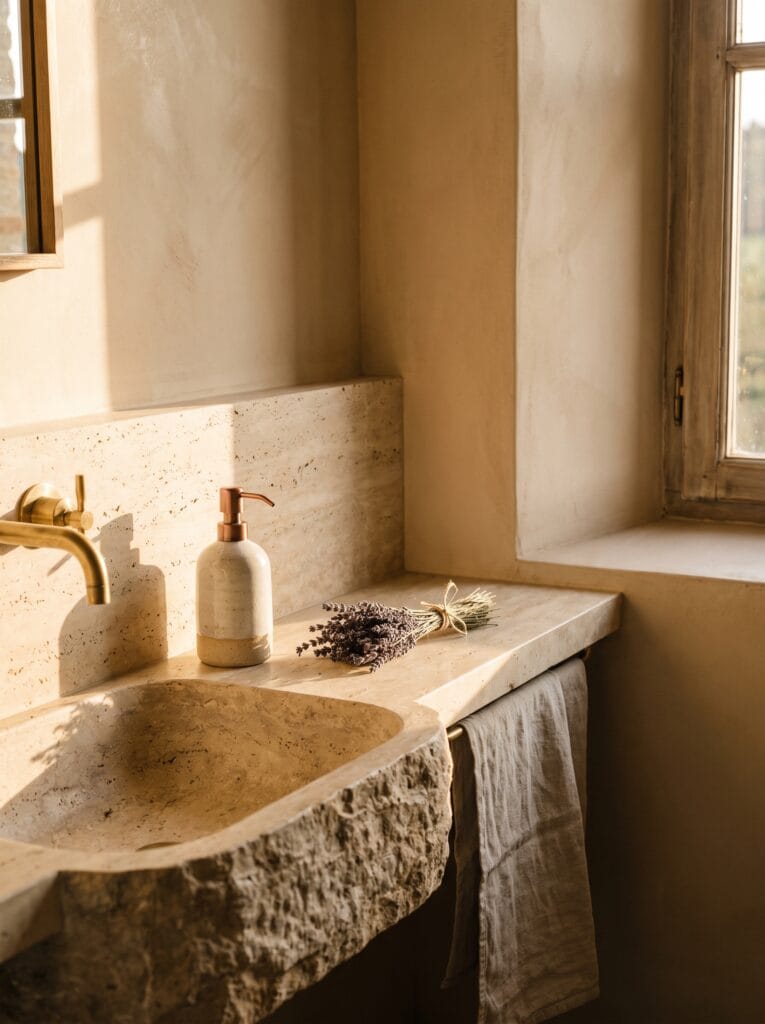
When the wall behind the sink is already stone, run a solid ledge across it. That gives you the lowest maintenance surface available in a bathroom. Travertine and marble do not cup, warp, swell or need resealing on any schedule a homeowner would notice.
The slab in this room does shelf duty along the full width of the wall, with a matching upstand behind it. It holds a soap pump and a bundle of dried lavender, and it will hold exactly that in twenty years. Warm plaster around it keeps all that stone from reading cold.
The catch is weight. A 30 inch honed travertine ledge runs 40 to 60 pounds, which makes it a decision taken with the wall open rather than a Saturday upgrade.
A tiled-in ledge belongs in the wettest part of the room
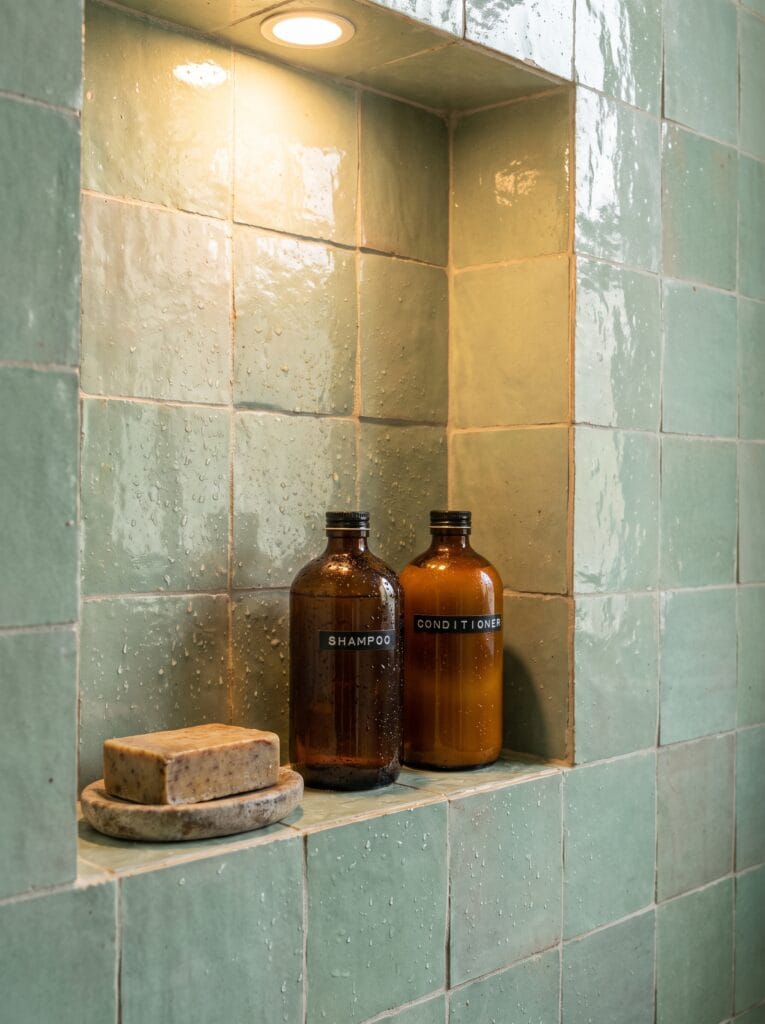
Inside the shower enclosure, stop thinking about shelves and build the storage into the wall. A tiled niche has no bracket to corrode and no board to warp. There is no gap behind it for water to sit in either, because it is part of the same waterproofed assembly as the wall.
This one is finished in the same green zellige as the surrounding tile. A recessed downlight washes the back, and water beads visibly on every surface. Nothing in that frame is going to fail.
Slope the sill about a quarter inch per foot toward the shower so it drains instead of holding a puddle behind your shampoo.
Keep the depth under eight inches
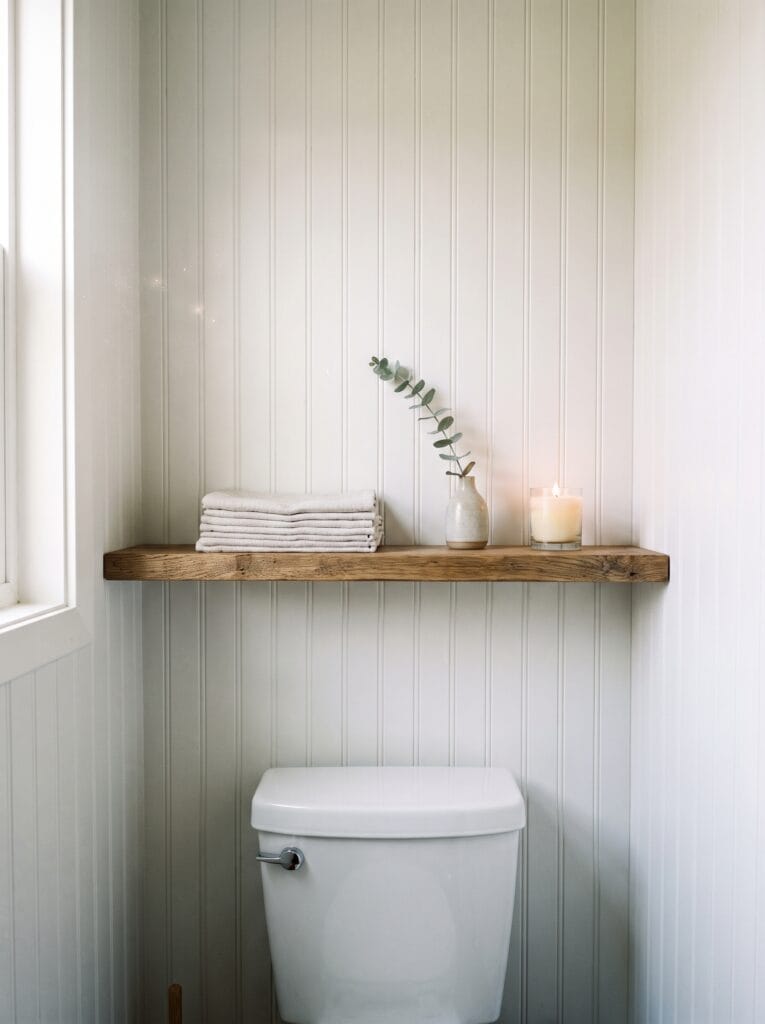
Depth is the number that quietly decides whether a shelf sags. Every extra inch moves the load further from the wall and multiplies the leverage working against the fixings.
A wide shallow shelf therefore outperforms a narrow deep one carrying the same weight. The reclaimed oak board above this toilet does real work at what looks like six inches. Folded towels, a small vase and a candle all fit comfortably.
Because it hugs the beadboard, the narrow room behind the door still feels open. Eight inches is the practical ceiling in a bathroom. Ten and up belongs in a pantry.
Hidden rod brackets need studs and a span limit
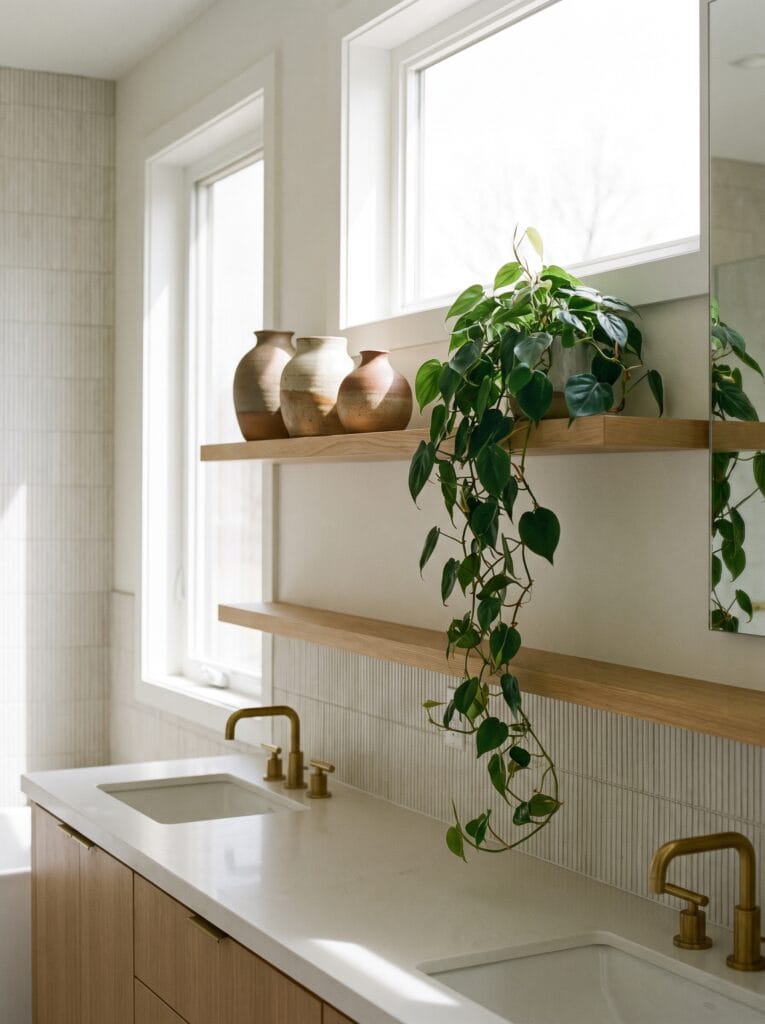
That clean bracketless line carries a structural price. It gets paid in where the shelf is allowed to go. Concealed rod brackets push everything through two or three steel pins driven into framing, so the shelf has to land on studs.
The pair above this double vanity runs the full width of the wall with nothing visible underneath, carrying heavy stoneware and a trailing plant. That only holds because the rods are anchored into framing at 16 inch centres. Hang the same shelf off drywall anchors and the pottery ends up in the sink.
Keep unsupported span to about 32 inches and add a third rod on anything longer.
Shop it on Amazon: Invisible Floating Shelf Brackets, 6 Pack Hidden Rod Kit
Toggle bolts, not plastic plugs, on a tiled wall
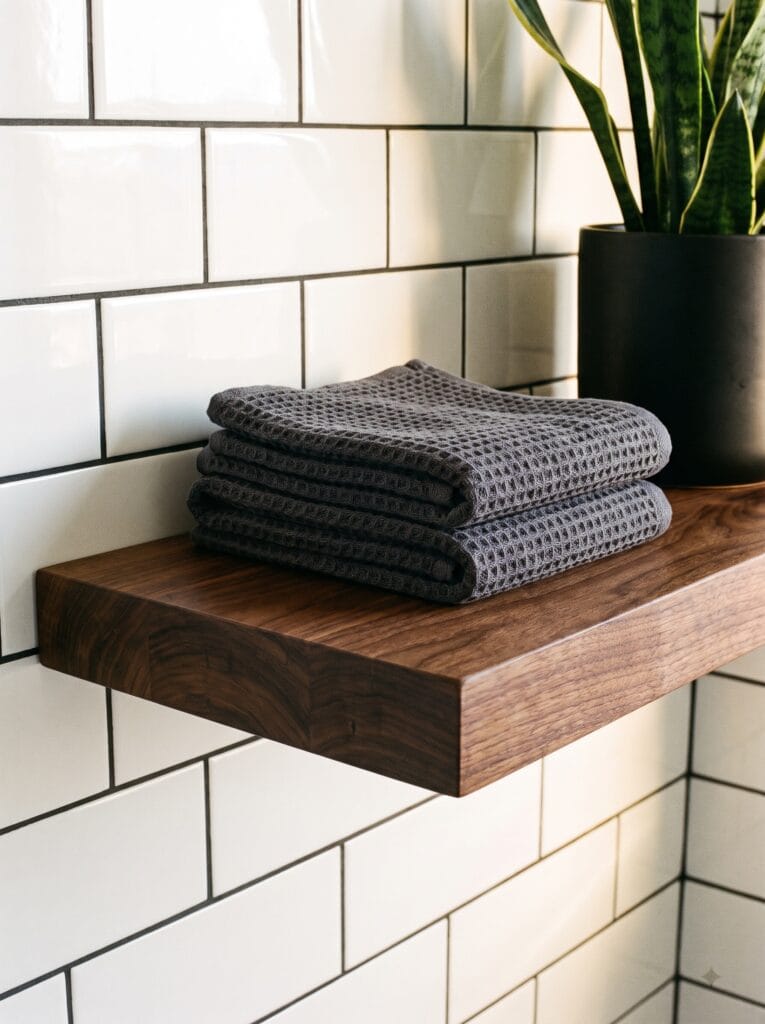
Tile changes the mounting problem completely. Behind that glossy face is usually cement board or plaster. A plastic expansion plug has nothing solid to expand against, so it works loose under the daily vibration of a door closing and a shower running.
The walnut board here sits flush against dark grouted subway tile. It carries folded towels and a heavy ceramic planter, which is more load than most people ever put on a bathroom shelf. A metal toggle opens behind the substrate and spreads that weight across a far larger area than a plug ever touches.
Drill tile with a diamond bit on a slow speed and no hammer setting. Otherwise you crack the glaze and the tile with it.
Coated brackets stay clean, bare steel does not

Visible brackets are a legitimate choice, and often a better one, since you can see exactly what is holding the shelf up. What matters is the finish on them.
Powder coating and stainless both shrug off bathroom humidity. Bare or painted mild steel starts bleeding orange down the wall inside a year. These matte black brackets have an even, unbroken coating with no chips around the screw heads, which is precisely where corrosion likes to start.
Against pale sage plaster under a brass sconce they read as a deliberate detail rather than hardware you failed to hide. That is worth remembering when hidden brackets are out of budget. If you ever drill a bracket to resize it, touch up the bare metal before it goes on the wall.
Mount it outside the spray arc

Direct water and ambient steam are two different problems. Only one of them is avoidable. Any shelf inside the arc of the shower head gets soaked several times a day, which is a much harder ask than simply living in a humid room.
Look at where this walnut shelf sits. Steam is clearly visible inside the glass enclosure across the room, while the shelf and its stack of dry towels occupy the opposite wall. Same bathroom, completely different exposure.
If towels have to live near the shower, give them the wall behind the door rather than the wall facing the spray.
Leave a gap behind the board so it can dry
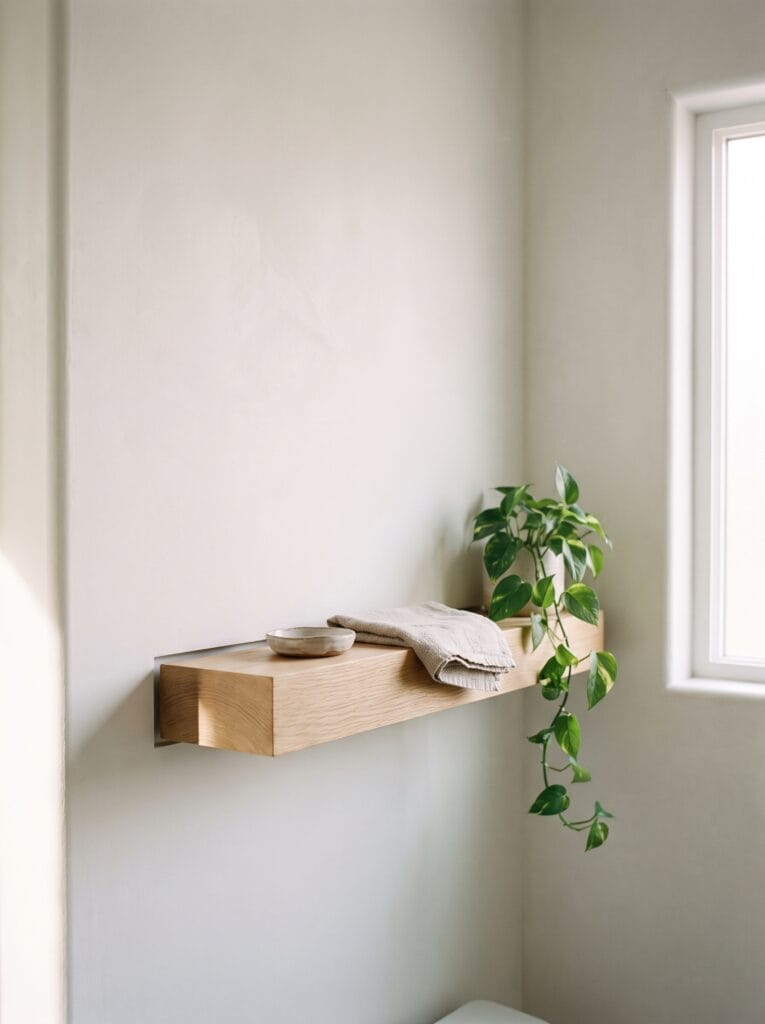
A shelf pressed tight to the wall traps a thin film of moisture along its back edge that never gets airflow. That strip is where mould starts.
It is also where a wooden board first begins to swell, because it is the one face that stays damp between showers. The mounting rail on this oak shelf holds the board slightly proud of the plaster. You can see daylight in the shadow line behind it.
It costs nothing, it is invisible from straight on, and it lets both faces dry at the same rate. A quarter inch is plenty. Any more and it starts to look like a mistake.
A thicker board resists cupping better than a wider one

Cupping happens when one face of a board absorbs moisture faster than the other. The timber then curls toward the drier side. A thick section fights that because there is more material resisting the movement.
A wide thin board gives you the opposite: maximum surface area, minimum structure. The slab on this terracotta wall is easily three inches deep, with growth rings and a couple of knots reading clearly through the front face. It carries a heavy stoneware pitcher and a full stack of linen without visible deflection at the middle.
Choosing between wider and thicker at the same budget, take thicker. The extra cost is always smaller than the replacement.
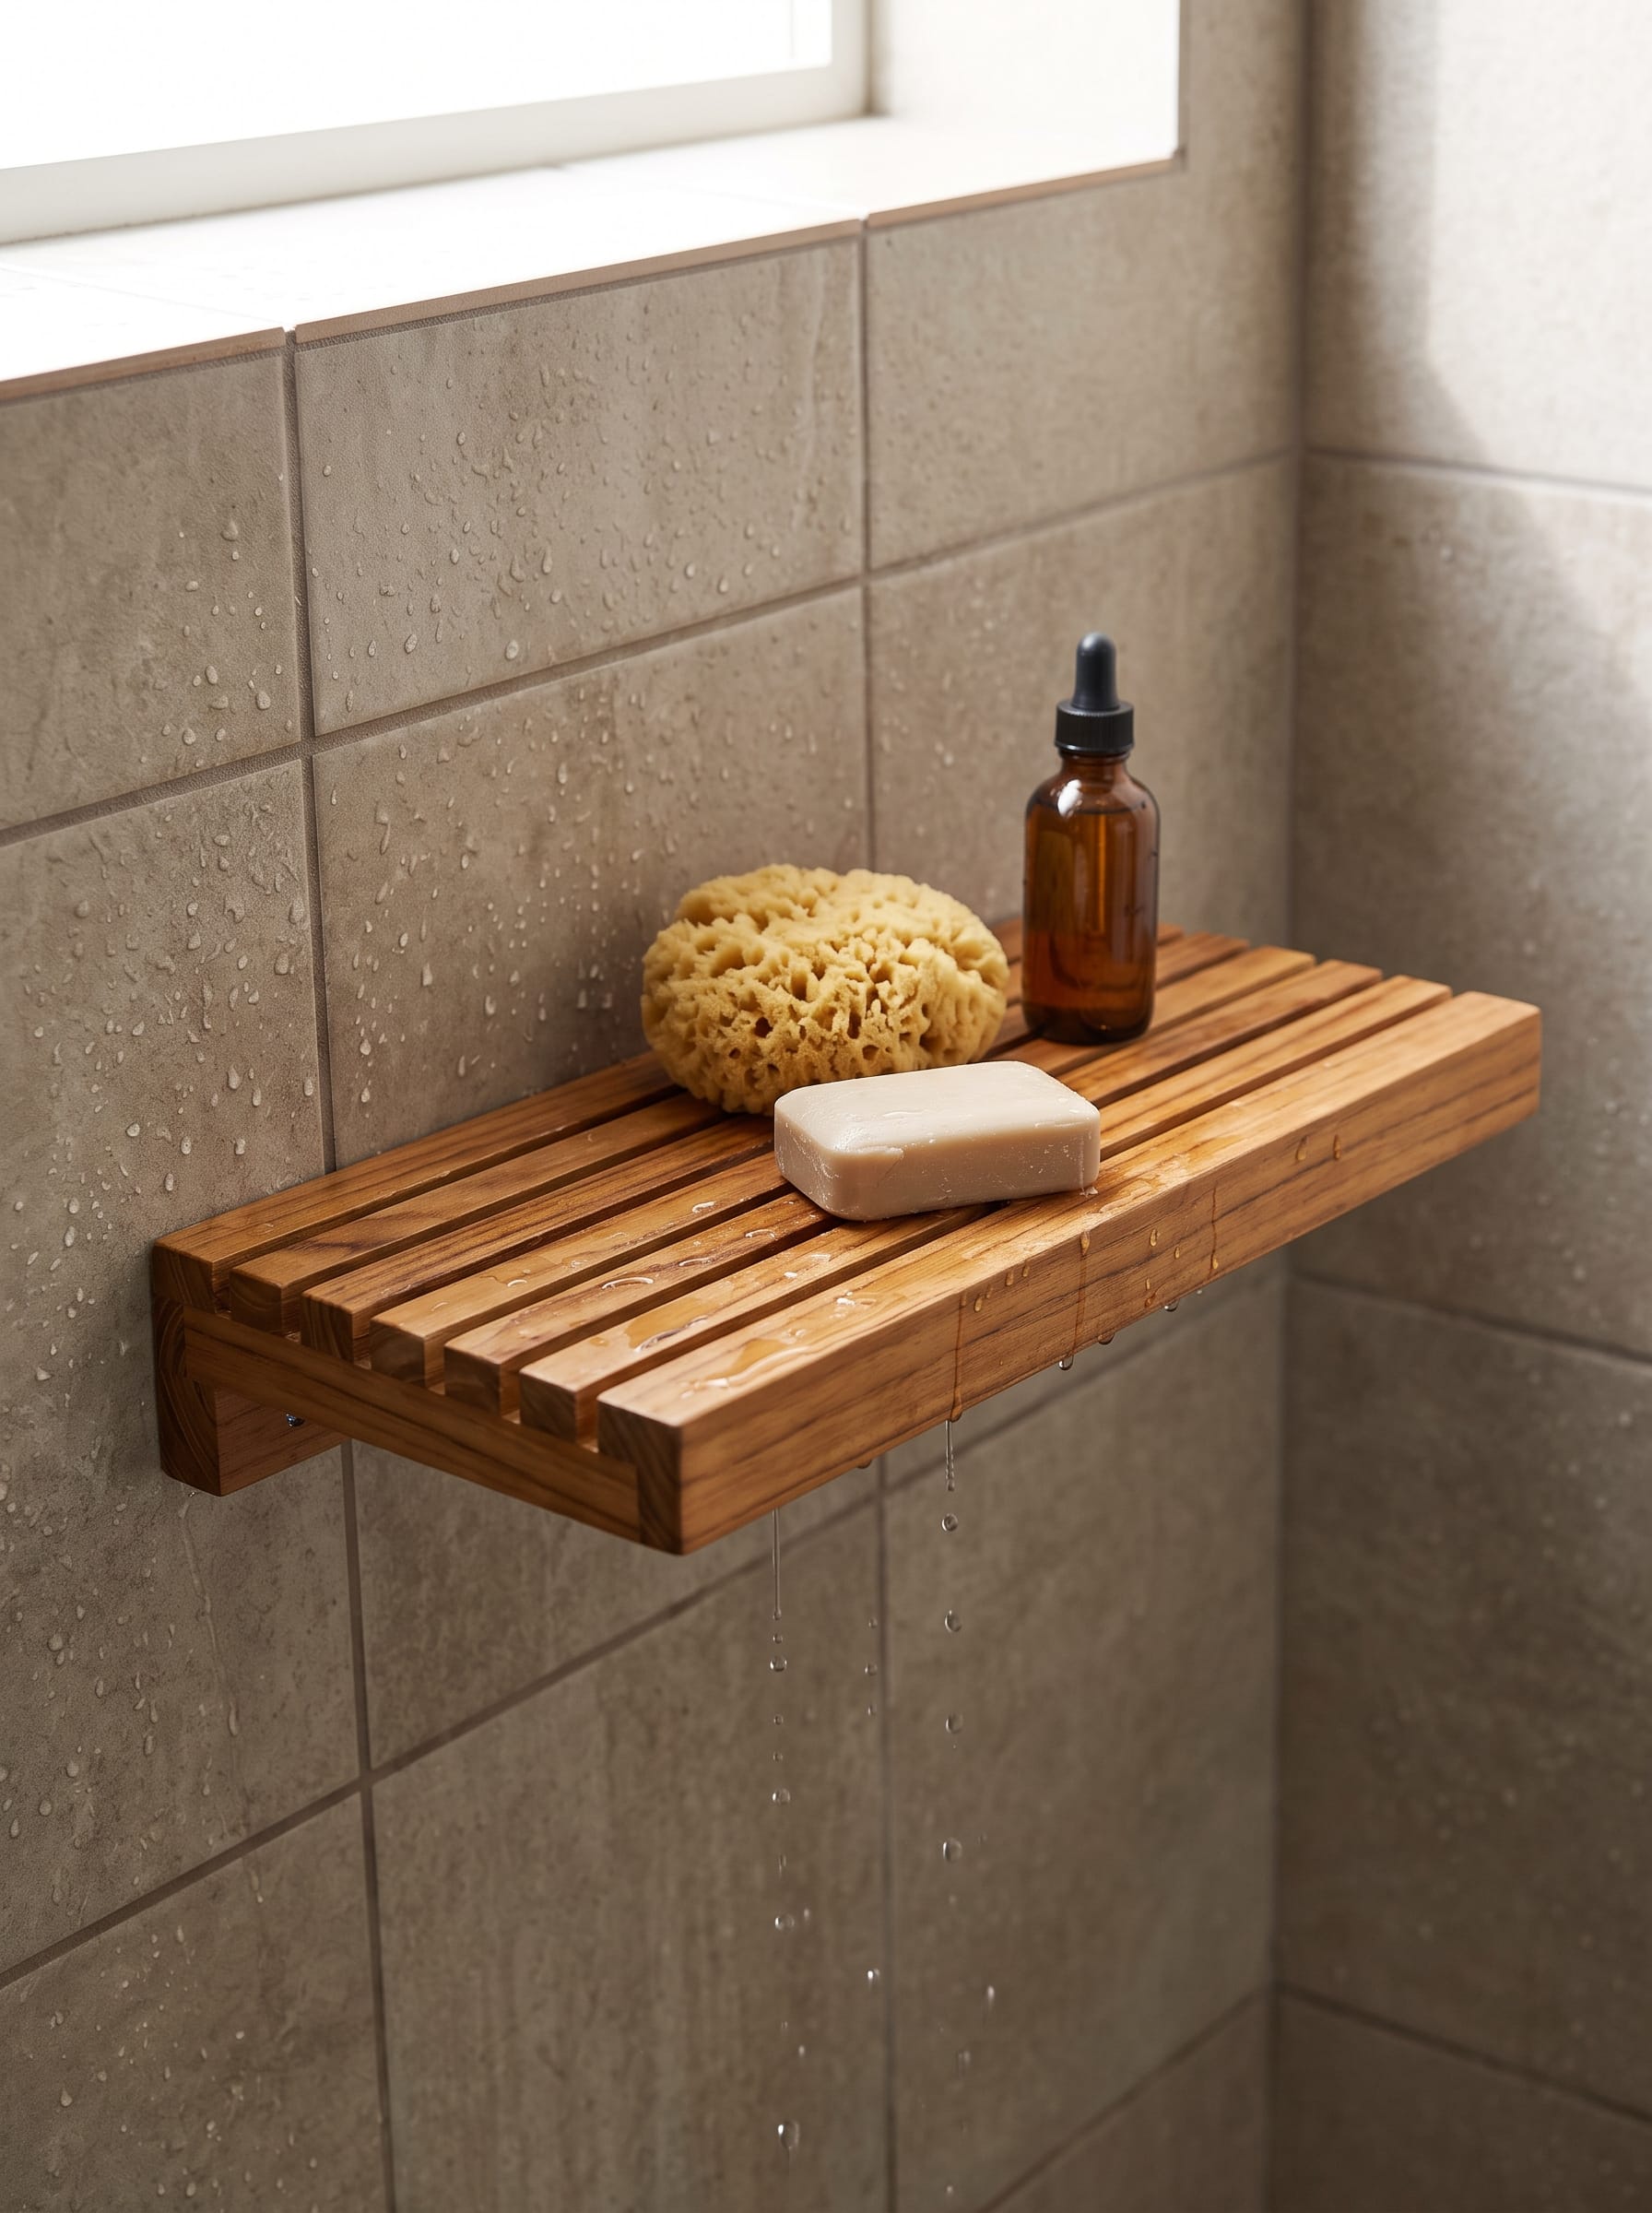
Slats let the water leave
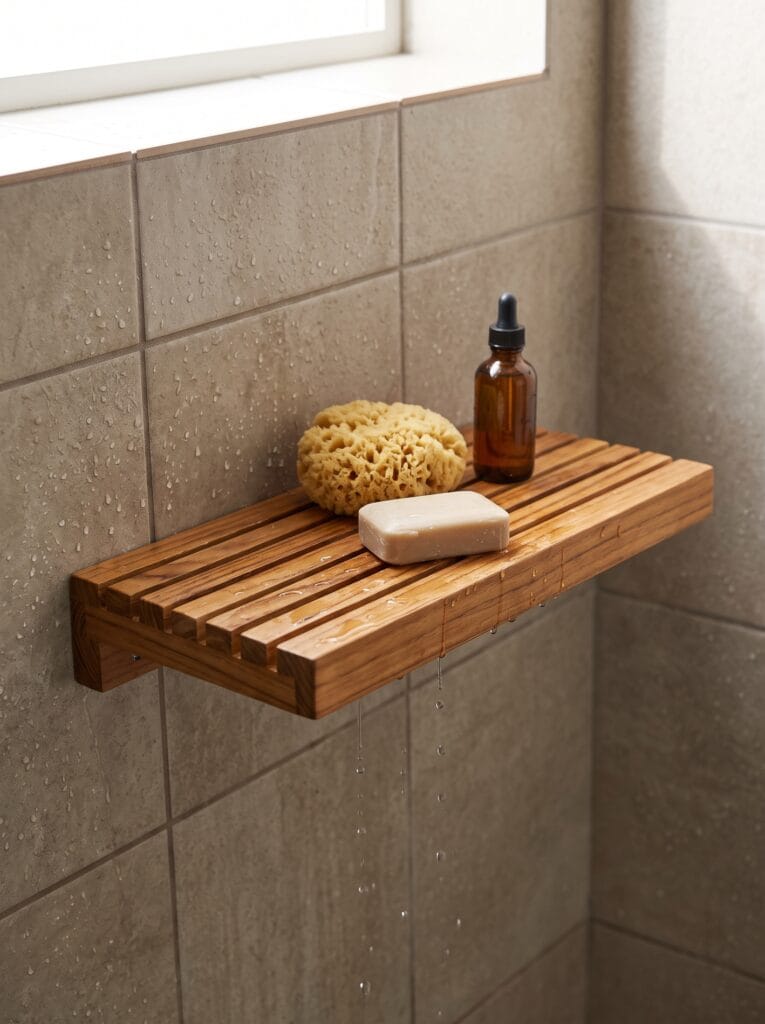
Inside the wet zone, a solid surface is a puddle waiting to happen. Every bar of soap sitting on a flat shelf leaves a permanent grey ring. It also keeps that patch of timber wet between uses.
Slats remove the puddle by giving water somewhere to go, and you can watch it working here. Water runs between the teak strips and drips clear onto the tile below. The soap and the sponge sit on a surface that is already draining.
Space the strips about 3/8 inch apart, because tighter than that and surface tension holds the water in the gap.
Shop it on Amazon: AquaTeak 24″ Moa Teak Floating Shelf
What fails first, and roughly when
Bathroom floating shelves do not fail all at once. They fail in a fairly predictable order, and knowing the sequence tells you which corner you can afford to cut and which one you cannot.
Months one to six: the fixings. Plastic plugs in tile or plaster are the earliest casualty. Nothing dramatic happens. The shelf just develops a small amount of play when you press down on the front edge, and that play is the plug rotating in its hole. It only gets worse from there. This is the failure you prevent at install time for about four dollars in toggle bolts.
Year one: uncoated hardware. Rust shows up first as a faint orange halo around a screw head, usually on the underside where nobody looks, then as a streak down the tile after a hot shower. Once it stains grout it is effectively permanent.
Years one to three: the finish, then the wood. Interior polyurethane develops hairline cracks as the timber moves through its daily humidity cycle. Water enters through the cracks, the surface greys, and the end grain darkens before anything else does. If the underside was never sealed, this stage arrives closer to the one year mark than the three.
Years three and beyond: geometry. Cupping and sag are the slow ones. A board that was flat develops a visible curl across its width, or the middle of a long unsupported span drops far enough that you notice it against the grout line behind. Neither is repairable. At that point you are buying another shelf.
Teak, glass and stone skip most of this list entirely, which is the honest argument for spending more at the start.
Start with how wet your bathroom actually gets
The right shelf for a windowless interior bathroom with a tired fan is not the right shelf for a large room with an openable window. Before you choose a material, run the shower for ten minutes. Watch how long the mirror takes to clear.
Under five minutes means you have real ventilation, and sealed oak will be fine. Still fogged at fifteen, and you should buy teak, glass or stone and stop thinking about it. The mounting rules hold either way.
Under eight inches deep, into something structural, sealed on all six faces, with a little air behind the board. Get those four right and the shelf stops being something you maintain.
Found a shelf that would survive your bathroom? Save this pin so you have the material and mounting rules with you when you are standing in the aisle.